I am now blogging new recipes on my farm website.

Cooking from Scratch is on facebook! Click here to check it out!

Tuesday, December 7, 2010

Lemon Jellies

I love making pretty things. I also love making unexpected things. In this case, it's a win-win. These candies are easy, beautiful, and delicious. Nobody expects to receive homemade jellied candies as a gift, and recipients are always pleasantly surprised.

An interesting note about these candies is that they really taste better after sitting around for a few days, so make them in advance if possible for the best flavor and texture.

Another great thing about homemade candies is that you can use real flavorings. No artificial flavors here! Just natural lemon juice, sugar, and unflavored gelatin to firm things up. For the best flavor, you want to be sure to use both the juice and the zest of the lemon. When the zest hits the hot sugar mixture, it gives off its oils to impart a wonderful citrus zing.

Remember, unflavored gelatin has to be softened in a cool liquid before it can be melted in a hot liquid. Here I have softened the gelatin in the lemon juice and a little bit of water. Stir well to avoid lumps in the final product.

Prepare your molding pan in advance. While this recipe doesn't require you to be as quick as some hot sugar candies, you still want to get it into the mold in a timely fashion. You can use whatever pan you want, but I always try and find one with the sharpest corners and edges I can. These are going to be cut into squares, so really rounded edges make square shapes difficult. Spray the pan with cooking spray and then line with some parchment. Be sure the parchment comes up high enough that you can use it to help you lift out the candies when firm. It's also important to spray the parchment surface itself. This candy is sticky!

Boil the sugar and half a cup of water together in a sauce pan. Stir until the sugar is completely dissolved and then do not stir again until you are adding the remaining ingredients. Bring the sugar mixture to 255 degrees F on a candy thermometer. It can take a while, so be patient. I usually have my burner on medium-high.

Remove the mixture from the heat and stir in the softened gelatin and the zest. Stir completely and pour into the mold. Let the mold sit at room temperature for at least four hours or overnight.

Pour enough sanding sugar onto the bottom of a rimmed cookie sheet to cover the bottom. Carefully remove the sheet of very gummy candy onto the sugar. I pull the whole thing out of the molding pan using the parchment and then invert the candy onto the sugar so I can then pull the parchment off. It may help to trim the parchment edges before you try to invert the mess onto the sugar. Spray a pizza cutter with oil and cut the candy into strips. Then cut across to form squares. Roll each square completely in the sugar to coat all sides. This is extremely important, otherwise your candy will become one giant sticky mess.

Spread the candy out with all the excess sugar on a sheet pan to dry for 24 hours. Rotate the candy once or twice during this drying period. After twenty four hours, the outside will be slightly rigid but the inside will still be very springy. Place the candies into an air tight container and let them sit another two days before serving or gifting. After these two days, the moisture content will have evened out and the candies will have a wonderful texture and flavor and you'll be proud to present them to your friends and family!


Lemon JelliesYield: 3-4 dozen candies

2 1/2 TBS unflavored gelatin
1/4 cup water
3/4 cup fresh lemon juice
1 TBS lemon zest
2 cup granulated sugar
1/2 cup water
2 drops food coloring
1 to 2 cups sanding sugar, for coating (see note below)

In a small bowl, mix together the gelatin, 1/4 cup water, and lemon juice. Stir until they are well mixed and set aside so the gelatin can soften.

Prepare an 8x8 inch pan (or similar area pan) by spraying the inside with oil. Then line with parchment across one direction, leaving the edges sticking up to use as handles after the candy has firmed. Spray the top of the parchment as well so that the candy releases easily from the parchment sheet.

Then mix the 2 cups of sugar and a 1/2 cup of water in a heavy duty sauce pan and attach a candy thermometer. Heat the mixture over medium to medium-high heat, stirring only until the sugar is dissolved. Continue cooking, without stirring, until the mixture reaches 255 degrees F on a thermometer.

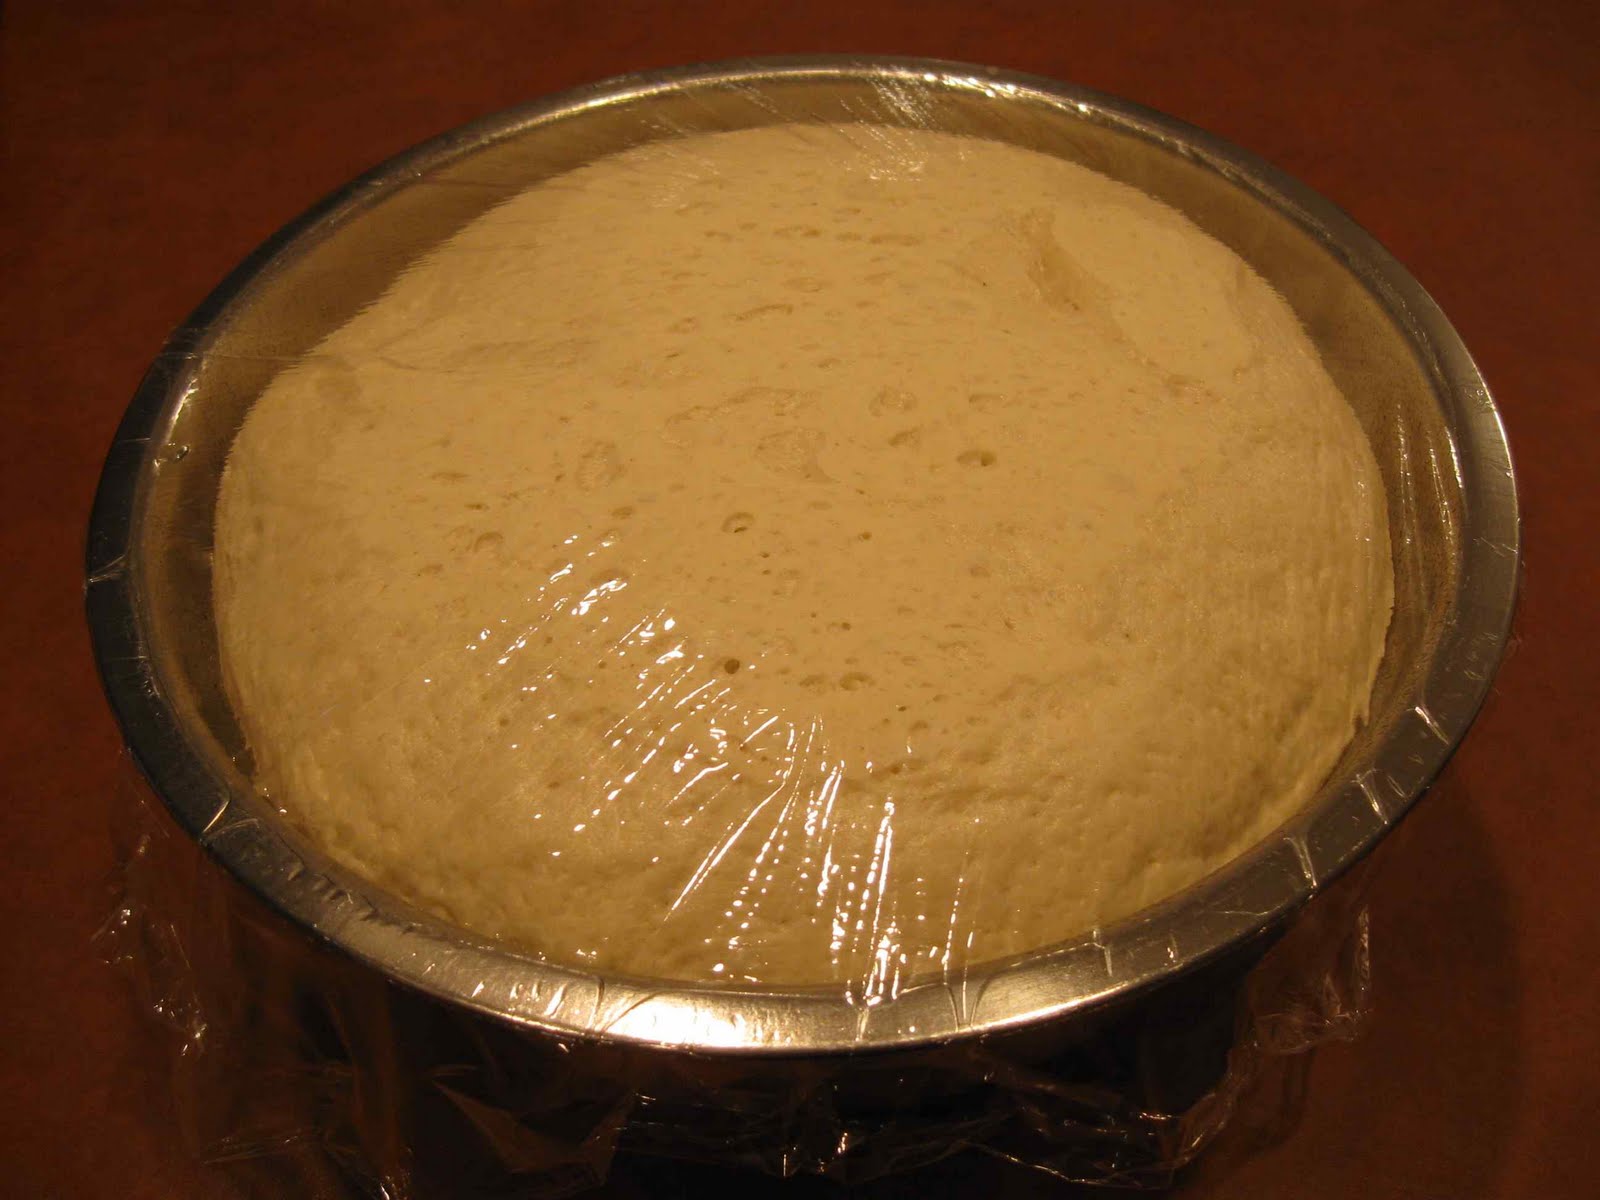
Remove the hot candy from the heat and add the softened gelatin and the lemon zest. Stir until well mixed and pour into the prepared pan. Let sit at room temperature for four hours or overnight to harden. Only cover loosely if you feel the need to cover it while it sets.

Sprinkle the sanding sugar into a rimmed cookie sheet. Loosen the edges of the firmed candy with a knife and use the parchment to lift the mass out. Handle carefully so that the sheet of candy does not tear. Lay face down onto the sanding sugar and remove the parchment sheet. Sprinkle some more sanding sugar over the top to minimize its stickiness. Use an oil coated pizza cutter to cut the candy into strips and then squares. Dip each square into the sugar to coat all sides completely.

Leave candy out on baking sheet to dry for twenty four hours, turning the squares occasionally. After twenty four hours, you can separate the candy from the loose sugar and store in an air tight container for two days before serving or gifting to allow the moisture to redistribute evenly through the candies and to let the flavor develop fully.

NOTE: You can roll the candies in regular sugar if you want, but I find the slightly larger grain sanding sugar makes them look nicer and helps keep them from becoming too sticky in storage.

*If you are interested in making lime and/or orange flavored jellies too, check out this post with pictures of a nice yellow, green, and orange assortment of candies, and this post discussing the minor changes in the recipe for best results.*

Tuesday, November 30, 2010

Focaccia

This is a wonderful, delicious bread to make. If you have a stand mixer, it's easy peasy. I love its versatility. I especially love it plain, fresh out of the oven. Once it's cooled, it's great dipped in balsamic vinegar and oil. If you have a panini press, then you can make some of the best sandwiches around with this stuff. And it takes mere minutes of your time to get it going.

Mix together the water, yeast, sugar, oil , and the first batch of flour. Mix on medium-low with a paddle attachment in a stand mixer until the dough is very elastic... maybe 6-8 minutes. It should become very stringy as it becomes more elastic.

Stop the mixer and switch to a dough hook. Add the remaining flour and salt. Knead the dough on medium-low for another few minutes until the dough is smooth. It will still be fairly sticky and will never quite pull away from the bottom of the mixing bowl.

Spray a bowl with oil and mound the dough inside. Spray the top of the dough with oil and then cover with plastic wrap to rise for an hour or until the dough doubles in size.

I kind of forgot about the dough for a bit, so it rose more than double... but it's not really a big deal. I just knocked the dough down and proceeded as normal.

Dump the dough out onto an 11 x 17 inch baking sheet lined with parchment. Drizzle a little extra virgin olive oil on the top so you can easily spread the dough out. Just use your hands to spread the dough out to the edges of the pan. If it springs back too much, just let the dough sit for a few minutes so it can relax enough for you to spread it out.

Once it's spread out, let it rise, covered, for thirty minutes to get a little puffy. Then, remove the cover and drizzle a little more oil and use your finger to dimple the surface. You can let it go at that or sprinkle your choice of toppings on it before baking. In this case, I used shredded Parmesan cheese, basil, and sea salt, but you can use onions, sun dried tomatoes, garlic, or whatever else sounds good to you.

Bake in a 400 degree F oven for 15-20 minutes, until it is golden brown. Use the parchment to remove the loaf from the pan onto a rack or board to cool. Ideally, you want to let it cool completely before cutting... if you can wait that long! I use a pizza cutter to cut this bread; I think it is the quickest way to get the nicest cuts. This bread can also be frozen and saved for later. I often bake one loaf and freeze half for a later date. You can even reheat this bread in the toaster (be sure it's thawed out first if it was frozen) for that fresh from the oven taste.


Focaccia
Yield: one 11x17 inch flat loaf

1 1/2 cup warm water
1 TBS instant yeast
1 TBS sugar
4 TBS olive oil
3 cups all purpose flour
1 1/4 cup all purpose flour
1 1/2 tsp salt

Mix together the first five ingredients in a stand mixer with a paddle attachment. Mix on medium-low speed until the dough is very elastic, about 6-8 minutes. Switch to a dough hook and add the remaining flour and salt. Knead another few minutes on medium-low speed until the dough is smooth. It will still be sticky and will never quite pull away from the bottom of the bowl. Place dough in a greased bowl, cover with plastic wrap, and then let sit in a warm place to rise until the dough doubles, about an hour.

Knock down the dough and let it rest for ten minutes. Dump onto a parchment lined 11 x 17 inch sheet pan. Drizzle a little oil on the top and use your hands to spread the dough out to cover the pan. Let dough rise, covered, for thirty minutes until it is slightly puffy.

Drizzle a little more oil over the surface and use your finger to dimple the surface. Sprinkle on any toppings you might like (such as garlic, basil, sun dried tomatoes, Parmesan, etc.). Bake at 400 degrees F for 15-20 minutes or until golden brown. Cool before cutting and serving.

Saturday, November 20, 2010

White Fish in Sherry Cream Sauce

If you like creamy sauces as much as I do, you'll need to plan to make this dish as soon as humanly possible. Heck, even if you only are ambivalent about creamy sauces, you'll want to make this... it's just that darn good.

The first time I can recall smelling shallots sauteing in butter was when I was maybe eight and we were visiting friends in Paris. It was like I'd never smelled heaven until that moment. This dish takes it even farther by adding cream sherry and Gruyere cheese to make the tastiest sauce around. I made it with white fish. Pollock, I think. You can make it with any mild fleshed white fish or chicken breasts, if you're not a fan on seafood. If you choose to go the chicken route, just remember it will take longer to cook through than the fish will.

The first step is to saute the shallots and garlic in butter. You don't want the heat so high that they brown; cook them until they are softened. Then, add the flour, stir it into the butter, and then add the milk slowly, whisking continually so that you don't end up with a lumpy sauce.

When the milk is incorporated, add the cream sherry and stir until it just comes to a simmer and is nice and thickened. Remove from the heat and add the Gruyere cheese. Taste and add salt and pepper as needed.

Preheat the oven to 375 degrees F. In a small baking dish (9x9 or similar), spoon a bit of the sauce and spread across the bottom. Place the fish in a single layer on top of the sauce and then pour the remainder of the sauce over the top. Sprinkle the top with a little paprika for color. Bake for 20-25 minutes, until bubbly and the fish is cooked through.


White Fish in Sherry Cream Sauce
Yield: 3-4 servings

1 lb mild flavored white fish
2 TBS butter
1/2 tsp minced garlic
1 TBS minced shallot
3 TBS + 1 tsp flour
2 TBS cream sherry
1 1/2 cup milk
1/3 cup grated Gruyere cheese
paprika (optional)
salt and pepper to taste

Preheat the oven to 375 degrees F. In a sauce pan, saute the shallot and garlic in the butter until softened but not browned. Add the flour and stir into the butter until a paste forms. Add the milk slowly, whisking constantly to reduce lump formation. Add the cream sherry. Cook, stirring constantly, until the mixture begins to simmer and becomes nicely thickened.

Remove from the heat and add the cheese, stirring to incorporate. Add salt and pepper to taste. Spoon some of the sauce into the bottom of a small baking dish (9x9 or similar). Spread the sauce to cover the bottom. Place the fish in a single layer on the sauce. Pour the remainder of the sauce over the fish and sprinkle with paprika for color. Bake for 20-25 minutes or until fish is cooked through.

Monday, November 8, 2010

Pumpkin Puree

Well, we can all sigh a breath of relief.. the great canned pumpkin shortage is over. Oh... wait, but I never use the stuff. I never suffered one day by not being able to purchase canned pumpkin from the grocery store during the last year.

Why? Because I still have more pumpkin puree than I can use thanks to an over-abundant crop a few years back and the yearly jack-o-lantern. By the way, if you've never tried pumpkin pie made from pumpkin puree that hasn't been tormented in the pressure canner, you are missing out. To be honest, I simply can't eat pumpkin pie made from canned pumpkin. If you think there isn't a difference, compare eating frozen green beans to canned green beans.

I rest my case.

Now, if you're starting to feel like your house looks like this pumpkin field, then you need to convert that crop into orange gold! It's easy, especially if you have a food processor.

First, Cut the pumpkin in half. Cut out the stem and blossom end and discard it. You can see my dog, Stella, here suddenly decided that what I was doing was way more interesting than trolling for dead bugs and crumbs.

Once you've split them apart, Use a large spoon to scrape the insides out. Now this is a jack-o-lantern pumpkin, and a very mature one at that. See how stringy it is? It still makes a fine pie, but if you want the creme-de-la-creme, then you need to buy (or grow) the small pie pumpkins. Also, you may want to save the seeds to make toasted pumpkin seeds!

Once the insides are scraped out, place them face down on a foil-lined, rimmed baking sheet.

Tuck the edges of foil up around the pumpkin. It doesn't have to be a tight seal or anything, but you want to keep them from drying out too much while baking. Place the baking sheet in a 350 degree oven for one to two hours, depending on the size of your pumpkins.

Be sure your pumpkins are very tender before removing them from the oven. I use a cake tester to see how done they are. Obviously, the skin is always kind of tough, even when the inside is well done, but you can still gauge their doneness pretty well by poking them. If in doubt, let them cook a little longer. Overcooking is waaaaay better than under cooking them here. Let them cool completely at room temperature before moving on to the next step.

When they are cool, use a large spoon to scrape the now tender flesh out of the skin. You'll end up with a shell that can easily be discarded.

Look at that gorgeous color! Pumpkin out of a can never looked that good! See how fibrous it is at this point? If you only want to use this for pumpkin bread, you could simply stir it to break up the fibers a bit and call it good. If, however, there's a chance you want to make pumpkin pie or some such thing, then you need to puree it. And, I mean, puree it good. I hate pumpkin puree that's not smooth.

Here's where a food processor comes in handy. You can use a blender, but you have to use a lot more water and let it drain a lot longer. Working in batches, puree the pumpkin flesh with enough water to allow it to process very easily into a very smooth puree. Then pour the puree into a cheesecloth lined colander to drain. I use four layers of cheese cloth to be sure I don't lose any of that wonderful puree.

Let the puree sit and drain for a few hours. I find it helps to stir the puree from time to time. When it is dry enough to allow it to "stand-up" in pointy ridges, it's ready for the last step.

There are two main ways to freeze the puree. You can use freezer containers or zip top bags. I have used both. The zip top bags are nice because they thaw very quickly and stack fairly well in the freezer. The freezer containers stack even better and don't ooze at the seams when they thaw. Dang, but things just aren't made the way they used to be.

I usually freeze two cups together since that covers most of the recipes that I use. Oh, and, yes... that's a 2007 you see in the upper corner of that frozen puree. That's what so great about this stuff, especially if it's frozen in the baggies. Provided you are careful to get all the air out of the bag before you freeze them, these things will last for years without any freezer burn!

Tuesday, November 2, 2010

Fried Cornbread

I've made these things for a long time, ever since I first learned how to properly deep fry food when I first lived in the South back in the early nineties. I think it's kind of funny that after all these years, the other night was the first time it ever dawned on me to use a portion scoop to make them. Previously, I dropped the batter from a spoon and always ended up with a nice free-form look to them.

The portion scoop makes a really nice, beautiful globe of fried goodness. I suppose it makes them look like hush puppies... which I guess technically they are. I'm not sure any true Southerner would call these hush puppies, however. In my experience, hush puppies are much more dense than these balls of fried cornbread.

I made them two different sizes the other night. What you see in the above picture is the larger size. The 2 tablespoon portion scoop made large 2-bite balls that took a good while to cook all the way through and were a little more dense. The 2 teaspoon portion scoop made perfect single bite nuggets that weren't quite so perfectly shaped, but ended up much lighter and almost fluffy inside. The smaller ones also cooked much more quickly, which was good for me since I am very impatient.

Make them whatever size you want, just be sure that you don't have your oil heated too hot or the outside will get too dark before the inside is completely cooked. There's nothing worse than having a gooey-inside piece of fried cornbread. To be sure they're cooked all the way, stick an instant read thermometer inside and look for a temperature above 175 degrees F.

Mix together the wet ingredients. I used creamed corn I had put up in the freezer, but you can certainly use canned cream corn.

Then mix together the dry ingredients. Yellow cornmeal is a must here to get that gorgeous yellow hue in the finished product. Fry for 2-5 minutes (depending on their size) in oil that is between 330 and 360 degrees F. I like to start with the temperature on the high side so that after I add a few blobs of batter, the temperature is still high enough to get a good crust on the finished product.

Fried Cornbread
Yield: approximately 20-40 pieces, depending on size

1/2 cup all purpose flour
2 tsp baking powder
1/2 cup yellow cornmeal
1 tsp sugar
1/2 tsp salt
1 egg
1 cup creamed corn
2 TBS melted and cooled butter
1/4 cup milk
1/2 cup diced onion

Mix the dry and wet ingredients separately and then add the wet to the dry mixture. Stir thoroughly. Drop by the spoonful (2 tsp to 2 TBS) into hot oil (approx. 330 to 360 degrees F) and cook until golden brown and cooked through. To ensure they are completely cooked inside, use an instant read thermometer to check for a temperature over 175 degrees. Let cool slightly on a paper towel before serving.

NOTE: Smaller pieces will have a lighter, fluffier texture than large pieces, which is simply a matter of personal preference. If you want an even lighter, fluffier end product, add a little more milk so that the batter is a little looser; this allows for quicker expansion when the batter hits the hot oil, leading to a lighter cornbread.

Friday, October 22, 2010

Fruit Crisp

I may love chocolate, but I'm also a fiend for fruit. Make that baked fruit with a crispy topping and you just can't go wrong. This particular dish can be made with almost any type or combination of fruit. In this instance, I used plums because I got a little excited when I saw plums first get down to a dollar a pound for the season and bought more than I could eat before they started getting wrinkly. Plums made a fantastic crisp, but blueberries, peaches, ooooooo, blueberries and peaches! Raspberries, blackberries, apples, pears. You see where I'm going with this, don't you? The sky's the limit.

I used the standard large purple plums found in the grocery store, but I also really enjoy the smaller prune plums (Stanley is the most common variety). The amount of sugar you use to sweeten the fruit will vary with how tart your fruit is. You may want to taste as you go to be sure it is right. As I said, these plums were starting to get a little wrinkly and were quite sweet from sitting on the counter for a while, so I only used a little sugar.

Prepare the fruit as necessary to be able to cut it into half-inch pieces. Be sure to take out any offending seeds or pits. Some fruit you'll want to peel (like peaches or apples), but most won't need it. Plums do not need to be peeled. In fact, most of the flavor and color come from the peel, so make sure you leave it on there!

After the fruit is cut, mix it with a little sugar, lemon juice, and cornstarch. The lemon juice not only helps to keep the fruit's color at its best, but it also gives a subtle flavor boost. Divide the fruit mixture among your dish or dishes. I like to make mine in single serving ramekins, but you could do it all together in one dish, if you like.

Prepare the topping by mixing together the flour, sugar, butter, and cinnamon. Give each dish a nice little mound of it.

Bake at 375 degrees F for 45 minutes to an hour or until the top is nicely browned and bubbly fruit can be seen around the edges. Baking time will vary depending on the dish size you used. Be sure to let them cool for a bit before serving or someone is liable to burn their tongue right off! These little guys are wonderful served warm plain or with a little ice cream or served cold right out of the refrigerator... for breakfast!


Fruit Crisp
Yield: 8 standard ramekins or 1 9x9 casserole

3 cups of chopped fruit
1 TBS lemon juice
sugar to taste (1/4 cup to 1 cup, depending on the fruit)
1 TBS cornstarch

1 cup all purpose flour
1/2 cup packed brown sugar
1/2 cup (1 stick) cold butter, cut in pieces
dash cinnamon

Prepare the fruit by seeding, pitting, and/or peeling, as necessary. Add the lemon juice. Stir in 1/4 cup of sugar and then add the remaining sugar to taste. Be sure to do your tasting before adding the cornstarch, which tastes chalky before it is cooked. Once the sweetness is how you want it, add the cornstarch and stir until no white lumps remain. Evenly divide the fruit mixture into the ramekins or pour into the casserole dish.

In a small bowl or food processor, mix the topping ingredients together, cutting the butter in until it is in small pieces and evenly distributed in the flour and sugar. Mound the topping over the fruit evenly.

Bake in a 375 degree oven for 45 minutes to one hour, or until the top is nicely browned and the fruit is bubbly at the edges. Baking time will vary with the dish size you use. Let cool before serving. Is good served warm, at room temperature, or cold. Will keep, covered, in the refrigerator for 4-5 days.

Saturday, October 16, 2010

Sauteed Spinach

You have to try this dish! Even if you are not a big fan of cooked spinach or greens, you must give this one a try. I made this dish up the other day on the fly when I suddenly needed a vegetable dish for a luncheon I was hosting. It turned out so well that I made it again that evening for dinner. Here's the most amazing thing. My husband? He said he liked the spinach dish even better than the pasta we were having, which was his favorite pasta carbonara.

There is so much flavor in this dish you will be amazed it is so full of vitamins and nutrients. I actually would recommend caramelizing the shallots (or onions) more than is shown in this picture. I was in a little bit of a hurry when I made the dish for this picture (although it still tasted great). The more caramelized the onions, the more flavor the end result will have.

While this dish takes around twenty minutes total because of the caramelization, it is very low maintenance. Start the onions and go work on other dinner preparations before taking one minute to finish the spinach dish at the last second.


Sauteed Spinach
Yield: 4-6 servings

2 TBS olive oil
1 TBS minced garlic
½ cup sliced shallots
½ tsp salt
¼ tsp cracked pepper
8-10 ounces fresh spinach
2 tsp lemon juice

Saute the garlic and shallots in the olive oil over medium high heat until they just start to brown. Add the salt and pepper. Reduce the heat and let the shallots caramelize over medium-low heat for 10-20 minutes, until they are nicely browned and sweet. Increase the heat to medium and add the spinach and lemon, tossing until the spinach is just wilted. Add more salt to taste, as needed.

Thursday, September 30, 2010

Mini-Cheesecakes

I have a thing for mini-desserts. Not only do I like the fact that they are built in portion control... well, unless you eat multiple of them... but I just think they're so dang cute!!

Mini pies, mini cakes, mini loaves of bread; I've even done small cheesecake tarts before. But for my birthday this year, my in-laws gave me this sweet little mini-cheesecake pan from King Arthur Flour. Two perfect bites of sweet, cheesy goodness in every cake. I also like how quick they are to mix up and bake.

I use my Perfect Graham Cracker Crust recipe and then whip up a basic cheesecake filling, which has nice lemony overtone. The cutest thing, which I did not take advantage of in this instance, is that they end up with a slight dimple in the middle of the cake, perfect for filling with whatever fruit or chocolate topping you think your mini-cheesecakes deserve!

Mini-Cheesecakes
Yield: 12 mini-cheesecakes

1 recipe Perfect Graham Cracker Crust
1 package cream cheese, softened to room temperature
1/2 cup sugar
2 eggs
1 TBS lemon juice
1 tsp lemon zest
1/4 cup heavy cream
1/2 tsp vanilla extract

Prepare the graham cracker crust and tamp about a 1/4-inch layer of crust in the bottom of each pan. Bake at 400 degrees F about 8 minutes or until nicely golden. Let cool.

Adjust the oven temperature to 325 degrees F. Mix all ingredients together with an electric mixer. Pour batter evenly into the twelve molds. Bake at 325 degrees F for 20 minutes. After twenty minutes, turn off the oven and let the cakes sit in the oven ten minutes longer. Remove pan from oven and let cool completely. For easiest removal, chill cheesecakes in the refrigerator a few hours until they are firm and then remove the cakes onto a serving dish.

Saturday, September 25, 2010

Perfect Graham Cracker Crust

I am pleased to announce that crumbly graham cracker crusts are no longer going to be a problem I have to deal with. I have always been frustrated by how the traditional graham cracker crust turned out for me.

It made perfect sense to me... I mean, really: crushed up graham crackers, sugar, and butter... there's no glue in there! What is supposed to hold it all together?

Fortunately, the cure is simple and wonderful. If you add one single egg yolk to the mixture, you end up with a perfect graham cracker crust that holds it's own once baked.

Perfect Graham Cracker Crust
Yield: enough for one pie/tart shell

1 pouch graham crackers (there are usually three pouches per box, 9 full sized crackers per pouch)
4 TBS melted and cooled butter
1 egg yolk
1/2 cup sugar
dash cinnamon

Grind the graham crackers into a fine meal. A food processor is easiest, but you can also use a rolling pin and a plastic bag. Then add the remaining ingredients into the mixture and be sure everything is well incorporated. Press into whichever mold or tart shell you choose and bake in a 400 degree F oven until the crust is gently golden, between 8 and 12 minutes depending on the size and thickness of your shell.

Thursday, September 16, 2010

Grilled Turkey and Pesto Sandwich

We love sandwiches around here. My husband's been working such late hours that many days by the time he calls to let me know he's on his way, I just can't think about cooking a full-fledged meal.

Yes. Soup and sandwiches visit our house very often.

But, when I'm really looking for a satisfying meal, cold sandwiches just don't quite measure up to the task. Ergo, we eat a lot of soup and grilled sandwiches at our house.

The great thing is that you have almost as much flexibility with a grilled sandwich as a cold one. Granted, I'm not a big fan of lettuce and tomato condiments on a grilled sandwich, for instance, but you can add all kinds of other great things! Besides the regular grilled ham and cheese (yes, I live with a man and, apparently, men cannot abide by a meatless sandwich), the sky's the limit. Swap out your cheeses; go with a variety of meats. My favorites often include caramelized onions and/or mushrooms. Oh, yes, the options are many.

Funny, then, that this one has made so many regular appearances lately. It's much easier to make than a sandwich that requires cooking onions or mushrooms separately. I can slap these together in no time flat, and my husband says they're good! And they have turkey on them. GASP! What, no beef? I guess when you slather a sandwich with pesto, turkey is A-OK.

So, here's the deal: Butter the outsides of your bread and spread the inside of each slice with a little pesto. I have a bunch of homemade pesto in my freezer that I froze in ice cube trays. I use one ice cube worth of pesto per sandwich. I then place a slice of smoke provolone cheese on each slice of bread (read: two slices per sandwich). Fold some deli smoked turkey in the middle, put them together, and grill over medium heat until nice and golden and heated through. Yup. This one's a keeper.