I am now blogging new recipes on my farm website.

Cooking from Scratch is on facebook! Click here to check it out!

Showing posts with label Candies. Show all posts

Wednesday, March 11, 2015

Andy's Mints


Last week, I made one hundred goody bags to donate to a women's mini-retreat. I included gingersnaps, toffee butter crunch, and these little mint gems. I'd made these mints once before and thought them wonderful enough to make again. If you like those little green foil wrapped chocolate mints, you'll love these things, too. They're darn easy to make, too, which is never a bad thing in my book.

I based them off a recipe I found in Taste of Home magazine. I just knew, though, that the way the recipe was written, I would find them cloyingly sweet. I am not a big fan of most fudges for that reason. But, I figured there was a way around that. Instead of using semisweet chocolate, I used a 60% bittersweet chocolate. It made them just right. The lack of excess sugar in the chocolate is more than made up for by the sweetness in the condensed milk. It ends up being the perfect balance. Interestingly, I have made these using both real white chocolate and white chips for the middle part and am not sure the flavor difference is worth the very real difference in price between them. It seemed to me they both worked well, so use either.

The first step is to melt the bittersweet chocolate and one cups of the condensed milk. Heat it in a heavy pan over medium-low heat, stirring frequently. Meanwhile, prepare an 8" square pan (use a 9x13 pan for a double batch) by spraying with a little oil and lining with a sheet of parchment (the oil simply helps keep the parchment from moving around on you as you spread the mixtures into the pan). When the chocolate is smooth, add the vanilla. Spoon half of the mixture into the prepared pan and spread it around. Chill until firm to the touch, about 10 minutes.


Then melt the white chips or white chocolate and the remaining condensed milk in another pan over medium-low heat. Heat until smooth, adding the color and extract as you remove it from the heat. Spread the green mixture on top of the now slightly firm chocolate layer and spread around. Let it firm up in the refrigerator another 10 minutes. Reheat the remaining chocolate mixture until it is smooth again and spread it on the top of the green mixture once it has firmed up.


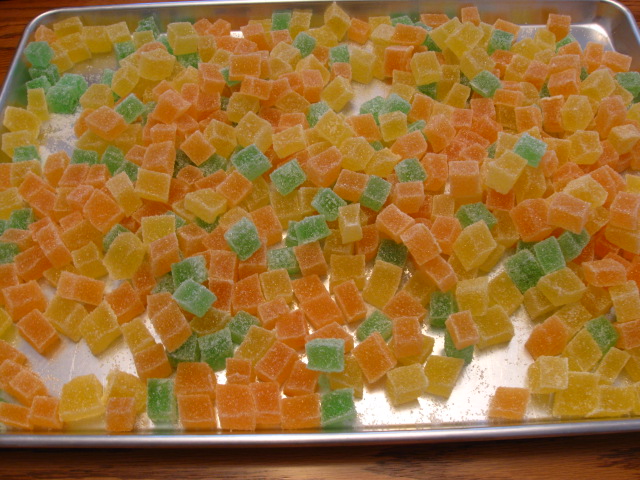
Let the tray sit in the refrigerator until completely firm, at least one hour, preferably two. Use the edges of the parchment to pull the candy out of the pan. Cut into roughly one inch wide strips. Use a sharp bench scraper or knife to then slice each strip into 1/2 inch wide pieces of candy.


Andy's Mints
Yield: approx 100 mints

2 cups bittersweet chocolate chips (~60% cacao)
1 14-oz can sweetened condensed milk (divided)
2 tsp vanilla extract
6 ounces white chocolate or white chips
2 1/2 tsp peppermint extract
3 drops food coloring

Heat the bittersweet chips and one cup of the milk in a heavy saucepan over medium-low heat. Heat, stirring frequently, until the mixture is smooth, Remove from heat and add the vanilla extract. Prepare an 8" square pan with spray oil and a piece of parchment. Pour half of the chocolate mixture into the pan and spread evenly. Let pan chill in the refrigerator for about 10 minutes or until firm to the touch.

Heat the white chocolate or chips with the remaining condensed milk, stirring frequently, until smooth. Remove from the heat, add the extract and coloring, and spread evenly on top of the first chocolate layer. Let chill ten minutes. Rewarm the remaining dark chocolate mixture and then spread over the top of the green layer. Spread evenly and chill until completely firm, at least one hour.

Remove candy from pan using parchment. Cut along the long axis into roughly one inch wide strips. Use a sharp bench scraper to cut each strip into 1/2 inch wide candies. Can be stored at room temperature, but they will keep longer if stored in a refrigerator. Let warm to room temperature before eating.

Note: If you ever find the mixture seems to firm to spread easily, you can always add a dollop of heavy whipping cream to the mixture. This will loosed it up without adversely impacting the final product. If making a double batch, use a 9x13" pan.

Monday, November 4, 2013

Ginger Jellies


As we rapidly approach the holiday season, I am already getting excited about the various goodies I can make to give as gifts to my loved ones. In the last few years, lemon, lime, and orange jelly candies have been staples of my gift giving repertoire. The candies are really tasty, pretty darn quick to make, and folks are always so pleasantly surprised to receive them. Lately, though, I've been trying to think if there was a way to freshen up the idea. My mom, who is an ardent ginger fan, inspired this version. They have such a wonderful flavor, and I've been eating them up very quickly as I've made my test batches. If you like ginger, you'll love these!

The basic process for making them is just like I posted previously when making lemon jellies. You just have one brief extra step because instead of juicing a fruit, you need to steep some flavor. In this case, stronger is better, so don't skimp on the amount of ginger you use. These candies have enough sugar in them to counteract the one-two punch the ginger can sometimes give when it's too strong.

It takes almost half a pound of ginger to get this juice potent enough, so buy plenty! Either cut or scrape the skin off the outside of the ginger and then cut it into thin slices and then cut those slices into small sticks. I cut up one and a half cups of small ginger sticks.


Then you add one and a half cups of water. Pour into a small sauce pan and heat over medium heat just until it comes to a simmer. Turn the heat off and let sit for an hour, stirring periodically. Strain the juice from the ginger first through a fine mesh strainer and then through coffee filters (or similar). You need one cup of ginger juice for this recipe. Surprisingly, the color of these jellies is beautiful without any added coloring. They end up a soft golden color - understated but beautiful.


Ginger Jellies
Yield: 3-4 dozen candies

1 cup ginger juice
   (made from 1 1/2 cups finely cut ginger and 1 1/2 cups water)
3 TBS unflavored gelatin
pinch citric acid powder (~1/16 tsp) optional
2 cups sugar
1/2 cup water
1-2 cups sanding sugar

Prepare the ginger by cutting or scraping off the skin. Slice thinly and then cut into small sticks. Place the ginger in a small saucepan with 1 1/2 cups of water and bring to a simmer. Remove from the heat and let steep for one hour, stirring occasionally. Strain through a fine mesh strainer and then through a coffee filter. Measure out one cup of the now cooled juice.

Mix together the ginger juice and the unflavored gelatin. Stir and let sit while the sugar heats on the stove. If desired, add the citric acid and stir to mix. Prepare a 4x13 pan or similar dimensions by spraying with oil and then line with parchment. Spray the parchment with oil as well. Set aside.

Pour the sugar into a sauce pan, add the water, and gently stir. Stir over medium-high heat until the sugar has dissolved. Stop stirring and place a candy thermometer in the pan. Continue heating without stirring until the mixture reaches 255 degrees. Pour the gelatin mixture into the hot sugar mixture, stirring completely. Pour into the prepared pan. Let sit at room temperature for at least four hours.

Pour one cup of sanding (or regular granulated sugar) on a sheet pan. Turn out the candy onto the sugar. Spray and pizza cutter with oil and cut the candy into strips and then square pieces. Toss in the sugar to coat all sides. Let the candy sit out at room temperature for two days, turning frequently.

For more details on making this candy, view the post on making lemon jellies.

NOTE: The citric acid is completely optional in this candy, but can help to keep the candy from becoming cloyingly sweet if you do not make a strong enough ginger juice.

Sunday, December 9, 2012

Gingerbread Men Shaped Lollipops


I love the holiday season. I especially love that it really gives me an excuse to go all out making all sorts of food goodies to give away. When I first started making lollipops a handful of years ago, I bought a variety of molds at a baking store (SugarCraft). The metal molds made by Sweet Creations are definitely my favorite. You can see what they look like in my Old Fashioned Lollipop post. I love them because they are easy to use and come in a variety of shapes.

In the packs of molds that I bought previously, I had ended up with two person shaped molds. One day, as I was making some root beer lollipops, I looked at those two and thought, "Wow! Those would make awesome gingerbread men for the holidays!" And then my life got busy and the idea got put on the back burner because I didn't really want to buy as many packs of molds as I'd need to get a reasonable number of the gingerbread men molds.

For some reason last month, on a whim, I decided to call the company and ask if they could make me a special pack of all gingerbread men molds. The folks at Sweet Creations were wonderful. Within a week, I had my new pack of molds and was ready to roll! They said they could create any package of molds from the shapes they offer that I wanted! How great is that? I am so happy that I called them, because look at how cute these little lollipops are!!!


I made a batch to give away to the little ones in our family for Christmas. I always make goodies to give to their parents, why shouldn't they get something special too? I made the lollipops exactly as I describe in my Old Fashioned Lollipops post. The only difference here was the addition of the white details. For this I used a stiff royal icing (I used the recipe on a package of Wilton meringue powder) and then let them dry uncovered at room temperature until the icing was dry and hard. Although most of our homes are on the dry side this time of year from the furnace, don't leave the lollipops out any longer than necessary or they could end up absorbing moisture and getting too sticky.

I then packaged them the same way I described in my previous lollipop post. I dusted them with powdered sugar and brushed the excess off with a pastry brush. Into the bags they went with pretty bows and, voila!, perfect little gingerbread men lollipops!


Sunday, December 18, 2011

So Pretty!

I've posted a few times already about making these cute little jelly candies. I originally posted about the lemon ones, but recently posted about making them in orange and lime as well. Well, I finally had an opportunity to make all three in the same time frame so that I could photograph them together. How cute they turned out! Yellow, and orange, and green, oh my!


Friday, October 28, 2011

Jelly Candies

About a year ago, I posted a recipe for lemon jellies. These cute little lemon candies are so tasty and such a cheerful lemon hue. I absolutely adore them, but what is good in lemon must be good in orange and other citrus flavors, right? So I made a batch of orange ones. I made them exactly how I made the lemon ones, except that I substituted oranges and used orange coloring.

You know what? They weren't right. I was so disappointed because they were cloyingly sweet. Fortunately, I have a fix for that. I got out the old citric acid granules and - voila! - a wonderful orange version of the lemon jellies was born. When I make orange jellies, I add about one half teaspoon of citric acid to the hot mix. If you really want a nice, tart treat, you can also add a little pinch to the dredging sugar.

So, if you want to make a nice, colorful assortment of jellies that looks adorable gifted in little cellophane bags or piled high in a candy dish, make a batch of lemon, orange, and lime jellies. Just be sure to add some citric acid to the orange and lime ones!

Tuesday, December 7, 2010

Lemon Jellies

I love making pretty things. I also love making unexpected things. In this case, it's a win-win. These candies are easy, beautiful, and delicious. Nobody expects to receive homemade jellied candies as a gift, and recipients are always pleasantly surprised.

An interesting note about these candies is that they really taste better after sitting around for a few days, so make them in advance if possible for the best flavor and texture.

Another great thing about homemade candies is that you can use real flavorings. No artificial flavors here! Just natural lemon juice, sugar, and unflavored gelatin to firm things up. For the best flavor, you want to be sure to use both the juice and the zest of the lemon. When the zest hits the hot sugar mixture, it gives off its oils to impart a wonderful citrus zing.

Remember, unflavored gelatin has to be softened in a cool liquid before it can be melted in a hot liquid. Here I have softened the gelatin in the lemon juice and a little bit of water. Stir well to avoid lumps in the final product.

Prepare your molding pan in advance. While this recipe doesn't require you to be as quick as some hot sugar candies, you still want to get it into the mold in a timely fashion. You can use whatever pan you want, but I always try and find one with the sharpest corners and edges I can. These are going to be cut into squares, so really rounded edges make square shapes difficult. Spray the pan with cooking spray and then line with some parchment. Be sure the parchment comes up high enough that you can use it to help you lift out the candies when firm. It's also important to spray the parchment surface itself. This candy is sticky!

Boil the sugar and half a cup of water together in a sauce pan. Stir until the sugar is completely dissolved and then do not stir again until you are adding the remaining ingredients. Bring the sugar mixture to 255 degrees F on a candy thermometer. It can take a while, so be patient. I usually have my burner on medium-high.

Remove the mixture from the heat and stir in the softened gelatin and the zest. Stir completely and pour into the mold. Let the mold sit at room temperature for at least four hours or overnight.

Pour enough sanding sugar onto the bottom of a rimmed cookie sheet to cover the bottom. Carefully remove the sheet of very gummy candy onto the sugar. I pull the whole thing out of the molding pan using the parchment and then invert the candy onto the sugar so I can then pull the parchment off. It may help to trim the parchment edges before you try to invert the mess onto the sugar. Spray a pizza cutter with oil and cut the candy into strips. Then cut across to form squares. Roll each square completely in the sugar to coat all sides. This is extremely important, otherwise your candy will become one giant sticky mess.

Spread the candy out with all the excess sugar on a sheet pan to dry for 24 hours. Rotate the candy once or twice during this drying period. After twenty four hours, the outside will be slightly rigid but the inside will still be very springy. Place the candies into an air tight container and let them sit another two days before serving or gifting. After these two days, the moisture content will have evened out and the candies will have a wonderful texture and flavor and you'll be proud to present them to your friends and family!


Lemon JelliesYield: 3-4 dozen candies

2 1/2 TBS unflavored gelatin
1/4 cup water
3/4 cup fresh lemon juice
1 TBS lemon zest
2 cup granulated sugar
1/2 cup water
2 drops food coloring
1 to 2 cups sanding sugar, for coating (see note below)

In a small bowl, mix together the gelatin, 1/4 cup water, and lemon juice. Stir until they are well mixed and set aside so the gelatin can soften.

Prepare an 8x8 inch pan (or similar area pan) by spraying the inside with oil. Then line with parchment across one direction, leaving the edges sticking up to use as handles after the candy has firmed. Spray the top of the parchment as well so that the candy releases easily from the parchment sheet.

Then mix the 2 cups of sugar and a 1/2 cup of water in a heavy duty sauce pan and attach a candy thermometer. Heat the mixture over medium to medium-high heat, stirring only until the sugar is dissolved. Continue cooking, without stirring, until the mixture reaches 255 degrees F on a thermometer.

Remove the hot candy from the heat and add the softened gelatin and the lemon zest. Stir until well mixed and pour into the prepared pan. Let sit at room temperature for four hours or overnight to harden. Only cover loosely if you feel the need to cover it while it sets.

Sprinkle the sanding sugar into a rimmed cookie sheet. Loosen the edges of the firmed candy with a knife and use the parchment to lift the mass out. Handle carefully so that the sheet of candy does not tear. Lay face down onto the sanding sugar and remove the parchment sheet. Sprinkle some more sanding sugar over the top to minimize its stickiness. Use an oil coated pizza cutter to cut the candy into strips and then squares. Dip each square into the sugar to coat all sides completely.

Leave candy out on baking sheet to dry for twenty four hours, turning the squares occasionally. After twenty four hours, you can separate the candy from the loose sugar and store in an air tight container for two days before serving or gifting to allow the moisture to redistribute evenly through the candies and to let the flavor develop fully.

NOTE: You can roll the candies in regular sugar if you want, but I find the slightly larger grain sanding sugar makes them look nicer and helps keep them from becoming too sticky in storage.

*If you are interested in making lime and/or orange flavored jellies too, check out this post with pictures of a nice yellow, green, and orange assortment of candies, and this post discussing the minor changes in the recipe for best results.*

Friday, February 26, 2010

Toffee Butter Crunch

This is one of those things that it seems everyone has made at one time or another, but maybe not well. If everyone else is working from the same recipe I started with, it's no wonder. Someone once gave me a bag of this stuff as a gift and the toffee part was very light in color, lacking in flavor, and had no snap. Definitely not what I had in mind when it comes to toffee.

If you really want to make good butter toffee, you have to push the temperature much higher than many recipes specify. The one that I have gives instructions to remove from the heat at 280 degrees. At 280 degrees, the sugar hasn't had a chance yet to develop much flavor and, if you want good snap, you need to bring the sugar all the way to the hard crack stage or 300 degrees.

The good news is that armed with this knowledge, you can make some darn fine butter toffee. If you give it as gifts, you can be guaranteed the recipients will love you for life. What's even better? It's the quickest, easiest candy you've ever made! Well, maybe except for lollipops.

For a single batch, you need to use at least a 2-quart sauce pan. This recipe can easily be doubled, but if you do, be sure to use a much larger pan. The candy will bubble up quite a bit higher than you might expect when it really gets going. The last thing you want is molten sugar overflowing in your kitchen!

Stir together the butter, sugar, water, and corn syrup in the sauce pan and place over high heat.

Place your candy thermometer into the pan to keep track of the temperature. Cook over medium-high to high heat, stirring occasionally with a wooden spoon. As you see in the picture below, it will come to a violent, roiling boil. Just keep an eye on the thermometer and let it do its thing. It may take anywhere from 10-25 minutes to reach 300 degrees, depending on your stove, so don't be dismayed if it seems to be taking a while.

As it cooks, it will lose water and shrink back down in the pot, becoming very gelatinous and gloppy. This is all part of the process, so just keep watching the thermometer. When you reach 285 degrees, you will need to be very vigilant; those last 15 degrees can go fast. Notice the difference in color between the picture above and below. That color is your flavor. Be ready to remove the pan from the heat right at 300 though... there's a fine line between flavor and burnt!


As soon as you remove the candy from the heat, add the pecan pieces, stir, and pour out onto a cookie sheet. There is no need to prepare the cookie sheet in any way. This candy has enough butter in it, it couldn't stick even if it wanted too! Jiggle the pan or help it to spread out with your wooded spoon. Be sure that you have a towel or trivet under the pan to protect your counter from the heat. Let the candy cool for a bit before moving on to the next step.

When the candy has cooled quite a bit (you should be able to touch it without hurting yourself), add the chocolate chips. I like to use the mini-morsels because they melt so much easier. The reason you need to let the candy cool before adding the chocolate is related to tempering. If you add the chocolate when the candy is too hot, it will heat the chocolate up too much and then it won't harden properly. It still tastes good, but is a real mess since the chocolate won't harden up like it should. The candy should not be warmer than about 105 degrees when you add the chocolate.


Let the chocolate sit on the candy for a bit to melt and then use a utensil of some sort to spread the chocolate evenly over the top. I use a butter knife. If you want, you can sprinkle some more crushed nuts on the top. They look pretty, but I find they tend to make the candy too messy. Move the tray to a cool area to firm up. If necessary, you can place it in the refrigerator. Avoid placing it in the freezer as this could also interfere with the chocolate's temper. (You can read my post about tempering chocolate if you want to learn more about this process).

When the candy is completely cool, break into small pieces and store in an air tight container. It will keep for at least a couple of weeks.

Toffee Butter Crunch
Yield: about 1 pound of candy

1 cup butter
1 cup sugar
3 TBS water
1 TBS light corn syrup
1/2 cup coarsely chopped pecans
3/4 cup semi-sweet chocolate chips (mini-morsels work best)
1/2 cup finely chopped pecans (optional)

Place the butter, sugar, water, and corn syrup together in at least a 2-quart sauce pan. Turn the heat to medium-high/high. When the butter melts, stir everything together and place a candy thermometer in the pan.

Let the mixture boil, stirring occasionally with a wooden spoon, until it reaches 300 degrees and has a nice caramel color. Be very vigilant once the candy reaches 285, as the temperature can go up very rapidly from there. Remove from the heat as soon as it reaches 300. Immediately add the coarsely chopped pecans and stir.

Pour the hot candy out onto a sheet pan. Be sure there are some towels or pot holders under the sheet pan to protect your counters. Jiggle the pan or use your wooden spoon to help spread the mixture out, if necessary. Let cool until the surface is no warmer than 105 degrees. (Just feels warm to the touch). Sprinkle the chocolate chips on top and let them sit to soften. Spread with a knife into a nice, even coating. Sprinkle with the remaining nuts, if desired.

Place tray in a cool area or the refrigerator to harden. When fully cool, break into pieces and wrap for gifts or store in an air tight container.

NOTE: If you are making this toffee to give as gifts, you may find yourself wanting to make a lot at one time. I have made as much as a triple batch and it works great. For a triple batch, you want to be sure you are using at least an 8-quart pan. A triple batch will fit perfectly on two 11x17 sheet pans.

Sunday, January 10, 2010

Candied Nuts

This is one of those recipes that's been on my back burner for a number of years now. Ever since I had a salad with candied walnuts in it that made my heart swoon. Somehow, I never got around to giving it a try. I did know that all of the recipes I came across for candied nuts just didn't seem like it would turn out a product like I was looking for. I knew I would have to just trial and error it. Yesterday was my second try, and I got what I was looking for!

Two weeks ago, while out doing some last minute Christmas shopping, I came across a guy selling farm fresh pecans. This might be my favorite thing about the south! So, despite the fact that the salad I still dream about had walnuts on it, I figured it might be a sin to use the grocery store walnuts in my freezer when I had beautiful, farm fresh pecans ready to be eaten... 'course, they were still in the shell.

If you ever find the need to shell pecans, please remember this simple axiom: pecans shell much more easily when they are frozen. Trust me on this one.

Once you have chosen your nut, be sure they are roasted. Candied nuts need to be crunchy and raw nuts simply won't do. You can dry roast them over medium heat in the pan before you get started or you can roast them in the oven at about 250 degrees for a few minutes until they just start to show some color. Set the nuts aside and start working on the candy part.

The proportions of this recipe will vary depending on how many nuts you want to candy. I did about twenty pecan halves in this trial run. I used 3 tablespoons of sugar. You can make as much of the candy coating as you want! This is the most simple coating ever; just be careful, because sugar can get very, very hot and can cause serious burns.

Simply place the sugar in the bottom of a skillet over medium heat. Let it melt and then let it start to caramelize and turn a glorious burnt sienna color. There is not need to stir. Just let it do its thing. Meanwhile, in a small bowl, mix together 2 TBS granulated sugar with 1/8 tsp table salt and a dash of cinnamon. Stir to mix. Here is a picture of my sugar about halfway there.

When the sugar on the stove is dark but not too dark (dark caramel can have a bitter flavor), turn the heat down and grab a pair of tongs that you have liberally sprayed with oil. Set up a little assembly line like shown below. I covered a cutting board with parchment as a cooling station.

Using the tongs, coat all sides of each nut with the molten sugar mixture. The nuts will really stick together if you let them; I find it's best to keep them apart as much as possible. Working one nut at a time, coat it with the hot sugar and then transfer it to the small bowl of coating sugar. Toss it around to coat all sides and then place it on the cooling board. While they are tasty almost immediately (please wait long enough to not burn the heck out of your tongue!!), they are best after they have time to completely cool and harden. Then they are crunchy and sweet with just a hint of salty. Great as a snack or as a garnish to salads or desserts!

Candied Nuts
Yield: 20 candied nut halves, can easily be adjusted for any yield

20 whole nut halves, such as pecans or walnuts
3 TBS sugar

2 TBS sugar
1/8 tsp table salt
dash cinnamon

Toast the nut halves in a dry skillet over medium heat or in a 250 degree oven until they just start to show some color. Set aside to let cool.

Place 3 TBS of sugar in a small skillet over medium heat. You do not need to stir the sugar, an occasional shake of the pan if it appears to be melting unevenly is all that is necessary. Let the sugar melt and darken to a light brown color. Do not let it go too far or it will have a bitter flavor.

While the sugar on the stove melts, mix the remaining sugar, salt, and cinnamon in a small bowl. Spray a pair of tongs with oil and set up a cooling rack by placing parchment paper over a bowl or cutting board.

When the melted sugar is ready, reduce the heat to low and, one by one, coat the nuts on all sides with the hot sugar and then dip them in the granulated sugar to coat all sides. Shake off the excess and place on the cooling rack. They should be completely cool, crunchy, and ready to use in about half an hour. Keeps for two weeks in an air-tight container.

Thursday, December 10, 2009

Marshmallows!

Oh la la... can it really have been almost two weeks since my last post? And Christmas - is it really only fifteen days away? WAIT! Stop the clock! I haven't been able to do anything yet. Christmas shopping? Uh, nope. Christmas cards? Ditto nope. Holiday decorations? Hmmm... does hanging a wreath on the front door count? Oh my goodness! How about holiday baking - my favorite part of the holidays? Not a darn thing. Not one single little cookie. It's positively depressing. Unfortunately, those darn priority things are getting in my way. Grrrr.

The worst part about the whole deal is what I've been eating for dinner. In the last week, the closest I have come to cooking was boiling up a packet of ramen. Other dinners this week have included canned soup, frozen burritos, and a bowl full of salad greens. Fortunately, while my mom was visiting over Thanksgiving we cooked a few things, so on these recently rare occasions when I have a few extra minutes, I at least have something to share with you. Please bear with me as I make it through the rest of this school year... believe me, lately, I would much rather spend the time with you than continually trying to convince my students that the purpose of my class is to prepare them for life, not to simply give them another 'A' they haven't earned. But - I digress - this is a cooking blog for crying out loud!

So, let's cook! I am not a marshmallow fanatic, but I like them reasonably well in certain applications and occasionally as a snack. I always wanted to try making homemade marshmallows and I rather enjoyed the process. As far as the product goes, they really don't differ that much from the store bought. In fact, in a blind taste test, I'm not sure I'd be able to tell the difference. The good news is that with homemade marshmallows, you can play with flavorings, colorings, and shapes. How fun! Of course, I'm not going to talk about that today. Since it was my first go at the things and I needed a baseline from which to work in the future, I just made plain ones.

It starts with unflavored gelatin. This type of gelatin requires "blooming" before you use it. All that means is that you mix it with a little cold water to soften it up. Here it is in the bowl of my mixer looking funky.

The next step is to heat up a sugar syrup on the stove. It gets heated to the soft ball stage, or about 240 degrees F.

The hot syrup then gets poured slowly into the softened gelatin with the mixer on low. Be sure to use the whisk attachment. Once the syrup has all been added, the speed gets cranked up until a magical transformation occurs.

It turns a beautiful white, glossy color and expands significantly in volume. It only took about 7 minutes in the mixer to get a nice, thick marshmallow cream.

While the marshmallow is beating, prepare a couple of cookie sheets with parchment and then sprinkle with the cornstarch/powdered sugar mix. I used a little strainer to get an even distribution. Don't be stingy with the powder or you'll regret it later. You can never have too much, but believe me - you can definitely have too little.

Once the marshmallow cream can stand on itself like shown in this picture, turn the mixer off and remove the whisk.

Spoon the cream into a pastry bag either with the tip cut out or use a large, round tip. You could simply line a rectangular pan with the parchment and powder, but I like the whole marshmallow shape too much. Pipe the cream into rows on your sheet. I found it's best to make them on the small side unless you don't mind them having a slightly oval shape, as the large ones tend to flatten a bit under their own weight.

Refilling the bag can be a bit tricky. In the future, I might simply use a new disposable bag for each refill. It's a pretty sticky situation...

When you have finished piping out the rows, sprinkle them again very generously with the starch/sugar powder mixture. Let them sit out for a few hours to firm up.

There are two ways to go about separating the little buggers. I tried the scissor method first. It was fine, but the scissors tended to goop up more quickly that I have the patience for, so I ended up using the secondary method.

Ah... now this is more like it! The pizza cutter worked like a gem. Just be sure to use plenty, plenty, plenty of the powder to keep from ending up with a crazy, sticky mess!

Hey, look! It's a marshmallow! As I cut them up, I tossed them around in a bowl with more of the sugar to cover all sides. I then placed them in a colander to shake off the excess.

Be sure to store them in an airtight container. Because they are mostly sugar, if you keep them air tight, they will last for weeks... which is good, cause I'm not ditching them after just a few days with all this effort!

Oh, and let me tell you about the hot chocolate application. Here is where I might actually be able to tell a difference between store-bought and homemade. The homemade ones seemed to melt differently - and in a good way. Yup, they were worth the work after all!


Marshmallows
Yield: about a half-gallon container of small marshmallows
Adapted from Alton Brown's recipe

3 packages unflavored gelatin
1/2 cup ice cold water

1/2 cup water
1 cup light corn syrup
1/4 tsp table salt
1 1/2 cups granulated sugar

1 tsp vanilla extract (or any other flavoring you choose)
1/4 cup powdered sugar
1/4 cup corn starch

Place the gelatin and the 1/2 cup of cold water in the bottom of a stand mixer fitted with a whisk.
In a small saucepan, mix together the other 1/2 cup of water, granulated sugar, salt, and corn syrup. Outfit the pan with a candy thermometer. Turn on the heat to medium high and cook without stirring until the mixture reaches soft ball, or 240 degrees F. Remove from the heat.

Bring the pan of hot syrup over to the mixture and add slowly while mixing at low speed. Once you have added all the syrup, increase the speed to high. Mix on high until it gets thick, shiny, and white, and can stand up on itself (see picture above). This step took me about 7 minutes. Add the vanilla and whip just until well mixed. While mixing, prepare a couple of baking sheets with parchment and a liberal sprinkling of the cornstarch and powdered sugar mixture.

Spoon cream into a pastry bag with a round tip (or with the end cut out). Pipe into 1/2 - 3/4 inch logs on the prepared pans. This is a sticky procedure, so be prepared! When finished, sprinkle the top sides completely with the powdered mixture.

Set the tray aside for a few hours to firm up. Use a pizza cutter to cut into small marshmallows. Dip into a bowl with the starch/sugar powder mixture to completely coat all sides. Remove excess by shaking marshmallows briefly in a colander.

Store in an air tight container for at least a month.

Tuesday, June 23, 2009

Old Fashioned Lollipops

I think every tooth in my mouth is a sweet tooth. I just can't seem to go a whole day without having at least one sugar laden treat. Sometimes I want chocolate, sometimes I crave pastry, sometimes I want something cold and creamy, and sometimes, I just want some good old fashioned candy.

Lollipops are very quick and easy to make. They do require some special equipment, namely molds of some kind. But once you have your molds, you can make a batch in just a few minutes. They make great gifts and there are so many different molds and flavorings out there, the possibilities are endless!

My preferred mold type are metal lollipop rings. They come in a wide variety of shapes and are very easy to use and clean. I get them from Sugarcraft. This time I used the traditional circle, but I have molds for hearts, animals, flowers, and cars.

In addition to molds, you also will need a candy thermometer. I like the ones that clip onto the pan. This is the one that I have, and after trying at least a dozen, it is by far the best. You also need to consider flavorings. You can't just use any old flavoring in hard candy. Regular old extracts are not appropriate. You need to use flavoring oils specifically made for hard candy, such as those produced by LorAnn brand. They have a huge assortment of flavorings available online or in many grocery stores. My favorites are root beer, lemon, and orange, but there are probably over two dozen flavors available!

Before starting your lollipops, be sure to have your molds set up and ready to go. I lay them out on a parchment lined sheet pan. I do not oil the sheet or the molds. I find this leaves an undesirable coating on the lollipops. I do not have trouble with the candy sticking to the metal ring type molds, but I do not have any experience with other mold types.

To make lollipops, set up a heavy sauce pan with a thermometer. Stir together in the pan the sugar, water, and corn syrup (which helps to prevent undesirable sugar crystal formation). Heat over medium-high heat until the temperature reaches 300 degrees F. You do not need to stir. Remove immediately from the heat when it reaches 300 degrees. Let the mixture cool to 275 degrees before adding the flavoring, coloring, or any other additives. Pour into prepared molds immediately, as it starts to firm up right away! If you have extra, you can pour that onto the pan around the molds to snack on after it cools.


Do not unmold the lollipops until they are completely cool. One of my first times making these, I unmolded them as soon as they were cool enough to handle. Unfortunately, the candy was still warm enough that without their mold holding their shape, they oozed horribly. It was somewhat disturbing...

Once they are cooled and unmolded, I prepare them for packaging. I use the small treat bags sold by Wilton and similar companies and tie them with pretty ribbon. I use confectioner's sugar to keep the suckers from sticking to the bags. I fill a jar about half full of powdered sugar and have a dry pastry brush handy. I dip the suckers into the sugar to be sure all surfaces are covered. I then use the brush to remove excess sugar. Be careful not to touch the lollipops as you will never get your fingerprints off of them! Don't worry if they look slightly lackluster as you bag them, they will clean themselves up in the bag as they sit. Store in a cool, dry place.


Old Fashioned Lollipops
Yield: enough for 10-12 average sized molds
1 cup sugar
1/3 cup light corn syrup
1/2 cup water
1/8 to 1/2 tsp flavoring oil
food coloring (optional)
1/8 tsp citric acid (optional, provides tartness)

Heat the sugar, corn syrup, and water together in a heavy sauce pan fitted with a candy thermometer. Heat to 300 degrees F over medium-high heat (takes about 10 minutes). Remove from the heat. Let mixture cool to 275 degrees F before adding flavorings and colorings. Be careful when adding these mix-ins, as the candy will bubble and steam violently. A wooden spoon is best as it does not conduct the heat to your hands. 300 degree F sugar will burn the living heck out of you, so be very careful. Pour quickly into molds and let cool completely.

Here are the guidelines I use for some of my favorite flavors:
  • Root beer - 1/2 tsp flavoring, no coloring needed
  • Lemon - 1/4 tsp flavoring, 5 drops color
  • Sour Lemon - 1/4 tsp flavoring, 5 drops color, 1/8 tsp citric acid

Wednesday, March 18, 2009

Crystallized Pansies

It's that time of year! Spring is thinking about coming and those cool weather loving pansies are going crazy. I love taking advantage of this time of year by preserving some of these gorgeous blooms for use the rest of the year. Just be sure that you use flowers that have not been sprayed!

Crystallized flowers are great decorations for cakes and other baked goods. In fact, the only decoration I had on my wedding cake was these little guys. (see picture below). These things taste great (once you get past the whole eating flowers thing), but I would recommend not eating the green stem part... it tastes kind of grassy.

Typically, instructions for crystallizing pansies include dipping the flowers in egg whites and then sugar. All that gave me was funky, lumpy balls of sugar. Not what I was looking for. After some experimentation, I came up with an easy method of making perfect flowers. This method also negates any concerns regarding using raw egg whites.

Required Ingredients and Materials:
A food dehydrator (or sheet pan and very cool oven)
Parchment paper
Hand sprayer (be sure it is clean enough for food use)
Pansies (duh!)
Meringue powder (such as Wilton's)
Granulated sugar in a shaker

As you can see in the picture above, I cut the parchment to fix the dehydrator trays. The parchment helps to keep the pansies from sticking to the trays. They become very fragile when dried. They can still stick sometimes if you don't shake the liquid off the pansies enough, so I always make more than I need to account for breakage.

Mix the meringue powder with water in a roughly 1 to 4 ratio. Be sure it is mixed well so that you don't stop up your sprayer. Trim stems on pansies quite short (maybe a 1/4 inch) and then using stems to hold, spray completely with meringue water. Shake excess liquid off as vigorously as possible without ruining the flower. Then sprinkle all sides with granulated sugar. Lay face up on the tray. Continue until all flowers are done. Dehydrate on low until flowers are completely dry, usually at least 24 hours. Carefully peel off of parchment. Properly dried flowers will keep in an airtight container darn near indefinitely... though I'd recommend using them within 6-8 months.

Here's a photo of my wedding cake. While they still look nice, these were made using the ol' dip in egg white, dip in sugar technique. If you look closely, you'll notice the flowers are a bit lumpy.