I am now blogging new recipes on my farm website.

Cooking from Scratch is on facebook! Click here to check it out!

Showing posts with label Commentary. Show all posts

Tuesday, September 27, 2016

Did You Know? Banana Edition


In the not too distant past, I somehow came across a bunch of online forums where moms were debating the best way to manage bananas for their babies. The complaint was regarding how to best store bananas after peeling them because their babies were only eating a small part of the banana at a time. There were all kinds of methods mentioned, but not one single person discussed the simplest method of all.

Simply cut whatever amount of banana off that you want to use and... leave the rest there. That's it. That's all there is to it.

The end of the banana dries out and seals itself and when you are ready to consume the rest of the banana, all you do is cut or peel off the dried end and proceed as usual. How long will it last like that, you might ask? As long as the banana will last before turning to goo on your counter. Yay for simple answers!


Friday, June 17, 2016

Better Butter


This is one of those things that I always feel weird posting because it seems too simple. I originally started doing this when my boy first started eating solids, about three years ago. I wanted to reduce the amount of sodium in the butter I used, so I could use a wider range of other ingredients without feeling like I was blowing his daily limit too badly. Interestingly, a couple times over the last few years, I've briefly had to go back to regular butter and it's just not as good! I find myself getting anxious to get back to the "good stuff."

When I recently had multiple people in a short time period asking what butter I used because they thought it tasted so good, I decided maybe it was time to share my secret with the world. It's so simple, it's hard to imagine it making such a big difference! All I do is mix one stick of salted butter with one stick of unsalted butter. Then I put the mixture in a crock and leave it on the counter. So, so easy.

Why does it make such a big difference? I think the reason is two fold. First, I think salted butter is salty enough that it tends to overwhelm the delicate flavor of the butter. Second, look at the photo below. The top box is salted. See the ingredients? Cream and salt. That's it. Now look at the bottom box. See those ingredients? Cream and natural flavoring. Initially, I was, like, whoa!, what are they sticking in my butter!?! But after a little snooping around, it appears that to keep it from tasting too flat without any salt, manufacturers add a little lactic acid to the butter to give it a little tang. It's a cheaper way to give a little bit of cultured flavor to butter (like what the Europeans do) without actually having to culture the cream. I think between those two things, the butter just tastes extra fresh and delicious. Additionally, now that I am used to the lower sodium, regular salted butter seems overwhelming to me.


The other good news is, that in my experience, it doesn't matter what butter you use. Name brand or store bought, it all comes out tasting about the same. Yay! 

In other news, see the utensil in that bowl? That's called a "sandwich spreader" in food service lingo. May just be the most awesome tool ever made. I use them for everything. In this case, though, they make mixing butter like this a breeze and they make spreading soft butter on toast amazingly easy. I own around half a dozen of them and almost start crying when I realize they're all in the dishwasher. :-)


Wednesday, January 6, 2016

It Does Matter


I tend to think of myself as a pretty practical gal. When it comes to generic brands, for instance, all other things being equal, I find no reason to pay a premium price for an ingredient. Occasionally, I find there are exceptions where all things are not, in fact, equal. For example, take domestic pre-grated Parmesan cheese; the stuff in the green can is always better than the store brand version.

Recently, since I started doing a lot of baking for hire, I've been going through tubs of cocoa powder. It seems like such a basic ingredient I thought, surely it's all the same, right? Wrong!!! I made the mistake once. I will not make it again. I made my classic chocolate cake and all I changed was using store brand cocoa powder instead of Hershey's classic cocoa. The cake was horrible! The lack of chocolaty flavor was so obvious and overwhelming, I could hardly believe it.

But upon close inspection of the powders, it became obvious. The store brand powder's aroma was so weak in comparison and so was it's color! Take a close look a the picture above. Which is which? Depending on the type of screen you are using, you might have to move your head around to get a good look at the difference, but it is clearly there. Look how much richer the color of the powder on the left is (Hershey's). Lesson learned... some things are worth the premium price. Now, what do I do with the rest of that container of store brand cocoa? It feels wrong throwing it away, but I sure don't want to use it!

Sunday, November 23, 2014

Planning A Thanksgiving Feast


Can someone please tell me how the heck it is already the week of Thanksgiving? If you were to ask me what time it felt like, I might say mid-September. Huh. Thanksgiving's really this week? I guess maybe I should start planning my meal. At least this year I only have a modest gathering of people to cook for. Last year, now that was another story. I had great intentions of posting more about it at the time, but it was tricky enough making dinner for twelve with a nine month old, let alone posting about it, but it's all about the planning. Even when you don't have a baby, it's all about the planning.  

Let me show you what I mean by planning. The first step, obviously, is to decide what (and how much) you're going to make. This was my menu last year. At the top, you can see the appetizers that I wanted to make. Then you can see the main meal, followed by dessert. I smoked the turkey on my Weber grill. Because I had never done it before, I smoked a test turkey a couple of weeks before Thanksgiving. It worked pretty well and, hopefully, I can share how I did that with you this week, too. I always have great intentions of posting holiday appropriate recipes in a timely manner, but... well, you can see that it doesn't always happen. 


After I made the menu (and the requisite grocery list), the next step was to come up with my timing planning. When preparing food for large meals such as this, I always try to prepare as much as I can in advance, especially when a lot of the work is limited to nap time. As you can see, I started the Friday prior with making the bread, which I was planning to use in the stuffing. 

As you can see, as I finished tasked, I crossed them off... usually, I'm not sure why the name card cookies task isn't crossed off, since I did get them done. You can also see that I allow for some changes as I go as well. Note that I switched a couple tasks between Monday and Tuesday. Flexibility is the name of the game when preparing large, complex meals. Another important thing to point out is my oven plan at the bottom of the page. When you only have one oven (or even two) with many items needing to be baked, this step is essential. If I plan on having more than one item in at the same time, I make sure the dishes that I plan on having the items in will, in fact, all fit in the oven at the same time. There's nothing worse than planning so well only to be foiled by dishes that won't fit!!


And then, because turkey day itself is always crazy, especially if people are showing up early in the day, I make sure to have a timeline for the day of. Not only is it important to think through the logistics of how it will all work ahead of time, I find it critical to have a list to keep me from forgetting things the day of. 


As I mentioned, my meal this year is quite a bit simpler. Thank goodness, since I've only just planned my menu. Since I'm a traditionalist, it's very similar to what I make every year. The big change is that, this year, I'm not baking up a whole turkey. I'm going to stuff a turkey breast and roll it up into a roulade. If I can find the meat in the store, I would like to also roast some turkey legs and thighs to be able to serve some dark meat (and help make gravy), but we'll have to see how the grocery stores are around here! I plan on making/prepping almost everything ahead of time, so Thursday, hopefully, will be relaxed and festive. That's my favorite kind of Thanksgiving!

Saturday, November 16, 2013

Hosting Thanksgiving


I am so excited for this Thanksgiving. For the first time ever, I am getting to host a large family dinner. As military folk, we're usually by ourselves far away from family. Sometimes we invite a few airmen or colleagues who are in the same boat over, but often it's just us. One year, when my husband and I were doing split duty for a time, I went to visit him and we had Thanksgiving dinner in a pub. Finally, we are close enough to one side of the family to be able to host the event. It's not a huge crowd; I expect it to round out at close to a dozen, but that's enough for me to have an enjoyable time hosting a dinner I don't normally have a chance to.

So, what am I serving? I am so glad you asked! (You did ask, didn't you?). As I sit here writing this, I am smoking my first turkey on the grill. I'm a huge fan of smoked salmon (which I plan on serving cold as an appetizer), but I've never tried to smoke poultry, let alone a bird big enough to serve twelve. I figured I'd better give it a test run, and that's what I'm doing today. I'll let you know how it works out. It's been out there for an hour and a half, and it already looks great. Fingers crossed!!

In addition to a turkey, I'll serve a small ham (just in case I blow the turkey, right!?!). Not everybody loves turkey and leftover ham is awesome, so why not? I have a counter top roaster oven to bake it in, so I'm not hurting for oven space.

Let's see... so that takes care of the meat. I'll be serving the traditional dressing. I like a bread cube stuffing with mushrooms and sage. And, of course, there will be mashed potatoes and gravy. I may even spike the potatoes with a little cream since it's a special occasion!

I'll be making my green bean casserole from scratch. No cans of mushroom soup here!


I also plan on making my fabulous and gorgeous spiced cranberry sauce, shown - here - with currents, and shown - at the top of this post - without. I love it both ways, but maybe just slightly better with. I know a lot of folks aren't cranberry sauce fans, but this version has certainly converted a person or two.


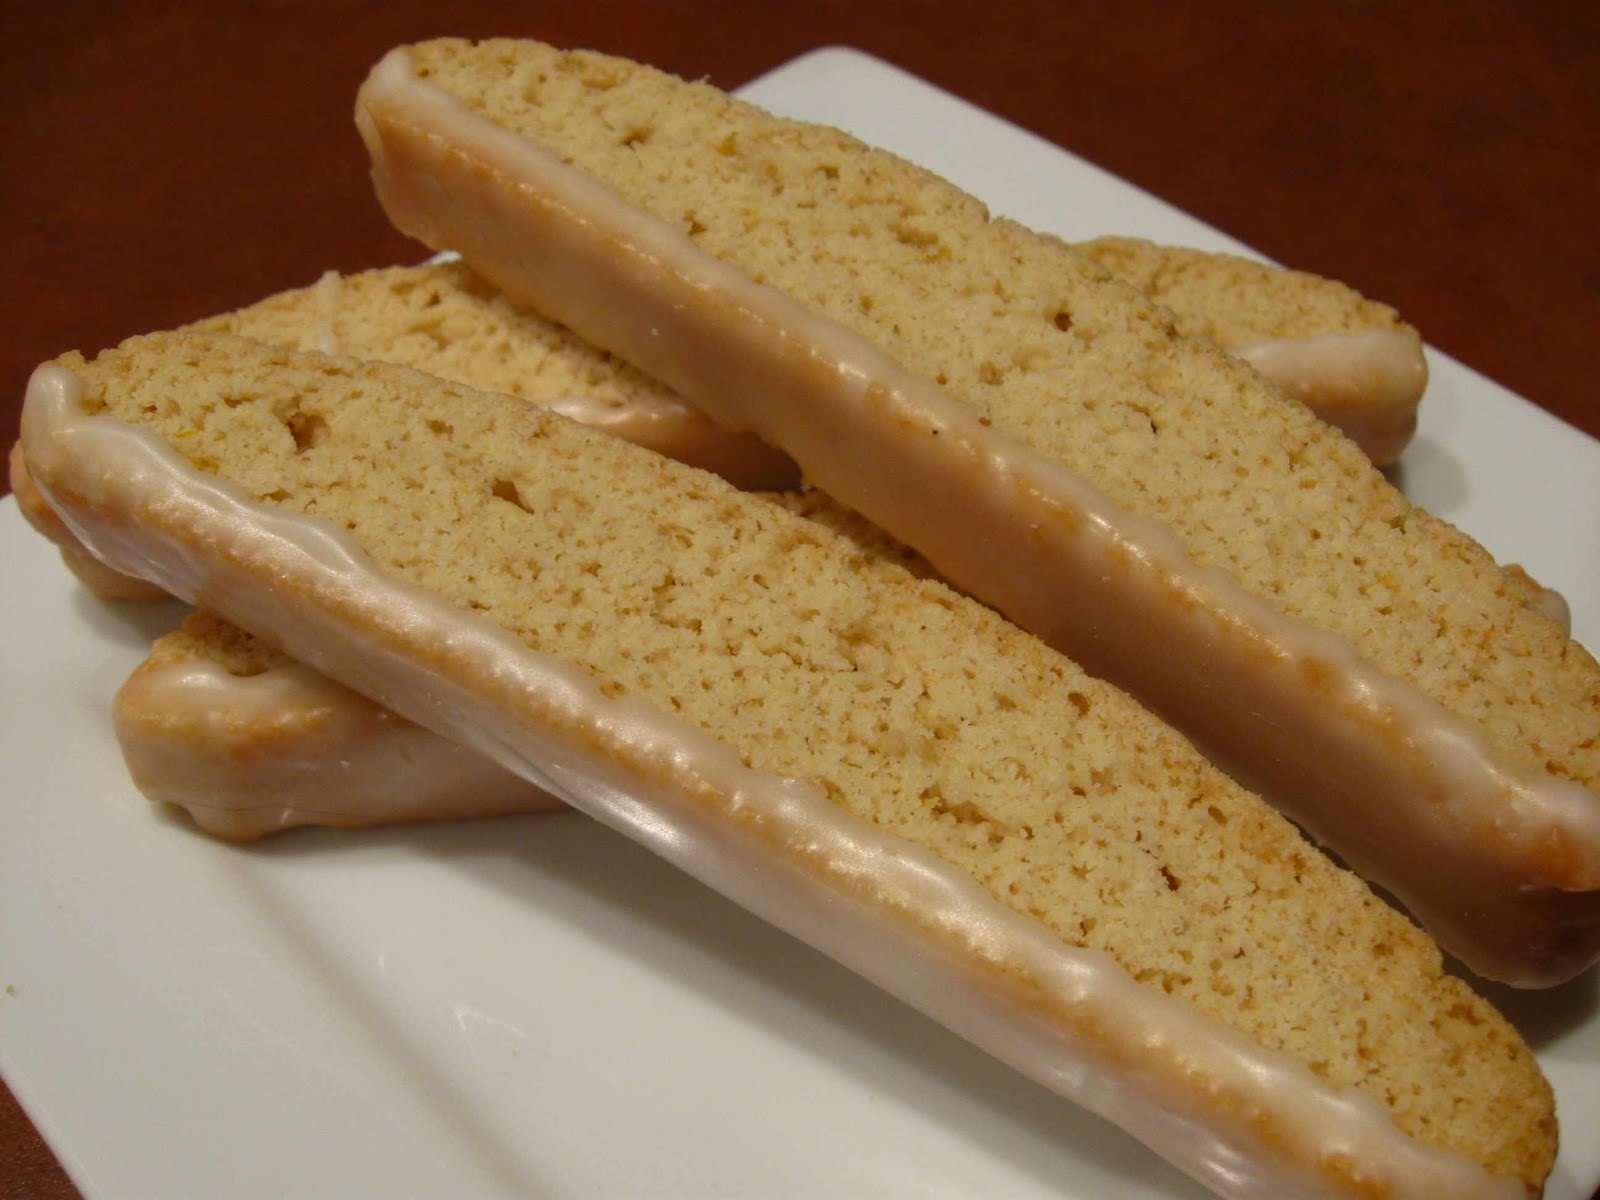
And what Thanksgiving meal would be complete without some form of home baked bread? These refrigerator dinner rolls fit the bill since they taste phenomenal. Additionally, they fit well with my "do as much in advance as possible" doctrine.


For a nice change of pace, I decided I would serve these mincemeat peaches as a side dish. They're sweet and sassy with all the spice of the holidays. Using canned (whether home canned or store bought) mincemeat makes them the fastest dish in the west.


I'm still thinking about maybe adding one more side dish... a vegetable, I think, but we'll see if it happens. I've been thinking about creamed pearl onions or maybe slices of pecan crusted acorn squash. Since we have plenty of food already planned, I'll play this last dish by ear.

What about dessert, you say? Well, of course, I can't forget about dessert. While I like to get really fancy for Christmas desserts (think buche de noel or cream puff swans), I'm more of a traditionalist for Thanksgiving. Pies it is! I plan on making a classic apple pie and will serve it with homemade vanilla ice cream. I do think, however, that I will make the pie with my newer, super flaky pie crust. I've even held back a few Cortland apples for making the pie extra tasty.


And, what Thanksgiving would be complete without pumpkin pie? Apple pie may be all American, but pumpkin pie is all Thanksgiving! I always make mine with pumpkin puree I've put up myself. I can't abide by canned pumpkin.


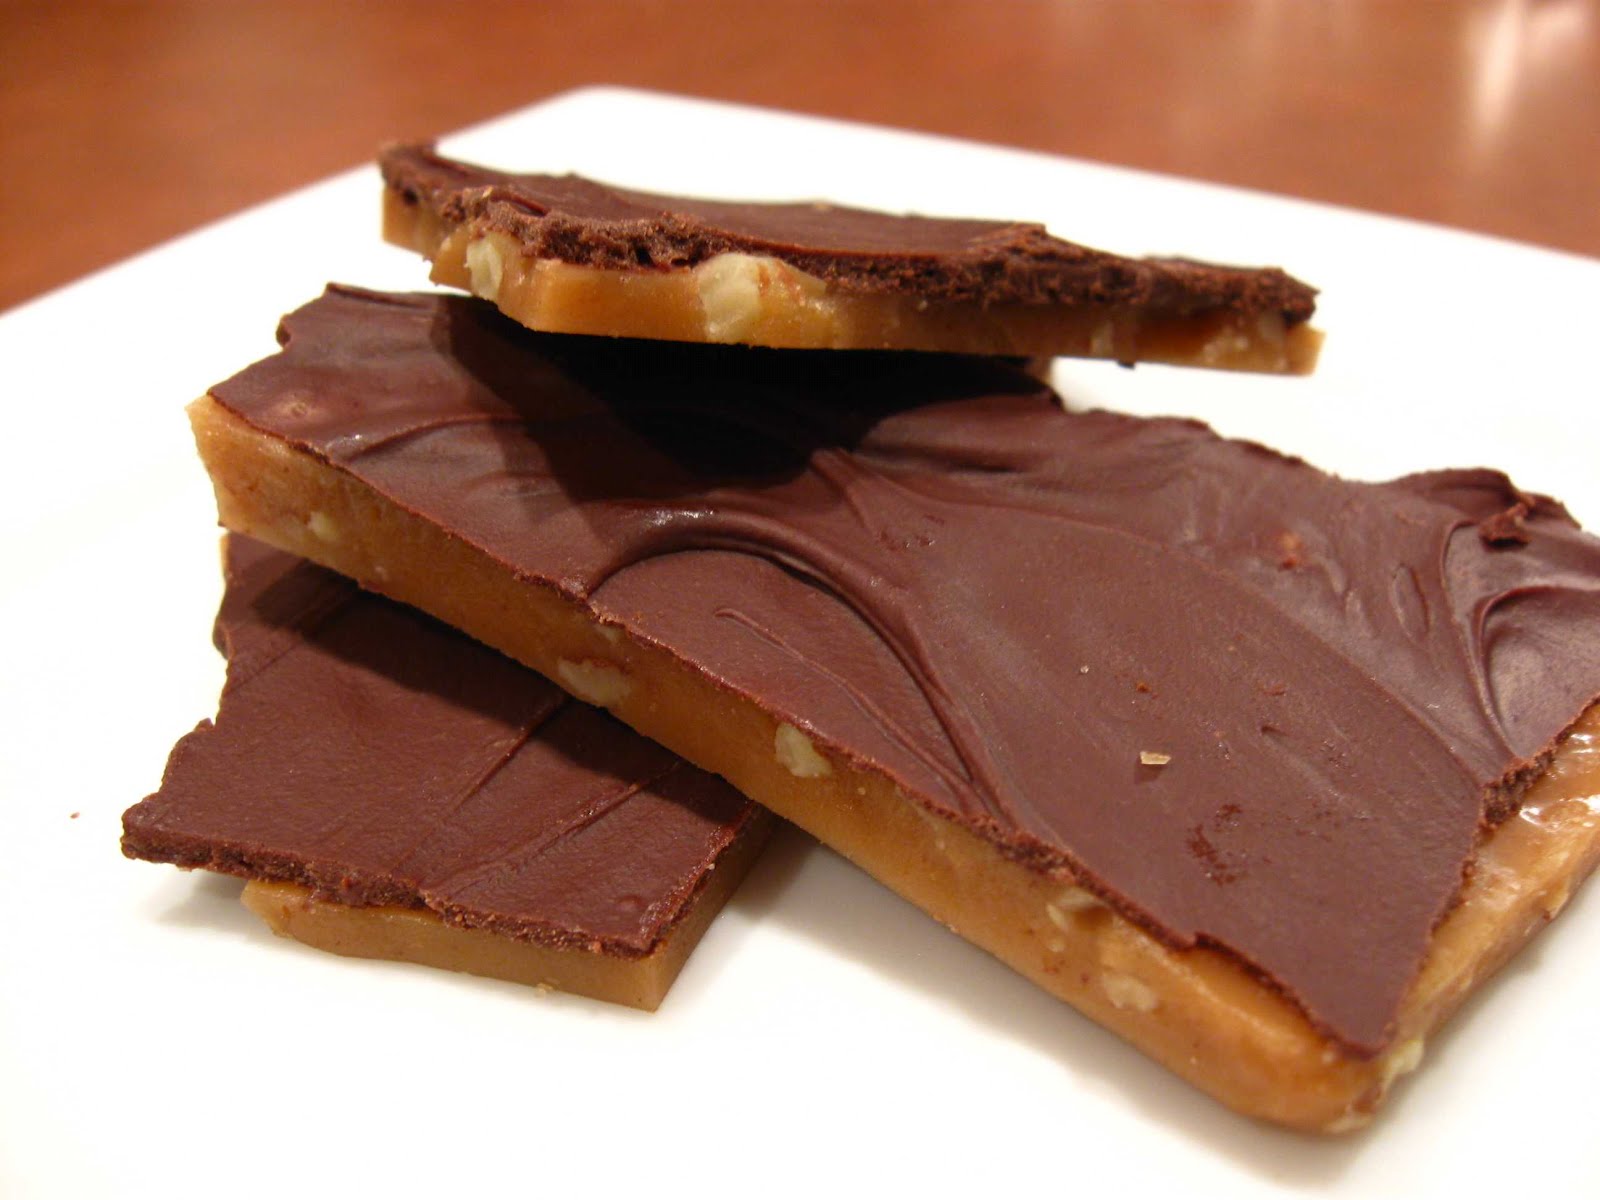
Lastly, I think I'll make a pecan tart. This is like a pecan pie, but not so... well, goopy. I love the flavors of pecan pie, but am always overwhelmed but how much filling there is compared to nuts. It's too heavy and sweet for my tastes. I've made it as a tart before. I just used a tart pan instead and only added half the amount of filling (but all of the nuts!!). I found the balance perfect. Nutty, sweet, and delicious. A perfect ending to a meal filled with family and fellowship.

Tuesday, October 22, 2013

Baby Food


If you haven't noticed, I've been having a little trouble getting around to posting lately. Interestingly, it isn't because I don't have anything to post about; I do. I actually have quite a few things I could post about. I've been cooking... some. My little boy has finally decided that naps are good things and I now get a few hours most days to do stuff. Of course, after months of not having any time to do stuff, I spent the first month or two of his new napping prowess to simply vegetate and enjoy having some time to myself. I read! I ate uninterruptedly (what a concept!). But, now he's been a pretty good napper for a while and I find myself starting to catch up on housework, cooking, and projects that have been on the back burner for a really long time.

While I do have a little time now to play and experiment in the kitchen, I am mostly utilitarian in there these days. Take the baby, for instance. From his first day on solids at six months, he's been a very enthusiastic eater. I try to provide him with a lot of appropriate finger foods that he can eat all by himself (sticks of soft fruit or vegetable, toast, etc.), but the mainstay of his solid food diet is chunky purees. I do feed him some store bought baby food, but not very much. There are two main reasons for this: 1) I was surprised at how little selection there really is when it came to the store bought stuff, and 2) it's all canned (meaning it's been cooked to death). I'm not a fan of overcooked vegetables (think peas, carrots, etc.) because it changes their flavor so much. I want my boy to grow up enjoying the lovely freshness of produce, so I have taken to preparing most of what he eats.

I have some plain items, like acorn squash (one of his favorites). I simply bake it until it's soft and then mush it with a fork (I do the same thing with sweet potatoes). Other items, I take a little more effort with. Here are some of my boy's favorite foods and how I prepare them:
  • Spinach -  I cook the spinach in boiling water for a few minutes, drain, and then puree in the food processor. I then add a little bit of Parmesan cheese (I don't add too much since you really want to watch an infant's salt intake) and a bit of plain bread crumbs. He loves this stuff!
  • Dahl - That's right, dahl, the Indian lentil dish. I try hard to get a lot of iron in my boy and lentils are a good source. How could I know how much he'd enjoy the Indian spice flavors? He's always up for dahl. I just found a recipe I liked in an Indian cookbook and left out any salt or "hot" spices.
  • Black Beans - I buy unsalted, canned black beans and "refry" them in a saute pan with a little olive oil. I then gently puree them with a little sour cream and a little cheddar cheese. I add in a good dash of garlic powder for good measure. He always enjoyed this dish, but now he seems to like it even better when I mix it in with a little infant corn cereal. 
  • Couscous and Pesto - I freeze the pesto (without pine nuts or extra salt) in little bitty containers for him. Then I make the couscous fresh (it only takes a few minutes) and mix in the pesto. The first time I offered him this dish, his eyes were bright and he was practically smiling the whole time he ate it.
  • Broccoli - I steam the tops (I find the stems more than an inch down from the florets are a bit to fibrous for him at this point) and then puree them with unsalted chicken stock and a little bit of cheddar cheese. 

Other, simpler standbys you see in this drawer of my freezer include: pureed mango (I stocked up while they were 4/$5), pureed carrots, mashed potatoes, applesauce, and pureed beef (the leftovers from a pot roast).

The good news is that it really hasn't been very time consuming to prepare his food this way. Each "batch" of food I make him takes only a few minutes of active time (it may take a while to cook on the stove or roast in the oven), and then I put them in these little plastic take out ramekins. I got mine at GFS and reuse them over and over again. I've been using the 2 oz cups, but may have to move up to the larger 3 1/4 oz cups as his appetite grows with him!

Well, I guess I'd better get a few things done before he wakes up from his nap!


Sunday, September 16, 2012

Not All Soy Flour is Alike

If you make many breads, especially breads from my site, you've probably seen a recipe that calls for soy flour. I use it in my raisin bread, potato wheat bread, and wheat sandwich loaf. Soy flour is used in bread recipes for a couple of main reasons: it improves the texture by helping the bread to hold moisture and it lengthens storage life. It also strengthens the dough, which can be important in breads with whole wheat in it so that you get a bit more volume. Additionally, it can contribute to crust browning.

The first time I bought soy flour, it happened to be Hodgson Mill's brand, and for years that was the brand that was always available and convenient. When I moved to Florida a couple of years ago, however, that brand was not as readily available, so I purchased a bag of Arrowhead Mill's soy flour. I was so confused when I opened the package and the flour looked so different! In the photo above, the Hodgson Mill's flour is on the left while the Arrowhead Mill's is on the right. Look at that difference in color. Not only did it look different, it smelled different! Worst of all, it tasted different. In delicately flavored breads, I could taste it, and I was not a fan! I couldn't understand why it was so different.

Then one day I finally found some Hodgson Mill's soy flour in a store again and brought it home. I got the other bag out and did a side by side comparison. The first thing I noticed was that there was a HUGE difference in calories and fat. Notice that even though the volumetric serving size is the same, the Hodgson Mill's flour (bag on right) has half the calories and zero fat compared to the Arrowhead Mill's soy flour? Hmmmm. I had to look farther.

Aha! There's the difference. The Hodgson Mill's is a
defatted soy flour. Once I did a little research, I came to realize that I had just gotten lucky with my initial purchase. When I started doing a little reading on using soy flour in baked goods, I found the articles usually referred to defatted soy flour.

The moral of this whole story is that you should be aware that not all soy flour is alike and one is better for baking than the other. I was not a fan of my wheat sandwich loaf using the fat-full soy flour because I could taste it in there, which was not my intent and altered the flavor in a negative way. In most bread recipes, soy flour is used more like a dough conditioner than a flavoring, so the defatted version is definitely preferred. Now you know!

Saturday, September 8, 2012

What's this? A Cookbook!?!

This is something I first started a couple of years ago. And then I got sidetracked. The nice thing about being stuck in temporary housing for so darn long is that you finally get around to things you've been putting off forever.

Why did I ever start in the first place? I mean, really, all of my recipes are online and available to all as it is. Well, I always thought that I would be okay with taking the digital revolution into the kitchen. But you know what? I've found I'm not. I hate having to read a recipe off my computer or husband's iPad while I'm trying to cook or bake. I have to clean my hands to scroll, or the screen goes to sleep while I'm doing step 2 and have to wake the darn thing back up to go on to step 3, and, worst of all, I have to be careful not to destroy the thing with all the messiness of the kitchen.

The good news is that I like my recipes! I don't post things just for the sake of posting them. If I don't think it's really good, I don't post it. As a result, I make and refer to my recipes all the time. Unfortunately, once I realized I wasn't a fan of referring to them online while I was in the kitchen, I started printing them all out. I had quite a stack of papers going. I realized that what I really needed was to have a volume that was beautiful (I love looking at the pictures) but also had all of my favorite, go to recipes in it, ready to be pulled out on a whim.

So, I decided to make it happen. I made it using Blurb. Sadly, print on demand isn't cheap. I won't be offended if you decide it's too expensive for what it is and decide you don't need it. However, if you are like me and you want it? It's out there waiting for you. I've put a fairly extensive preview online, almost half the book (all the recipes are already online, after all). In addition to the concise version of the recipes (for quick reference, if you need a reminder of all the little tips and details, the full post for each recipe is still available online). I've included my 116 favorite recipes in a variety of categories. Every recipe includes at least one full color photograph. I know I've had the link to the preview on here for a week or so, but I thought a little explanation would not be taken amiss.

Sunday, May 13, 2012

Party for Sixty

A good friend of ours recently retired from the Air Force after 24 years of active duty service. When his wife told me how much they were quoted by a local caterer to provide food for the party they were hosting in honor of the event, I liked to have choked. The price was obscene! As I've been toying with the idea of pursuing some kind of personal chef service when we move the D.C. area this summer, I thought it would be a great trial run to see if I would enjoy that type of work... and I did!

They wanted to provide heavy appetizers for up to sixty guests this past Friday evening. The picture above shows just one of the tables of goodies. Based on estimates that I found online, I prepared over 1000 pieces/servings. As I was also a guest at the party, I had the opportunity to see the reactions to my food. The feedback was great! While I developed some new menu items, which I will be posting in the near future, I also served a lot of items I have already shared with you.

I made my prosciutto and cheese calzone. I made the crust from scratch as well. I just love the salty punch the prosciutto gives to this calzone. For such a simple list of ingredients inside, the flavor is amazing!

Because no party is complete without chips and dip, I decided to serve my
black bean dip.

And because my husband would have disowned me if I hadn't included
deviled eggs on the menu, I managed to shell four dozen very tricky eggs. You know, it's bad enough when you are trying to peel a couple of eggs that won't peel easily, but with this amount, I am amazed I didn't end up with eggs being thrown all over the house! Fortunately, the ugly side goes down and they still ended up looking pretty decent.

I made a monstrous bowl of my
chicken salad. Instead of serving it on french type bread, I baked a loaf of soft sandwich bread and made little finger sandwiches.

Of course, there had to be dessert! I made my favorite
lemon biscotti, but instead of making two logs out of the dough, I made three to make cute little biscotti. I learned a good lesson in that if you cover the biscotti before the icing is 100% completely dry, the biscotti lose their snap. Fortunately, a short trip in my food dehydrator on the lowest setting cured what ailed them.

I made two pans of my
devilishly good brownies!

I couldn't resist making a batch of my delicious little gingersnaps. They're the perfect finger food. So snappy and gingery!

And, lastly (of the things I've already posted, anyway), I served up a dish of crack... aka toffee butter crunch. I think I've gotten a few more people addicted to it deliciousness. Sorry!

There were a bunch of other dishes I prepared, including sausage stuffed mushrooms, some toasted french bread slices with herbed cheese and tenderloin, a smoked salmon spread on cumber slices, chicken satay, mini twice baked potatoes, and spinach and feta triangles. I'll be sharing these recipes with you over the next week or so!

Monday, February 20, 2012

Baker's Math


I know there are a lot of folks out there with math phobia. I see them when my earth science students mutter that they thought they signed up for a science class, not a math class. What they, and a lot of other people, don't realize, is that math makes the world go round. We are fortunate that the universe appears to be structured in a very deliberate and organized way. I would argue that it is quite possible that until we are able to mathematically describe physical phenomena we see in our universe, we do not truly understand it.

Now, what does all of this have to do with baking bread? Well, to be honest, not a whole lot. I'm not worried about mathematically modeling the chemistry of bread baking, but I do believe that a few math skills in baking can be darn useful.

I won't lie to you. It took me a while to really grasp its usefulness, and many of you may find yourselves in that category forever. There's nothing wrong with that. You don't need baker's math to make great bread. But it comes in really handy when you want to start fiddling. Or scaling recipes. It really comes in handy there.

The whole idea of baker's math is that the recipe is presented as a list of percentages. Here's a sample recipe for french bread:

Flour 100
Salt 1.9
Yeast 0.55
Water 65

Two things you may notice right away: 1) the flour is 100%, 2) the total of all ingredients does not total 100%. All baker's math formulas are based on the flour totaling 100%. The other ingredients are listed as a percent of the flour's weight. How much weight is totally up to you. In this case, if you start with 4 cups of flour (weighing approximately 5 oz per cup), the required water would be 13 ounces. I obtained that number by using this first formula here. I plugged in 65 for the ingredient % (from the recipe above) and 20 ounces for the flour weight (4x5 oz). Multiply those two numbers together and divide by the 100 gives you how much water you need to add.


So, now if you want to use a baker's math recipe, you have a formula that can allow you to easily figure out how much of each ingredient you need. All you need to do is decide how much flour you want to start with and do one calculation per ingredient.

I used to pooh-pooh the use of the scale in the kitchen because it seemed laborious and unnecessary, but when it comes to making bread, the scale really is a rock star. Simply place your bowl on the scale, tare it, and start adding ingredients until you hit the requisite amount. Tare between each ingredient and there's no thinking involved!

But really, most cookbooks give the baker's weight and conventional measurements, so the above formula is only sometimes useful. So why the hubbub about baker's math?

Because I like to fiddle.

Lately, I've been fiddling with french bread. None of the recipes I tried quite gave me the results I was looking for, but many of the recipes had features I liked. But it is very hard to compare different recipes when they are written in conventional measurements. However, in baker's math, you can easily compare the recipes. Here are four french bread recipes from three different cookbooks that I converted to baker's percentages. The first thing to note is that they are quite similar. In fact, I could now probably write a set of parameters for what constitutes a french bread dough. And while there are a lot of factors that can influence the final product besides proportions of ingredients, it's an important place to start.


After making 5-6 different batches of baguettes, I took the above information and came up with a formula of my own I wanted to try. I decided on my percentages, and then I used the above formula to determine the weight of each ingredient. (I'll share that recipe in the not too distant future.)

What if you want to scale a recipe that is in conventional measurements? Then you need a different arrangement of the above formula.

With this formula, you need the weight of each ingredient, so you'll have to use a scale to get started. Once you have the weight of each, you can simply plug in the ingredient weight and flour weight to get the percent of each. Remember, in every case, the flour weight is 100%.

Again, baker's math is not required for bread baking, but it can be very useful when you want to compare recipes or scale them for a different yield. It may not be that hard to scale the measurements to increase a yield from 2 to 3 loaves, but what if you have a recipe that always makes loaves just a little smaller than you are happy with? With baker's math, you can simply and easily scale them up just a bit while still keeping all of the proportions equal! Handy dandy!

Monday, September 26, 2011

A Strange, Strange Dream

So, I had a very strange dream last night... it wasn't really a nightmare, but it was a little stressful. It actually woke me up!

This last month has been a whirlwind of travel. First I went home to Washington to visit family and friends for a week. Then my husband and I went on our first real vacation in the last five years. We went on a lovely cruise up the New England coast. For the most part, it was a great time. It was a nine day trip. Unfortunately, on day six, we both woke up and went, "Ugh." Apparently, hanging out in a confined space with 2,400 other individuals from all over the globe was more than our immune systems could handle. Fortunately, we still managed to have some fun.

Anyway, we got home Saturday afternoon. Sunday, I slept a lot, trying to kick this stupid cold's you-know-what. I didn't even go out to get any groceries, even though it was some serious Mother Hubbard's cupboard around here. Then last night, I had this strange dream.

Like most dreams, some of the details are fuzzy. As you might imagine, the "why" is a little mysterious, but in this dream, I was tasked with preparing a three dish "meal" in a limited amount of time. While I had two other dishes in the bag, for some reason, I felt compelled to make eclairs.

Perhaps it was because I partook of a substandard eclair on our trip. In Boston, we ate in the North End Italian district and stopped in a pastry shop afterwards where I purchased an eclair that was so unsatisfying, I threw most of it away. Now, anyone that knows me, knows that this is a rare event indeed. Actually, come to think of it, I also had a very substandard profiterole on the cruise ship. I think these two disturbing events may have prompted my dream... that and the fact that there was no heavy whipping cream in my refrigerator last night.

So, here I am in my dream, attempting to make eclairs when I realize that I do not have enough time to make pastry cream, let it cool, and pipe it into said pastries. Being the resourceful gal I am, I decide to go for making whipped cream filled profiteroles, but - I didn't have any whipping cream! I became so distraught in my dream that I actually woke up!

I lay awake for some time, trying to calm myself enough to fall back asleep, which I finally did. However, when I woke up this morning, the first thing I felt compelled to do was go grocery shopping! Apparently, I cannot rest (literally) until there is at least a pint of whipping cream in my fridge awaiting the call of duty.

Friday, September 16, 2011

Oiling Utensils

Like most people these days, I use a lot of wooden utensils in the kitchen. I love them for a variety of reasons, not the least of which is they are relatively cheap, don't mess up my non-stick pans, and are fairly durable. I even put them in the dishwasher with great success. I do this mainly because wood does tend to absorb stuff and I like to think that my utensils are free of any bacteria and food odors.

A key step in improving the life and utility of your wooden utensils (and cutting boards) is to periodically oil them with mineral oil. As you can see in the picture above, there is a big difference between that gnarly, feathery fork like thing and the freshly oiled spoon behind it. And after oiling my cutting boards, it never ceases to amaze me how much easier they are to clean (I hand wash them). I love to see the water bead up on the surface! Just don't forget to be sure you use a food safe mineral oil. I got mine at a kitchen supply store for less than five bucks. It's lasted me years and there is still plenty left.

I simply use a pastry brush to apply the oil and then use a clean rag to wipe off the excess. Suddenly, my wooden utensils look brand, spanking new!

Tuesday, August 9, 2011

Good to Know...

Yesterday, I posted the recipe for my favorite cake of all time. Of course it is a chocolate cake. Duh. You would think that as often as I have made this cake that I might be immune to these kinds of mistakes, but - alas - I was in a hurry... or I was preoccupied... or... well, something. Please tell me I have an excuse.

As you can clearly see on the right in the above picture, the cake came out very, very wrong. At first, I wasn't sure what had happened. Was my cocoa bad? Did I make some hideous batch of coffee? Did I forget an ingredient? I wasn't sure; I just knew that I could not serve this horrible disaster of a cake.

So, I set out to make it again. Would you believe that I got all the way through mixing the dry ingredients wrong a second time before I realized my error? This is what happens when you screw up the leavening in this cake. The recipe calls for one teaspoon of baking powder and two teaspoons of baking soda. I simply measured out two teaspoons of baking powder and called it good. You gotta love it when you misread a recipe the same way twice. Sheesh.

Now, you may be thinking: baking powder, baking soda... what's the difference? Well, there is actually a big difference. Baking powder is a balance of an acidic salt and a base. When you add moisture, it starts the two components to chemically reacting, producing carbon dioxide bubbles. Heat can also accentuate these reactions, but moisture really is the key. Baking soda on the other hand, is sodium bicarbonate, a basic substance that needs an acid in order to react. Usually, you see baking soda in recipes with buttermilk or sour cream, honey or molasses. In this cake, cocoa powder is the acidic component.

What I find especially interesting about this whole thing is that, obviously, the reaction in this cake does more than simply create lift. Look at the difference in the color! I'm going to tell you, there were some major flavor issues too. So, the next time you see a recipe that calls for a powdered leavening agent, read carefully! It may be the difference between perfection and the garbage.

Thursday, June 2, 2011

Definitely Worth the Effort: Dried Thyme

In these hectic modern days, it seems every decision is a cost-benefit analysis... is the end result worth the time it takes to do it yourself? In many cases, the answer is yes for me, especially when it comes to the kitchen. However, sometimes, life starts making some of those decisions for you. The other day I mentioned how we had to leave our little Ohio farm behind a few years ago. When I had my farm, I don't think I ever purchased store bought herbs for any reason... I grew them all myself.

Now days, I have to be a little more selective about what I plant. I currently have only 64 square feet to work with. That's less than one half a percent of the garden space I had in Ohio. This deficiency leads to some hard choices. Which crops are so much better home grown that they deserve some of that tiny little space? While I grow a number of fresh herbs in pots on my patio, I've recently realized that growing a few thyme bushes in my garden so I can have enough to dry my own is definitely worth the effort.

I came to this realization when I bought some thyme at the grocery store a few months back. Can you tell in the picture above which I bought and which I grew? Yeah, me too. Today, while I was shopping for some spices, I saw a jar of ground thyme that was brown. I may be mistaken, but I'm pretty sure thyme isn't supposed to be brown. One other benefit of home dried thyme? It actually smells like thyme. I know, you've probably started to forget that dried thyme actually has an aroma, haven't you?

Fortunately, thyme is super easy to grow. In fact, in Ohio, I started regretting planting all five thyme plants because by the third year, I had more thyme than I could eat, store, or sell. Drying thyme is also easy. I use my dehydrator because it dries it so quickly, which helps to retain that beautiful green color, but you could dry yours just as easily in an low oven or simply hanging in a warm, dry place. Once it's dried and stripped from the stems, it will last for years in an air tight container, provided you protect it from too much light exposure.

Thursday, December 16, 2010

Giveaway Winner


Congratulations to Amy! She is the winner of my KitchenAid Slicer/Shredder Attachment giveaway. There were only ten entrants, so there were pretty good odds for each of them. I intentionally did not publicize this giveaway as I have my previous ones since I wanted to give folks who actually read my blog more of a shot at winning. In the past, I found that most entrants came to the giveaway page on my blog through a link, signed up, and then immediately left. Besides, I wanted some suggestions on recipes folks want me to tackle in the future.

I received some great suggestions! Kimmy mentioned that she would appreciate some posts on making fresh pasta. That is one request I will definitely be fulfilling in the not too distant future. I also received requests for more cheeses, more homemade condiments, more chocolates, and more gift jar recipes. You betcha!

Alyssa asked if I would make Baklava. Well, I have never made it, so that in itself is challenge enough for me! Sharon asked about a Doberge cake... well, I had to look that up since I'd never heard of it. A super tall cake with lots of layers of cake and filling? Heck yeah. I'll give that a go!

Amy, the winner, asked for more slow cooker recipes. I have to admit, I received a slow cooker for a wedding gift seven years ago and have only used it a handful of times. For some reason, crock pot cooking seems to fall in the same category as casseroles, which are types of cooking I don't seem to do much of, but I'll see what I can do.

There was only one request that I can flat out say I just can't fulfill. Mmalavac asked about making homemade filo dough. While there are a bunch of sites on the Internet that purport to show how to make homemade filo dough, I just don't buy it. Part of the magic of filo dough is the amazing thinness of the sheets. I just don't think you can duplicate that process at home. However, I can show you a video of how filo dough is made by hand... you'll quickly see why I don't think it can really be made at home. I originally saw this video on How It's Made on the Discovery channel, I think, but I found a clip of it on YouTube. You've got to see it to believe it! I didn't think dough could be worked like that!


Congratulations again, Amy! I will be sending your KitchenAid attachment to you as soon as I get a mailing address from you. Thanks everyone for your great suggestions!

Thursday, August 19, 2010

So... what have I been up to?

Here's our backyard before. Before sanity was restored to an insane place. The vines! The brush! The over-zealous trees! What's a girl to do?

Sweat.

Sweat and then sweat some more. Dang, but it's been hot. Hot, hot, hot. And humid, too. Drippy, nasty humid. Sheesh!

But it's been worth it. Just doesn't quite look like the same place, does it? And now I have some space to grow a few vegetables. It's not the same as the third of an acre garden I had in Ohio, but it's better than nothing!

It's not 100% done, but it's darn close. I've been laying some stone in an area of the yard that is too shady for lawn, but I ran about ten pavers shy of finishing the job. But I'm so close, I can taste the sweet refreshing scent of air conditioning. The good news is that I have been cooking some... I just need to get around to sharing the recipes with you. Stick around! New posts are just around the corner!

Wednesday, May 12, 2010

Rancid!

I've been posting some recipes recently that require foods that can easily go rancid. Check that... maybe I need to review what the word "recently" means. It doesn't seem like I've really posted anything recently. All I have to say about that is: 22 more wake-ups and I free! I am really ready to get back into the kitchen, let me tell you.

Anyway... what I was trying to say before I so rudely interrupted myself was that there are certain foods that can go rancid on you and if you're not careful, they can sneak up on you and make things that normally taste wonderful taste... weird.

Case in point: I've been eating a fair amount of hummus lately. And up until about a month ago, I couldn't understand why the recipe I've always used and loved kept coming out so darn disappointing. I'm not really sure what prompted the moment of enlightenment, but all of a sudden one night it dawned on me that I was working from a jar of tahini (sesame seed paste, similar in consistency to peanut butter) that had been in my cupboard for something like three years.

I stuck my nose in the jar. It didn't really smell bad, but there was something different going on. You've got to watch those high fat products. I've had this problem before; because they're shelf stable, we (or maybe just I) tend to forget how long they've been in there. Unfortunately, those items high in fat can go rancid pretty easily.

The good news, I guess, is that using rancid ingredients doesn't hurt you, it just can lend an odd taste to whatever you are making. In the tahini case, my hummus just tasted slightly off. I went to the store and got a new jar, and all my troubles were solved.

But here's the thing. How do you know when something is rancid? Sometimes it's just darn obvious. When something is really rancid it has a sharp odor that you can instantly recognize even if you have no idea what is wrong. That's easy. The problem is when it's so subtle that you don't really recognize it.

Here are a couple of recommendations:
  1. When you first purchase items that are prone to going rancid (whole wheat flour, bran, whole grains, shortening, nuts, and nut butters), take a really good long sniff of them to create a memory of what they should smell like. I always have this problem with whole wheat flour in particular. I can't tell you how many times I've stuck my nose into a batch of flour and couldn't decide if it was rancid or not. When I am in doubt, I open a new package and smell it in turn with the rancid batch and then it is really obvious.
  2. Be sure to store items properly. Foods with a high fat content can go rancid when they become oxidized and/or undergo chemical alteration by microbes. To combat these issues, make sure you store the items in an air tight container and then store them in a cool, dark place. I always store my nuts in the freezer. My whole wheat flour lives in my fridge.

Well, I guess that's all I've got time for today. I've got tests to correct and lessons to plan still, but I wanted to let you know I am still kicking. I hope everyone is having a wonderful week!

Friday, January 29, 2010

Wordless Friday?


All right already, so it's not Wednesday and it's not quite wordless, but I just couldn't let another day go by without sharing this photo with you. Some time ago, I posted a recipe for cinnamon rolls. Well, I recently made another batch and they came out so dang pretty, I just had to take some more photos. This one stimulates such a Pavlovian response in me, it's all I can do not to run down the stairs this instant to bake up a batch. I'm sorry if you now feel compelled to make these rolls... it was all just a part of my master plan (insert evil cackle).

I hope you have a wonderful, tasty weekend!

Saturday, January 9, 2010

Beautiful Potatoes


I recently received a mandolin as a gift. It may be the only thing kitchen related that I did not already own. I had thought that because I have a food processor now, I was not in need of a mandolin. Boy, was I wrong! I love my food processor, but I have since realized that a mandolin can do things a food processor only dreams of doing.

So, anyhow, the other day I was slicing potatoes while running the gizmo through its paces. How many times in my life have I sliced potatoes? Hundreds? Thousands? How can it be that I have never noticed how beautiful they are on this inside?

Friday, November 27, 2009

A Belated Thanksgiving Wish

I hope that everyone had a wonderful Thanksgiving and was able to spend time with family and friends and able to enjoy great food and fellowship. We had a small gathering here, just me, my mom, and my husband. But it was an unexpected bonus, as we had been working under the assumption that the hubby was going to have to be out of town over the holiday. It is nice to have family near at the holidays, isn't it?

We decided that this year, minimalism was an okay thing. For dinner itself, we only served three dishes, just like I do for my meals throughout the year: a meat, a starch, and a vegetable. We also decided to be a bit unconventional with the meat this year. We roasted a duck. It was a great choice, because with only three people, we could reasonably feed our "crowd" with only one bird (note to self... ducks are small!). We boiled it first to render off some of the fat and then finished it in a really hot oven to brown. We also put together a nice sour cherry, red wine, and orange sauce to go over the duck. It worked out really well.

While I could give up the turkey or ham at Thanksgiving without any remorse, I just couldn't do without dressing. I put together a stuffing using bread cubes from some left over potato wheat bread I had in the freezer. I sauteed a bunch of aromatics and mushrooms, added herbs, a fair amount of butter, and some chicken broth. I like stuffing that is fluffy and moist on the inside and crunchy and golden on the outside. This stuffing fit the bill!

The last item I made was an old standby. I love peas with caramelized shallots. I should have taken a picture of them last night, as they were much prettier than what you see below (an older photo from when I didn't really know how to use my camera properly yet). I love caramelized shallots because they give a sweet, full flavor to a sometimes pedestrian vegetable.

We finished the evening off with a non-traditional dessert. My mom wanted to taste my cornmeal crust, so we made small blueberry tarts. They were so delicious. We made six so we each had one last night and now we each have another waiting for us today. I can hardly wait! So often, a crust is simply a vehicle for the filling. What I love about this cornmeal crust is it really is the star of the dish. I added a little lemon zest to it this time as well. It is sweet and delectable with a slight hint of lemon and a nice je ne sais quoi from the cornmeal.

This had been an interesting week of cooking... some of which was successful, some not. We made marshmallows, which were delicious. I attempted to make some mozzarella cheese for the first time, but I kept forgetting to come in from our yard work at the proper times and it failed. Fortunately, serendipity took over and I found the end result was a great base for a spreadable cheese. I'll have to see if I can recreate that serendipity to develop a real recipe to post. We really enjoyed the spread on crackers. Lastly, I also tried to make yogurt. It's a really simple process, so I was a little miffed when it didn't seem to come out quite as thick as it should... until I read the date on the carton of yogurt I used as a starter. I guess I don't always use plain yogurt as often as I need to! The carton "use by" date was in late September! Oops! I think I can still use the homemade yogurt for cooking, however, so all is not lost.

While I am starting to come to the sad realization that my week of relaxation is coming to a screeching conclusion (I'd better get my red pen in gear soon to finish grading papers), I will try to start posting some of the recipes I made this week that worked great. I hope food brought you and your family closer together this week, too. Happy belated Thanksgiving!