I am now blogging new recipes on my farm website.
Cooking from Scratch is on facebook! Click here to check it out!
Showing posts with label Cakes. Show all posts
Wednesday, November 5, 2014
Raspberry Chocolate Cake
I always love taking a tried and true recipe and giving it a little twist to end up with something that has a whole new feel to it. In this case, I took my favorite chocolate cake (the only chocolate cake in the world, as far as I'm concerned) and instead of making my usual decadent and rich chocolate frosting, I whipped together a batch of raspbery whipped cream. Making raspberry whipped cream is absolutely no more difficult than making regular stabilized whipped cream, but it ends up with a lovely pink hue and a delicate touch of raspberry flavor. What I love about this version is that it has a lighter feel and is fresh and beautiful looking when topped with a ring of fresh raspberries. Be sure to use stabilized whipped cream for this application so that it keeps for a few days without weeping and deflating.
Raspberry Chocolate Cake
Yield: 1 two layer 9 inch cake
1 recipe for Audrey's Chocolate Cake, baked in two 9-inch round pans
Double recipe of Stabilized Whipped Cream
1 pint fresh raspberries, mashed with a fork
8-10 large, fresh raspberries for decorating
Let the cake cool completely before assembling. When ready to put the cake together, make the double batch of stabilized whipped cream. Once it reaches stiff peaks, gently stir in the mashed raspberries. Place one cake round on a plate and spoon half of the whipped cream on it. Spread the whipped cream evenly to the edges. Gently place the second cake on top and spoon the remaining whipped cream on top of it. Spread to the edges. Place fresh raspberries, upside down, at even intervals around the edge of the cake. Keep refrigerated until ready to serve. Will keep, refrigerated, for two to three days.
Wednesday, October 3, 2012
Angel Food Cake
Angel food cake is one of those classic desserts that seems often to be forgotten these days. I do sometimes see it in the grocery store bakery, but I can't remember the last time anyone served it to me at a get together. I find this kind of odd considering just how delicious angel food cake is! Besides that fluffy texture and tasty flavor (in this case, just plain vanilla, but you can flavor it any way you like), this cake is great because it is almost fat free! No added oil or butter means that this cake is a bit more figure friendly than your average cake. I think some people shy away from it because it involves whipping so many egg whites and maybe that makes them nervous, but with a stand or hand mixer, it couldn't be quicker or easier.
The first step is to sift the flour and powdered sugar together and set it aside. That way it's all ready to go when you're done whipping the egg whites.
The next step is to whip the whites. This recipe takes between 10 and 12 egg whites, depending on the size of your eggs. The big question, of course, is what to do with all of those yolks...there are a few options. You can make a nice French vanilla ice cream, or a batch of pastry cream to fill some yummy cream puffs or eclairs, or - more simply - you could make some delicious pasta carbonara for dinner.
Mix together the egg whites (preferably at or close to room temperature), cream of tartar, and vanilla. Mix on medium speed until you get to the soft peak stage; this the point at which the whites are starting to be able to hold their shape, but the tip on a mound of whites will flop over.
Increase the speed now to medium-high or high. Gradually add the granulated sugar while the mixer is running.
Continue to beat the whites until they form stiff peaks. At this point, the mixture will hold its shape well, and a pointed peak of the whites will stay completely upright.
Gently fold in the flour and powdered sugar mixture to the egg whites and, once completely mixed, place in an ungreased 10 inch tube pan. This part is very important because if you put it in a greased (or even greasy) pan, the whites will not be able to hold themselves to the side of the pan and you could very well end up with a very flat cake! Smooth the top out as best you can and place into a preheated 350 degree F oven.
Bake 40-45 minutes or until the top of the cake is golden and beautiful. Remove the cake from the oven and place the hot pan upside down on a cooling rack to cool. Again, this is an important step as it helps to ensure that the cake retains its full height and fluffiness. Let the cake cool completely in the pan. Once completely cool, flip the pan right side up and use a knife to loosen the edges of the cake away from the sides of the pan. Gently remove the cake.
Slicing an angel food cake is best done with a serrated blade. The great thing about this cake is that it is delicious right out of the pan or a day or two later. If not serving immediately, store tightly wrapped in an air tight container. Serve alone or with any topping you please. Some of my favorites are a chocolate sauce (as shown above) or a fruit sauce such as strawberry or blueberry.
Lastly, the other great thing about this cake is how easy it is to freeze and serve at a later date. When I had laying hens that got ahead of me, I would often make this cake to use some of the eggs and then freeze the cake for later use. I cut the cake and individually wrap each slice in plastic wrap before placing them in a bag to keep them together in the freezer. Provided they are tightly wrapped, they should last 4-6 months in the freezer without any adverse affects.
Angel Food Cake
Yield: 8-10 servings
Adapted from the New Better Homes and Gardens Cookbook
1 1/2 cup powdered sugar
1 cup flour
1 1/2 cups egg whites, at or near room temperature (about 10-12 whites)
1 1/2 tsp cream of tartar
1 tsp vanilla
1 cup granulated sugar
Preheat the oven to 350 degrees F. Sift together the powdered sugar and flour and set aside. Using a stand or hand mixer, whip together the egg whites, cream of tartar, and vanilla on medium speed until the whites reach the soft peak stage. Slowly add the granulated sugar with the mixer running, then increase the speed to medium-high/high. Continue whipping until the whites reach the stiff peak stage. Fold in the flour and powdered sugar mixer. Pour batter into an ungreased 10 inch tube pan. Smooth out the top and place in the preheated oven. Bake for 40-45 minutes, or until the top is nicely golden. Remove the cake from the oven and place upside down on a cooling rack to cool completely. Once cool, use a knife to cut around the edges of the pan to loosen it before removing. Use a serrated knife to slice cake into slices. Serve immediately or store in an air tight container up to 2 days before serving. This cake can also be frozen for up to 4-6 months if tightly wrapped.
The first step is to sift the flour and powdered sugar together and set it aside. That way it's all ready to go when you're done whipping the egg whites.
The next step is to whip the whites. This recipe takes between 10 and 12 egg whites, depending on the size of your eggs. The big question, of course, is what to do with all of those yolks...there are a few options. You can make a nice French vanilla ice cream, or a batch of pastry cream to fill some yummy cream puffs or eclairs, or - more simply - you could make some delicious pasta carbonara for dinner.
Mix together the egg whites (preferably at or close to room temperature), cream of tartar, and vanilla. Mix on medium speed until you get to the soft peak stage; this the point at which the whites are starting to be able to hold their shape, but the tip on a mound of whites will flop over.
Increase the speed now to medium-high or high. Gradually add the granulated sugar while the mixer is running.
Continue to beat the whites until they form stiff peaks. At this point, the mixture will hold its shape well, and a pointed peak of the whites will stay completely upright.
Gently fold in the flour and powdered sugar mixture to the egg whites and, once completely mixed, place in an ungreased 10 inch tube pan. This part is very important because if you put it in a greased (or even greasy) pan, the whites will not be able to hold themselves to the side of the pan and you could very well end up with a very flat cake! Smooth the top out as best you can and place into a preheated 350 degree F oven.
Bake 40-45 minutes or until the top of the cake is golden and beautiful. Remove the cake from the oven and place the hot pan upside down on a cooling rack to cool. Again, this is an important step as it helps to ensure that the cake retains its full height and fluffiness. Let the cake cool completely in the pan. Once completely cool, flip the pan right side up and use a knife to loosen the edges of the cake away from the sides of the pan. Gently remove the cake.
Slicing an angel food cake is best done with a serrated blade. The great thing about this cake is that it is delicious right out of the pan or a day or two later. If not serving immediately, store tightly wrapped in an air tight container. Serve alone or with any topping you please. Some of my favorites are a chocolate sauce (as shown above) or a fruit sauce such as strawberry or blueberry.
Lastly, the other great thing about this cake is how easy it is to freeze and serve at a later date. When I had laying hens that got ahead of me, I would often make this cake to use some of the eggs and then freeze the cake for later use. I cut the cake and individually wrap each slice in plastic wrap before placing them in a bag to keep them together in the freezer. Provided they are tightly wrapped, they should last 4-6 months in the freezer without any adverse affects.
Angel Food Cake
Yield: 8-10 servings
Adapted from the New Better Homes and Gardens Cookbook
1 1/2 cup powdered sugar
1 cup flour
1 1/2 cups egg whites, at or near room temperature (about 10-12 whites)
1 1/2 tsp cream of tartar
1 tsp vanilla
1 cup granulated sugar
Preheat the oven to 350 degrees F. Sift together the powdered sugar and flour and set aside. Using a stand or hand mixer, whip together the egg whites, cream of tartar, and vanilla on medium speed until the whites reach the soft peak stage. Slowly add the granulated sugar with the mixer running, then increase the speed to medium-high/high. Continue whipping until the whites reach the stiff peak stage. Fold in the flour and powdered sugar mixer. Pour batter into an ungreased 10 inch tube pan. Smooth out the top and place in the preheated oven. Bake for 40-45 minutes, or until the top is nicely golden. Remove the cake from the oven and place upside down on a cooling rack to cool completely. Once cool, use a knife to cut around the edges of the pan to loosen it before removing. Use a serrated knife to slice cake into slices. Serve immediately or store in an air tight container up to 2 days before serving. This cake can also be frozen for up to 4-6 months if tightly wrapped.
Monday, June 4, 2012
Lemon Poppy Seed Pound Cake
This has been quite a week. After driving two days with my horse from Florida to Virginia, and dropping her off to live with a good friend, I've been looking at potential rental homes in the Washington DC area. We're moving there later this summer and are trying to get our ducks in a row. Although there's been very little cooking, there has been a lot of good eating! It has inspired me and I am excited to get back home and start cooking and baking again.
This is a recipe I have made quite a bit. I often make it to give to friends as a thank you gift. It is beautiful and it has a wonderful soft, spongy texture with a fantastic lemon kick. I think I could eat this cake day in and day out and never get sick of it.
Making this cake is a little more involved than for most pound cakes, but it is very worth it... and it's not hard, it just entails a few extra steps.
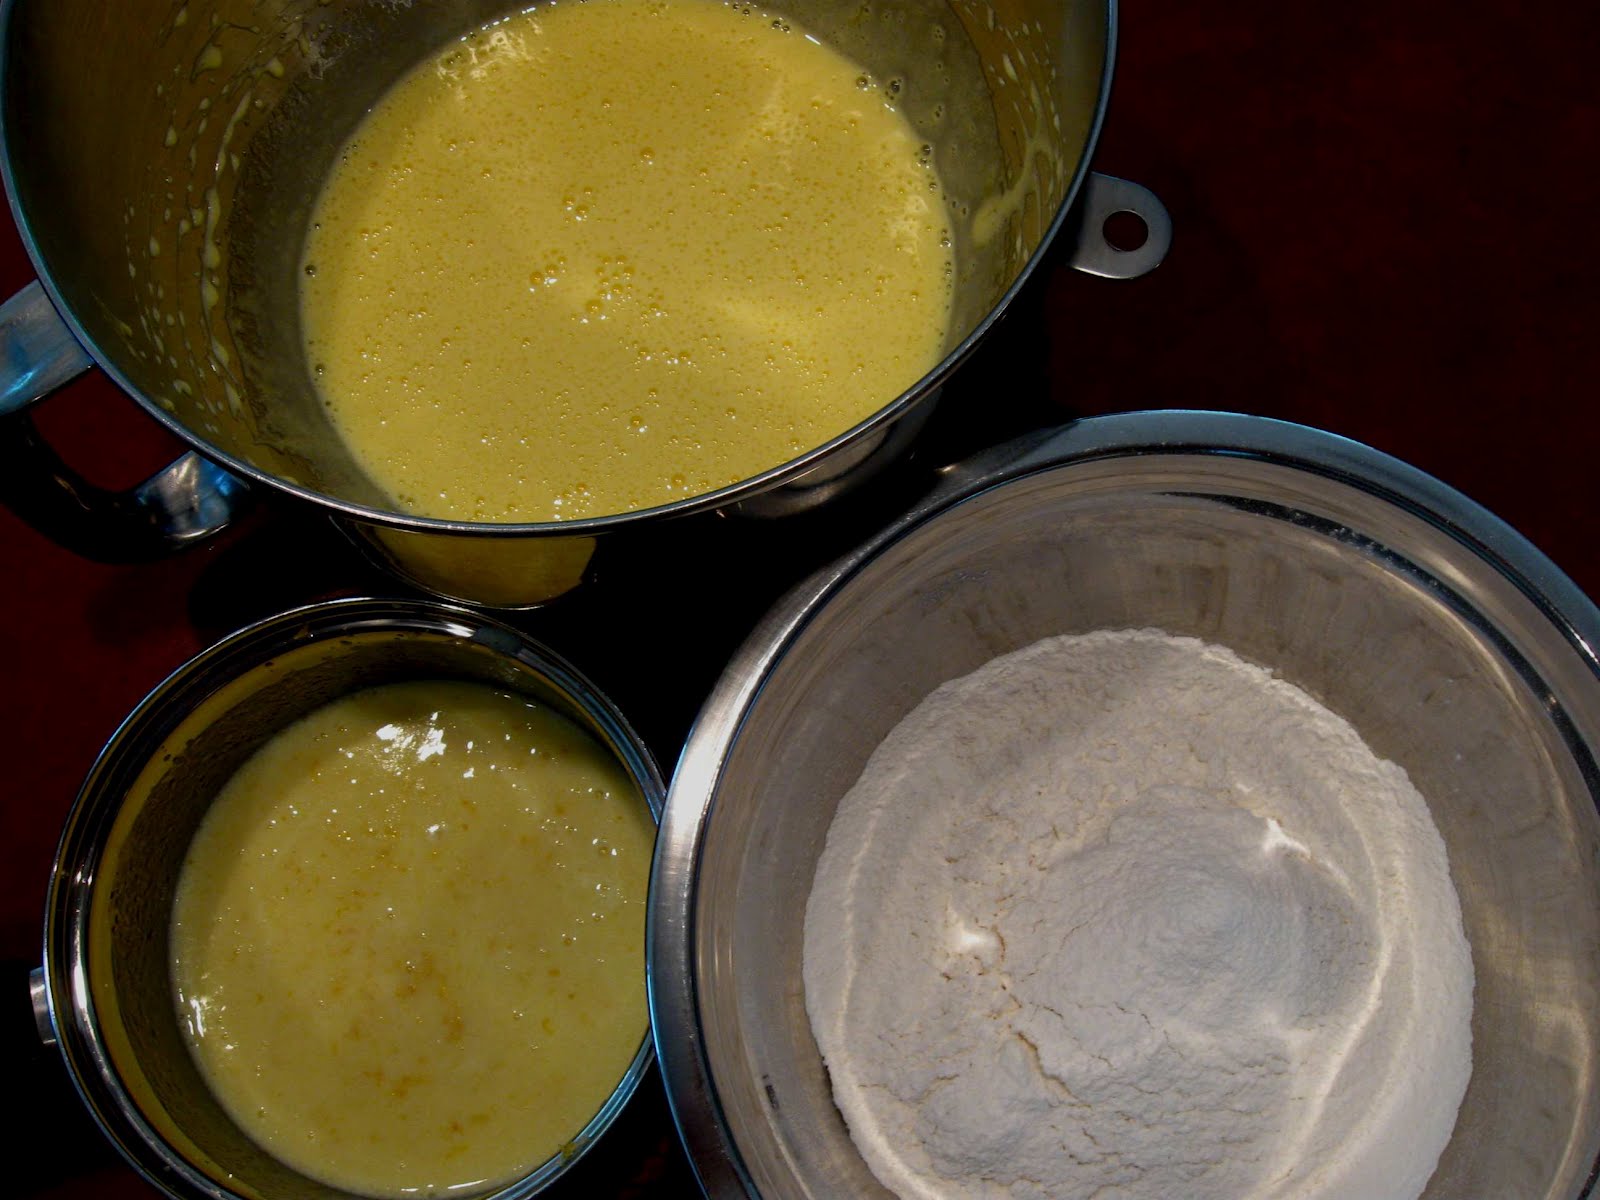
The first step is to sift together the flour, baking powder, and salt. Then beat the eggs and sugar together in a mixer until the sugar is dissolved and the mixture is thick and light yellow, about 3-5 minutes.
Meanwhile, gently melt the butter and then add the cream, lemon juice, lemon zest, and poppy seeds. Make sure it is not too hot before moving on to the next step.
So, this recipe involves three separate mixtures that are then brought together: the egg/sugar mixture, the butter/lemon mixture, and then the flour/leavening mixture.
Fold the flour mixture into the eggs and sugar. Then spoon one quarter of this batter into the butter mixture to lighten it, and then fold in the remaining batter until just mixed.
Pour the mixture into a prepared pan. To ensure I have a clean release, I grease the pan and then line with a small piece of parchment. There is nothing more frustrating than to go to all the trouble to make a nice cake and then have a big chunk of it remain in the pan. This recipe will make one 9x5 cake or one 8x4 and one mini loaf. I often like to go the later route because then I can partake of the bounty without having to eat some of the main cake.
Bake the cake in a preheated 325° F oven for 60-70 minutes, or until the top of the cake is golden and a tester comes out clean. Let the cake cool on a rack in the pan for 20-30 minutes before removing to finish cooling. Once the cake is completely cooled, mix the icing and pour over the top of the cake. I keep the cake on the cooling rack, but place the rack over a pan to catch the excess icing. Let the cake sit out to let the icing dry completely before serving or storing in an air tight container. While the cake will keep for a week, it is best within the first two days.
Yield: one 9x5 cake or one 8x4 and one mini loaf
Adapted from Joanne Chang's Flour Cookbook
2 cups cake flour
3/4 tsp baking powder
1/4 tsp table salt
4 large eggs
1 1/4 cups granulated sugar
1/2 cup + 3 TBS butter
1/4 cup heavy cream
3 TBS lemon zest
1 TBS fresh lemon juice
1 TBS poppy seeds
For the icing:
1/2 cup powdered sugar
2 TBS lemon juice
1-2 TBS low-fat milk
Preheat the oven to 325° F and prepare the pan by greasing it and lining with a piece of parchment. Sift together the flour, baking powder, and salt and set aside.
In a mixer, beat together the eggs and sugar together until thick and pale yellow, about 3-5 minutes. Meanwhile, in a small pan, gently melt the butter and then, off the heat, add the cream, zest, lemon juice, and poppy seeds. Let the mixture cool, if necessary, until lukewarm before proceeding.
Fold the flour mixture into the egg/sugar mixture. Spoon about a quarter of the batter into the butter mixture to lighten it, then fold in the remaining batter, just until mixed. Pour into the prepared pan and bake at 325° F for 60-70 minutes, until the top is golden and a tester comes out clean. Let the cake cool in the pan on a rack for 20-30 minutes. Remove the cake from the pan and set back on the rack to finish cooling. When the cake is completely cool, mix the icing and pour over the top of the cake. Let the cake sit out until the icing has completely dried. Store in an air tight container. Cake is best if served within two days.
Saturday, February 4, 2012
Vanilla Cake
I am usually all about a chocolate cake. As I've mentioned previously, growing up, there was only one cake for us. I talked about it here. But, you know, sometimes, chocolate isn't what you're looking for (Really!). And sometimes, maybe, you want a change of pace or to offer a variety. I have a friend who is getting ready for her son's birthday. She made cupcakes out of my chocolate cake batter and loved them. Then she asked me if I had any good vanilla cake recipes. I did not, so I told her I would need to get back to her.
Six batches of cake and four pounds later, I think I have a recipe I feel good about sharing! It has a very nice crumb, and a sweet, subtle vanilla flavor. It makes great cupcakes or a layer cake. The other great thing about this cake is how easy it is to make. You just throw all the ingredients into a bowl and beat them together! The cupcakes above and below are this recipe with a nice butter cream frosting. I made a layer cake but took it to a function and felt a little too weird about trying to take a picture of a slice after it was cut.
There are two things to be careful of in making this recipe. The first is to be sure to use cake flour. Because this cake is beaten after the flour is mixed, you can't use all purpose flour. All purpose flour has way too much gluten in it; if you beat it the way you beat this recipe, you'll end up with chewy goo. That's no good! So stick with the cake flour. Secondly, don't over-bake the cake. Start testing with a cake tester a few minutes early and take it out of the oven the second that tester comes out clean. I've found if it is over-baked, it can come out a little on the dry side. It's still tasty, just not as luscious as it should be.
Vanilla Cake
Yield: 2 dozen cupcakes or 2 9" layers
Adapted from The Good Housekeeping Cookbook
2 1/4 cup cake flour
1 1/2 cup sugar
3/4 cup room temperature butter
3/4 cup milk
3 eggs
2 1/2 tsp baking powder
3/4 tsp table salt
1 tsp vanilla extract
Preheat the oven to 375 F. Line either 24 standard sized muffin cups with papers or oil and cut a parchment round to fit the bottom of two 9" round cake pans. Measure all ingredients together into a large bowl. Beat with an electric or stand mixer for 3-5 minutes, until the batter is smooth and thick. If making cupcakes, a size 16 disher is the perfect portion size. Otherwise, spoon batter in until the cups are about 2/3 full. If making cakes, divide the batter evenly between the two pans. Bake cupcakes for 20-25 minutes, until puffed and just slightly golden and a tester comes out clean. Bake cakes 25-30 minutes, also until puffed, slightly golden, and a tester comes out clean. Let cool in the pans for about 10 minutes and then remove from pans to cool completely before frosting.
Monday, August 8, 2011
Audrey's Chocolate Cake
This cake... let me tell you something about this cake. You have never tasted chocolate cake until you have tasted this chocolate cake. In my family, there is no other cake. Ever. Every birthday, every Valentine's day, every special event that called for a cake while I was growing up, was celebrated with this cake. It's that good. It is so chocolaty and moist, there is absolutely no compare.Imagine my surprise the other day when my mom informed me that she was surprised this cake wasn't already on here. What do you mean it isn't on there? I asked. Of course it is. But it wasn't. I guess this recipe is so ingrained in my life, it never occurred to me that I had never actually posted it.
Well, let me correct that error right this second.
As you might imagine, my family's had this recipe for a long time (I'm no spring chicken, you know). My family is from Pennsylvania Dutch country, near Hershey, which makes sense since I'm pretty sure this recipe is an adaptation of Hershey's chocolate cake recipe. Audrey is my aunt and I guess my mom got the recipe from her since it's her name that's been attached to this recipe for as far back as I can remember; I have no idea where she got the recipe. I suppose it's fairly irrelevant at this point. All I know is that this is the best chocolate cake ever. Oh wait, I said that already.
The first step is to sift together the dry ingredients. I'm not normally a stickler for this kind of thing, but cocoa powder can be lumpy.
Then mix together the wet ingredients. Brew a cup of black coffee and have it on stand by. Add the milk and egg mixture to the flour and cocoa mixture first and then add the coffee last.
This batter will be exceptionally thin. I guess that's what makes for such a moist cake.
Pour the batter into two greased and parchment lined (cut to fit the bottom of the pan to help the cake come out cleanly) 9" cake rounds. If you prefer not to make a layer cake, simply pour into a 9" x 9" square pan with 3 " sides. Bake at 350 degrees for around 35-40 minutes for 9" rounds, closer to 50 minutes for the 9x9x3 cake. Bake until a tester in the center comes out clean. Let cool completely before removing from the pan.I like this best as a layer cake with frosting, but it is plenty good all by its little lonesome (that's how my mom usually serves it). Be sure to have a glass of milk or a cup of coffee on hand for this one; you're gonna need it!

Audrey's Chocolate Cake
Yield: one 2-layer 9" round cake or one 9"x9"x3" square cake
Sift together:
2 cups flour
2 cups sugar
3/4 cup Hershey's cocoa powder (do not use Dutch processed cocoa)
1 tsp baking powder
2 tsp baking soda
1/2 tsp salt
Mix together:
1 cup milk
1/2 cup vegetable oil
2 eggs
1 tsp vanilla extract
1 cup black coffee
Preheat the oven to 350° F. Sift together the first batch of ingredients. Mix together the second batch of ingredients in a separate, smaller bowl. Add the wet to the dry and mix thoroughly. Lastly, add the coffee. The batter will be very thin.
Pour the batter into two prepared 9" cake rounds. Grease and place a cut-to-fit piece of parchment in the bottom of the pans. Or, you can bake the cake in one 9"x9"x3" pan. Bake 35-40 minutes for 9" rounds or 45-50 minutes for a 9"x9"x3" cake, or until a tester placed in the center comes out clean. Cool completely before removing from pan and frosting.
Chocolate Frosting
Yield: enough to frost one 9" 2-layer cake
3/4 cup Hershey's cocoa powder
3 cups powdered sugar
1/2 tsp vanilla extract
1 stick (1/2 cup) butter, softened
8 TBS milk
Sift together the cocoa powder and sugar. Stir in the butter carefully, lest you end up with a cocoa/sugar cloud. Add milk. When evenly moist, whip with a mixer until smooth.
Sunday, June 27, 2010
Blueberry Lemon Cornmeal Cake
Happy Sunday! We've been busy around here, what with my in-laws in town and a lot of social engagements as part of a major job shift/promotion occurring later in the week for my husband. We've also been involved in a lot of very sweaty yard work with landscaping and building my new raised beds for my soon-to-be vegetable garden. But in spite of all this, I still couldn't let blueberry season pass me by without trying this recipe.Last year, I posted a recipe for a lemon cornmeal crust that just made me swoon, so when I saw a recipe for a cake that purported to have similar flavors - and blueberries to boot, I was hooked. That crust I made last year was fabulous with strawberries, but it was really fantastic with blueberries!
You just can't go wrong with the flavoring power of fresh lemon zest, and this cake tastes great because of it.
It doesn't take a lot of cornmeal to give a baked item a very interesting flavor and texture. In this cake, it amounts to only 1/4 of a cup of cornmeal.
If you want to ensure that you can remove your cake from the pan so that you can serve it on a nice plate, be sure to spray the pan with oil and place a round of parchment in the bottom. If you're not using a non-stick pan, you may want to also flour the pan.
Once the cake is mixed, you'll want to toss together the topping. The flour and sugar mix with the blueberries to make a nice crust on the top of the cake. If you end up with any extra flour and sugar in the bottom of the bowl after you've sprinkled the blueberries on the cake, you can discard the remaining flour and sugar.
Pour the cake into the pan and even it out. There are two ways you can do this. If you really want the cake to rise to its fullest and have a more even top, then you'll want to bake the cake for fifteen minutes before adding the topping. I just couldn't be bothered with that and the cake turned out fine. It was a little bit concave (you can check out the photo below), but I think it was still gorgeous and it still tasted great - so it's your call.
Bake the cake for a total of 40-45 minutes, until a tester inserted in the middle of the cake comes out clean. Let cool completely in the pan. Once cool, you can loosed the edges with a knife, if need be. Invert onto a plate and then invert again onto the serving plate. Once it's cool, you can sprinkle with powdered sugar for an extra pretty touch. Word to the wise, though, only dust it right before you serve it; the cake is moist enough it will absorb the powdered sugar in fairly short order.
Blueberry Lemon Cornmeal CakeYield: one 9"-cake
1 1/3 cup all purpose flour
1/4 cup cornmeal
1 tsp baking powder
1/4 tsp baking soda
1/4 tsp table salt
6 TBS butter, softened
1 cup granulated sugar
1 tsp lemon zest
2 eggs
1 TBS fresh lemon juice
1/2 cup buttermilk
1 cup fresh blueberries, rinsed and dried
1 TBS granulated sugar
1 TBS all-purpose flour
Preheat the oven to 350 degrees F. Prepare a 9-inch cake pan with cooking spray and then line the bottom with a round of parchment paper.
Mix the first five ingredients (though the salt) together in a small bowl. In a mixing bowl beat together the butter and sugar until light and fluffy. Add the zest and then the eggs. Beating again until the eggs are well incorporated and the mixture is thick. Add the lemon juice and buttermilk. At this point, the mixture will look curdled. Add the dry ingredients to the wet and stir until just mixed.
Pour the batter into the prepared pan and even the top out with a rubber spatula. Either put into the oven at this point for fifteen minutes while making the topping, or proceed directly to the next step. Putting it in the oven for fifteen minutes first will allow the cake to have time to rise unfettered by the weight of the topping, but the cake turns out just fine, albeit a bit concave, if you top it right away.
Mix the berries, remaining flour and sugar in a small bowl and slightly mush the berries. You do not want to mush everything too much, just enough to get some juices flowing. Sprinkle the topping on top of the cake and bake. If you have a little flour and sugar left over, simply discard it. If you pre-baked 15 minutes, give it another 25 minutes or so, if you are baking it all at once, start checking it after 40 minutes. Remove from the oven when a tester inserted in the middle of the cake comes out clean.
Cool completely on a rack. Once cool, loosen the edges and then invert onto a plate. Then invert again onto your serving plate so that it ends up right-side up. Sprinkle with powdered sugar right before serving. This cake is best when served within two hours, but it is still very good after a few days.
Friday, July 24, 2009
Peach Cake

Goodness gracious, what a week! Between an 800 mile drive on Tuesday and two tow truck calls, I've not had much time left over to drool over some good recipes. Fortunately, that has all changed now. My truck is fixed and the peaches are ripe. I bought a bag of them at a farmers' market in the middle of Alabama before I broke down.
I spent some time pondering how I wanted to use those peaches. After much debating, I decided on a cake. This dessert involves a simple cake with peach slices dropped on top. Lastly, it involves sanding sugar sprinkled over the top which bakes into a lovely browned, sweet crust. Look at that!
Here's what it looks like before you bake it. You could place the peaches in a design if you want, but I kind of like the random placement.
Peach Cake
Yield: One 9" cake
1 1/2 cup flour
1 cup sugar
1 1/2 tsp baking powder
dash salt
3/4 cups whole milk
1 tsp vanilla
1 egg
1/3 cup plain yogurt (or sour cream)
1/3 cup vegetable oil
1/2 tsp lemon zest
2 peaches peeled and sliced
2 TBS sanding sugar (or granulated if it's all you've got)
Preheat the oven to 350 degrees F. Mix the flour, sugar, baking powder, and salt together in a bowl. In a separate bowl, mix the milk, vanilla, egg, yogurt, oil, and lemon zest together. Add the wet ingredients to the dry and stir completely. Spray a 9" round pan with oil. Pour the batter into the pan. Place the sliced peaches on the top of the batter. You don't need to press them in; the batter will rise up around them. Sprinkle with sanding sugar. Bake at 350 for 60 minutes or until the cake is nice and golden and a tester comes out clean. Let cool slightly before serving.
Saturday, June 27, 2009
Carrot Cake
I don't make cakes very often. Not because I don't enjoy making them - I do - but because I enjoy eating them so much. A whole cake has an awful lot of calories, so unless I have some guests lined up to help put them away, it is just too dangerous to have the darn things around. Sometimes though, I just can't help it. When this happens, I will individually wrap most of the slices and put them in the freezer... deep in the freezer with hopes that I'll forget they're in there.This week, it was carrot cake that did me in. The carrots that I used were so bright orange. I wish that I had taken pictures, but sometimes I still get in the kitchen and forget to take my camera along for the ride. The strange thing was that once the cake was done and I started snacking on the trimmings, I wasn't sure I liked it. It was really carroty... and not necessarily in a good way. But, I figured I'd gotten that far, and it wasn't that much more work to make some frosting to see how the cake tasted with cream cheese goodness all over it. Boy am I glad I did. Something magical happens to these cakes when you apply the frosting. It's a match made in heaven!
Carrot Cake
adapted from the Better Homes & Gardens New Cook Book, 1989
2 cups flour
2 cups sugar
1 tsp baking powder
1 tsp baking soda
1 tsp ground cinnamon
1/4 tsp cloves
1/8 tsp nutmeg
3 cups finely shredded carrot
1 cup cooking oil
4 eggs
Preheat the oven to 350 degrees F. Using a food processor or a box grater, shred the carrots. In a large bowl or stand mixer bowl mix the flour, sugar, baking powder, baking soda, and spices. Mix thoroughly. Add the carrot, oil, and eggs. Mix until combined but be careful not to over mix.
Prepare pans with cooking spray and parchment liners in the bottom. Pour into two 9 inch round cake pans (or other similar volume pans - I used 8 mini round pans). Bake at 350 degrees F for 25 to 40 minutes, depending on the pan size. For 9 inch round pans, start checking after 30 minutes. Bake until a cake tester comes out clean.
Remove from oven and cool for about 10 minutes before removing from pans. I also like to cut the tops of the cakes flat with a long serrated knife before removing them from the pans. Cool completely on wire racks.
Once the cakes are completely cool, they can be frosted with cream cheese frosting. These cakes keep best in a refrigerator.
Cream Cheese Frosting
Yield: enough to frost one-two layer 9 inch round cake
1 8-oz package of cream cheese, softened
1/2 cup softened butter
2 tsp vanilla
4 cups powdered sugar
Whip the cream cheese and butter together. Mix in the vanilla. Slowly add the powdered sugar one cup at a time. Whip on medium speed and add sugar until the frosting has a nice, spreadable consistency. You may need to use a little more less sugar to achieve the right consistency.
Subscribe to:
Posts (Atom)