I am now blogging new recipes on my farm website.

Cooking from Scratch is on facebook! Click here to check it out!

Showing posts with label Perfected!. Show all posts

Monday, February 1, 2016

Brownies - Perfected!


Quite some time ago, I posted a brownie recipe on here that I was pretty fond of. Fond enough that I called them "Devilishly Good." They are. But as time went on, I stopped using the coffee granules; I guess I just wanted that pure chocolate taste. And they are just a tad on the cakey side, and I found that I really was a fudgy brownie girl at heart. And even though I had already reduced the fat in them significantly from the brownies I used as my beginning recipe (Barefoot Contessa's), they still seemed a bit greasy. Lastly, they just never quite seemed dark enough, but just adding more chocolate didn't help them. 

I pondered and pondered this darkness conundrum over the last few years. Then one day, out of the blue, I remembered an interesting accident I had once when making my favorite chocolate cake. I had messed up the leavening, substituting baking powder for baking soda and came out with drastically different results. And I do mean drastic... baking powder cake on right, baking soda cake on left. Interestingly, not only was there a difference in color, but the chocolatey-ness was completely different. It got me to wondering if there was some kind of a special chemical reaction that happens between the acidic cocoa powder and the basic soda that just wasn't happening when using baking powder.
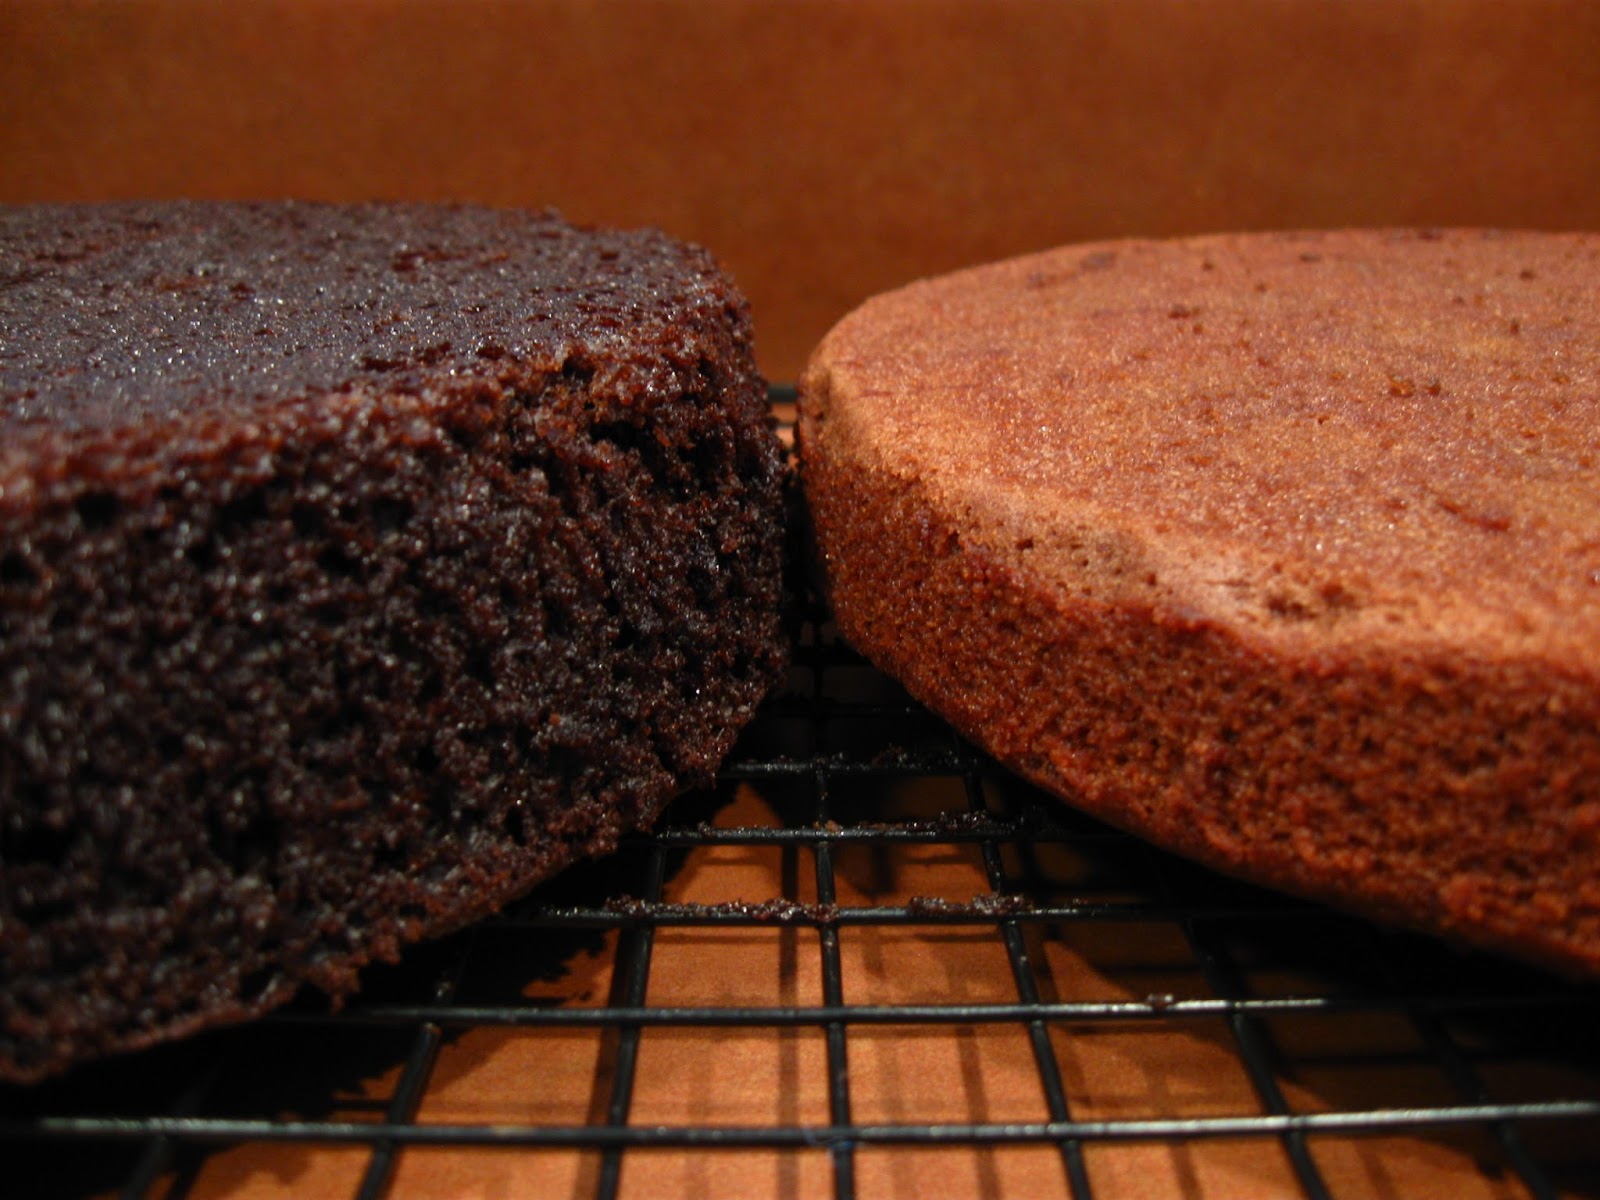

And so there is! Check out these two batches of brownies. On the right is my original "Devilishly Good Brownies" and on the left is my "Brownies - Perfected!" recipe. The recipes really aren't that different, but look at the change in the end result! My new brownie recipe is fudgy and so, so, so chocolatey, they are divine. Hard to imagine that simply changing the type of leavening could make such a big difference in the color and flavor. Adjusting the fat and egg level did the rest. If you prefer cakey brownies, stick with my old recipe, but change to using baking soda. If you want the perfect fudgy brownie, this is the last recipe you will ever need.


The hardest part about this recipe is melting the chocolate and butter together in the microwave... just kidding - it isn't hard at all!


This recipe is a cinch to mix together and the end results are really, truly special.


Brownies - Perfected!
Yield: one 9x13 pan of brownies

1 1/2 stick salted butter
1 1/2 cup semi-sweet chocolate chips
1/2 cup cocoa powder
1 cup sugar
3 large eggs
1 1/2 tsp vanilla
1/2 cup flour
1 1/4 tsp baking soda

In a medium microwave safe bowl, melt together the butter and chocolate chips. Check regularly and stir until smooth. Add the cocoa powder and sugar and mix together. Add the eggs and vanilla and stir again. In a small bowl, mix together the flour and baking soda. Add to the batter and stir just to mix. Dump into a greased 9x13 pan. Smooth out with a spatula and bake in a 325 degree F oven for about 20 minutes. Be sure not to over bake or they won't be fudgy. Brownies are ready when the middle does not jiggle much when the pan is gently shaken on oven rack and a tester will come out clean. Let cool before cutting.


Friday, January 8, 2016

Meatloaf - Perfected!


I've been making meatloaf for years. Decades, really. It's gone through a number of iterations as the years dragged on, some better than others. I posted about my bacon wrapped meatloaves early on in the life of this blog. They are good, but the whole bacon thing fell by the wayside as I came to realize that the true glory of meatloaf is how easy it is to make at the last minute. The bacon wrapping puts a kink in that "easy." So, I stopped wrapping, but I still wasn't quite satisfied. Then, one night, I was really in a hurry to get the meatloaf made and decided to not even bother with dicing an onion; I'd use dried minced onion instead. What a revelation! I'm not entirely sure why it makes such a difference, but it does. To be honest, my meatloaf often gave me heartburn when I made it with fresh onion and garlic. Now, it never does. I absolutely adore my new recipe. It is so simple, so easy to make, and so delicious. It's tender, moist, and meaty.

Now, before I give you the recipe, let's talk just a moment about the top of a meatloaf. The classic is ketchup, but I've never been a big fan. It's not thick enough and it's too sweet. I really like using just plain tomato paste, but my husband has kind of given me the turned up nose at it. I recently decided to try mixing tomato paste and ketchup 50-50 and have decided it is the clear winner. You can go with whichever of those three sounds best to you, but my vote now goes solidly in the 50-50 camp.

Meatloaf - Perfected!
Yield: serves 4

1 lb lean ground beef (~93% lean)
1 egg
1/4 tsp salt
1/4 tsp pepper
1 tsp oregano
1/4 tsp garlic powder
2 TBS dried, minced onions
1/2 cup dry bread crumbs
1/4 cup milk
1/4 cup ketchup

Topping:
1/3 cup tomato paste or ketchup, or a 50-50 mix of the two

Preheat oven to 375 degrees F. Line a sheet pan with foil. In a large bowl mix all ingredients thoroughly. Dump onto the sheet pan and form into a flat, rounded loaf. Shoot for a loaf thinner than two inches, or it will take a really long time to bake. The recipe as written will make a loaf about 5"x10"x2". Recipe can be doubled easily, simply increase the cooking time to roughly one hour. If you want to make more than a double recipe, make more than one loaf to keep the cooking time reasonable. Spread the topping over the entire surface of the loaf. Sprinkle with a little oregano or parsley, if desired. Bake for 45 minutes or until cooked through. Let cool slightly before serving so that it does not fall apart when sliced.

NOTE: If you eat a lot of processed foods or tend to eat a lot of foods high in sodium, you will probably not be satisfied with the seasoning level as written. Increase the amount of salt you add, but don't go too crazy because there is a lot of sodium hiding in both the bread crumbs and the ketchup. Try 1/2 to 3/4 of a tsp the first time you make it and adjust from there.

Thursday, November 20, 2014

Bran Muffins - Perfected!


I know I updated my original bran muffin recipe not that long ago... and I love that recipe. I really do. I love that there is no refined sugar in it. I love the rich flavor from using only date sugar to sweeten them. But you know what? Date sugar is expensive!!! That recipe calls for more than a cup of the stuff, and as I started making these muffins more and more (they're really tasty!), I found I was spending a fortune on date sugar.

So, I went back and decided to see if I could modify them a bit to maintain the flavor that I loved in this new version without breaking the bank. I think I did it, well - geeze - I know I did, because I make this new recipe all the time. These muffins are my new go-to breakfast. The half a cup of date sugar the recipe now calls for is enough to make them really yummy without making me go through ridiculous amounts of the stuff.

Incidentally, since I have moved away from the "big city," I've had to start buying my date sugar online. I've been really pleased with the NOW Real Food brand date sugar. It's very dry and powdery (which can lead to a crazy cloud of it in my kitchen), but I no longer have to sift the stuff and get out a sledge hammer to break up the clumps, which I kind of like.

If you like moist and rich, sweet but not cloying muffins, you'll love these! They are full of dietary fiber (a back of the envelope calculation suggests each muffin has over 3 grams of dietary fiber) which is an important part of a healthy diet. Sometimes you can have your cake and eat it too!

Bran Muffins - Perfected!
Yield: 12 standard-sized muffins

1/4 cup canola oil
1 TBS honey
3 TBS molasses
1/4 cup brown sugar
1/2 tsp vanilla
2 eggs
2/3 cup buttermilk
1/2 cup wheat bran

1 cup whole wheat flour
1 1/2 tsp baking powder
1/2 tsp baking soda
1/4 tsp cinnamon
1/4 cup wheat germ
1/2 cup date sugar
1/2 cup chopped dates (optional)

Preheat your oven to 375 degrees. In a medium bowl, combine the first group of ingredients. The bran in included with the wet ingredients so that it has time to soak up some liquid and soften. This helps the texture of the final product. Let this bowl sit while you prepare the rest of the ingredients.

In a separate bowl, mix together the second batch of ingredients. Stir together. If adding the chopped dates, mix those in as well so that they are covered with flour. This step helps to keep them from sinking to the bottom of the batter. Add the dry ingredients to the wet and stir just until mixed. Line a muffin tin with papers and scoop approximately 1/4 of a cup into each paper. I use a #16 disher (blue) flat filled. If you want, sprinkle the tops of the muffins with some turbinado sugar and/or wheat bran. Bake in the  preheated oven for 18-22 minutes or until they are gently browned.


Saturday, March 16, 2013

Cinnamon Rolls - Mastered!


My in-laws showed up yesterday to come meet their newest grandson. I feel fortunate to have such a great relationship with my in-laws such that I am excited for their visit. It helps that my mother-in-law is great with babies and this has allowed me to get a few things done around here. To celebrate the first morning of their visit, I decided to make a pan of cinnamon rolls.

Now, I posted my recipe for cinnamon rolls a long time ago. You can see that post here. However, while the basic recipe has remained the same, there have been a number of changes that have turned these rolls from good to super-freaking fantastic. I used to have a hard time passing by a Cinnabon when out and about, but now it's not a problem. I like these rolls better! It's amazing what a difference a few subtle changes can make. You may want to read through my last post first if you are not familiar with the general gist of how cinnamon rolls are made. In this posting, I will focus on the changes to the recipe and then will re-post the recipe in full at the end in case you want to print it out.

The first major change was in the filling. I'm not sure why it makes such a big difference, but changing from regular sugar to brown sugar completely changes the way the filling melts. If you mix the butter and sugar together first into a paste, along with the cinnamon, it melts even better and makes a nice gooey filling. Here you can see the dough rolled out with the filling spread out on it.


The nest major change was the way that I rolled the dough. If you look at my pictures in my original post, you'll notice just how thick the dough was when I rolled it up. That resulted in rolls that were very bread-y without a lot of that delicious filling. I now roll the dough almost as thin as I can manage. I shoot for no thicker than one quarter of an inch now. In my experience, it is imperative to have the dough cold to manage this. That's why I put the dough in the refrigerator for a second proofing. Roll the dough up and then use a serrated blade to cut perfect rolls.


Compare this photo with the similar one in the previous cinnamon roll post and you can see just how many more rolls you get in the dough when it is rolled thinly. It leads to a much better balance of dough and cinnamon/sugar filling.


You can see here how that filling melts so much better than in my previous recipe. The last change that I made to the recipe was in the icing. Adding a little cream cheese to the icing, with that little bit of tang it imparts, is absolutely divine and really puts these rolls over the top. My goodness, these things are delicious! Be sure to have a plan for all twelve rolls or you may find them all in your own tummy!


Cinnamon Rolls - Mastered!
Yield: 12 rolls

2 1/4 tsp instant yeast
1 1/4 cup warm milk
1/4 cup sugar
1/4 cup shortening
1 tsp table salt
3 whole eggs
4 to 4 1/2 cups flour

1/2 cup butter (one stick)
1 cup brown sugar
4 TBS cinnamon

4 ounces softened cream cheese
2 cups powdered sugar
1-2 TBS milk

Mix the first 6 ingredients together in the bowl of a stand mixer (through the eggs). Add two cups of the flour. Mix on medium with a paddle for 3 minutes. Add the remaining 2 to 2 1/2 cups flour. The amount of flour can vary depending on the humidity of your kitchen. You are looking for a dough that is still somewhat soft and sticky. It will become more workable after it rises and is chilled.

Place the dough in a grease bowl, covered with plastic wrap, until it is doubled. Knock down the dough and refrigerate for 2 hours (and up to 24 hours). Turn the cold dough out onto a floured counter. Roll out into a rectangle as thin as the dough will reasonably allow; shoot for less than 1/4 of an inch. The rectangle will be approximately 20 inches by 12 inches. Beat together the softened butter, brown sugar, and cinnamon. Heat gently in the microwave if it is not soft enough to spread on the dough. Spread the mixture evenly on the dough. Roll up tightly and slice, using a serrated blade, into twelve rolls. I trim off the ends before slicing so each roll has a nice look to it.

Place the rolls in a greased 9x13 inch pan. They also fit nicely four to a pan in 8" disposable aluminum pans if you want tot gift them. Cover the pan with plastic wrap and allow the rolls to rise for 30 minutes or until slightly puffy. Preheat the oven to 350 degrees F. Remove the plastic wrap and bake rolls for 25 minutes or until baked through and gently golden. Remove rolls from the oven and cool for 15 minutes before icing.

Beat the cream cheese, powdered sugar, and milk together until it forms a smooth icing. It will be too thick to pour. Spread the icing over the rolls. Serve immediately or store in an airtight container and reheat in the microwave before serving.

7/31/13: I have altered the amounts for the filling slightly. I decided, if your going to go all out and have a cinnamon roll, it might as well be the best roll it can be! I upped the amount of brown sugar slightly (from 3/4 cup to one) and increased the amount of cinnamon a bit (from 3 to 4 TBS). I just made these again this weekend. Sooooo fabulous!!!