I am now blogging new recipes on my farm website.
Cooking from Scratch is on facebook! Click here to check it out!
Showing posts with label Pie. Show all posts
Friday, October 25, 2013
Spinach Pie
Now here's a recipe that's been getting a workout in my kitchen lately. It's a little reminiscent of a spinach quiche, but it's not so eggy. If you like spinach one iota, you'll love this! Not only does this pie taste great, but it's also pretty easy to make. The only caveat I'll put in there is to be careful what spinach you use... I tried once to make this a super easy to make dish by using thawed frozen spinach. What a let down! The spinach was so fibrous that it made it very hard to cut and eat the pie. That said, even making the pie from a bag of fresh baby spinach is not too time consumptive. You simply chop the spinach up, put it in simmering water for a few minutes, and drain. That's the hardest part of this pie.
And I'm not lying there. The crust on this bad boy is soooooo easy. You can use any old crust you want, including store bought, but I purposefully made an easy crust to go with this spinach pie so that I can make it in a second. Simply mix together the flour, melted butter, and salt until it resembles crumbs.
Then add the water and mix using your hands until it is evenly moist. Lastly, dump the crumbs into your pie tin (or glass) and press it into place. No rolling, no chilling. Yay!
Mix together the filling and pour it into the shell. Bake for about forty minutes and you've got dinner! For a vegetarian meal, it's pretty satisfying, and it makes darn good leftovers!
Spinach Pie
Yield: 8 servings
Crust:
1 1/2 cup all-purpose flour
5 TBS melted butter
dash salt
3-6 TBS cold water
Mix the first three ingredients until the mixture resembles coarse crumbs. Then add the water, starting with the smallest amount and adding as needed, until the crumbs are evenly moist and will hold together when pressed. Dump the mixture into a greased pie dish (I prefer a glass dish here). Press evenly into place.
Filling:
24 ounces fresh baby spinach
1/4 cup grated Parmesan
1/2 cup ricotta cheese
2 eggs
dash salt
1 tsp minced garlic
Bring a pot of water to a boil on the stove. Meanwhile, chop the spinach into small pieces. When the water is simmering, cook the spinach for 2-3 minutes. Drain in a colander. Let drip dry, but do not press dry. In a bowl mix together the cooked spinach and the remaining ingredients. Pour into the pie shell and bake in a preheated 350 degree F oven for about 40 minutes or until a knife comes out clean. Let cool five minutes before serving.
Labels:
Pie,
Quick & Easy Entrees,
Vegetarian
Thursday, December 13, 2012
Chocolate Pie
We had a guest for dinner last night; it was someone we hadn't seen in almost ten years! It was great to catch up and also a great excuse to have some fun in the kitchen. I made a shepherd's pie with chicken, salad, and some rolls (which I'll share with you in the next few days). For dessert, well, you know that's where my true passion lies, I wanted to go all out; I absolutely love baking!
I decided to go with making a chocolate pie. First, nearly everyone loves chocolate pudding, so I feel pretty confident that no one will turn down a chocolate pie when made. Secondly, I like the fact that I can make the whole thing in advance... like a whole day in advance. It's perfect!
This is another one of those "put together" recipes that uses a handful of other recipes that I have already posted to end up with a fabulous new creation.
The first step is to make the crust. I used my new flaky pie crust recipe that I posted yesterday, but you could go with a traditional crust as well, or - gasp - with a store bought crust. (Don't worry, I won't hold it against you if you do use a store bought crust. I don't use them because I don't like the flavor, but if they taste good to you, then why wouldn't you?). Blind bake the empty pie shell (pricked with a fork, lined with foil, and filled with pie weights or dried beans) at 425 degrees for ten minutes. Remove the foil and weights and continue baking until the crust is beautiful and golden. Let the pie shell cool completely at room temperature.
The next component is the filling. I started by making my chocolate pudding recipe. Once the pudding was thickened and off the heat, I added a few extra things. The first thing was about a half cup of bittersweet chocolate chips. I wanted to up the ante on the chocolate-y-ness of this filling. I also added about half a teaspoon of coffee liqueur. Both of these items are completely optional. Fiddle with it at this point as you see fit. You could add mint extract for a mint pie or hazelnut liqueur for a nutty essence. The only change that I made that I strongly recommend making is the addition of some gelatin. This pudding sets up pretty well, but for perfectly cut pieces, it really could use a little added stability. To do this, soften one teaspoon of gelatin in two tablespoons of cold milk. Let sit for 3-5 minutes. When the pudding first comes off the heat, stir in the milk/gelatin mixture. That's all there is to it, but it makes a huge difference. Pour the pudding into a bowl and place plastic wrap directly on the surface to prevent a skin from forming. Let the pudding cool completely but not become cold (you don't want it to start setting up yet). Pour the cooled pudding into the pie shell and smooth the top. Cooling the pudding is important for two reasons: first, it keeps the crust from getting soggy, and second, at this point you don't have to worry about a nasty skin from forming. Now you can put the pie in the refrigerator uncovered without any problems.
The last part of this process is the whipped cream edge. Because I wanted to be able to make everything in advance and then have any leftovers keep beautifully (there were only three of us, after all), I used stabilized whipped cream. Follow the recipe exactly and pipe the whipped cream onto the pie in any design you choose. I usually use a rope type border around the edge. I then sprinkled some chocolate shavings on the whipped cream for contrast. Refrigerate for at least a few hours before serving! Cuts beautifully and tastes wonderful!
*Per a commenter's request, I have written up my pudding recipe with the pie filling additions here. As I was writing the recipe, I remembered that I did also add a wee bit of sugar to balance the addition of the chocolate. It wasn't a lot, and you can certainly add some to taste if you find it necessary.*
Chocolate Pudding for Pie
Yield: enough for one pie
1/3 cup sugar
1/3 cup cocoa powder
1/4 tsp salt
3 TBS cornstarch
2 1/2 cups milk
1 tsp vanilla extract
1/4 cup bittersweet chocolate chips (optional)
1/2 tsp coffee liqueur (optional)
additional sugar to taste, if necessary
1 tsp unflavored gelatin softened in 2 TBS cold milk
Sift the sugar, cocoa powder, salt, and cornstarch into a medium sauce pan. Mix the milk and vanilla. Pour just enough of the milk into the dry ingredients to make a loose paste. Once the dry ingredients are all moistened, pour in the rest of the milk and whisk until well mixed.
Cook over medium-high heat, whisking occasionally, until the pudding just about reaches a boil and is thick and smooth. Remove from the heat and add the chocolate chips and liqueur, if using. Stir to mix. Add in the softened gelatin/milk mixture and stir again until well mixed and smooth. Pour into a bowl and place plastic wrap directly on the top of the pudding to prevent a skin from forming. Cool in the refrigerator until cool but not cold (and not set). Once cool, stir and then pour into pie shell, smoothing the top. Pie can now be refrigerated uncovered until served. Pipe a border of stabilized whipped cream, if desired.
Wednesday, December 12, 2012
Super Flaky Tender Pie Crust
I know I have already posted a recipe and tutorial on pie crust, but this one is just so phenomenal, I can't not share it with you. Look at how flaky that pie crust is! It's almost like puff pastry. I've been messing with this recipe for a little over a year now, but have finally gone a few times making it without making any adjustments to the recipe.
You use the exact same technique as I outline in my Pie Crust 101 post and video. It's amazing how just a few alterations in the recipe make such a huge difference. A pleasing bonus is that the dough is easier to work with when rolling because using half cake flour reduces the amount of gluten in the dough. Give this dough a try in your next pie crust application - I promise you will not be disappointed!
Super Flaky Tender Pie Crust
Yield: enough for two thin single crusts or one thick crust with some extra
1 cup all purpose flour
1 cup cake flour
1/2 tsp table salt
11 TBS chilled butter cut into small pieces
5-6 TBS chilled water
1 TBS white vinegar
I think making crust is easiest in a food processor, but you can certainly mix it by hand. Mix together the flours and salt. Cut in the butter until the mixture resembles coarse crumbs with some pea sized pieces of butter remaining. Mix the water and vinegar together and then add to the mixture while pulsing in the food processor or add all but the last TBS and then mix by hand. Hold back the last TBS of water regardless of your method until you are sure you need it. The ambient humidity will impact how much water is required to allow the dough to come together into a ball. Pulse just until the dough starts to clump. Dump out onto the counter and shape into a disk of dough about 6 inches across. Wrap in plastic wrap and chill 30-60 minutes before rolling.
Sunday, December 11, 2011
Pumpkin Pie
I have a number of problems with most of the pumpkin pie out there, not the least of which is that canned pumpkin tastes, well, like canned pumpkin. It's the same reason I don't eat canned peas or green beans. Canning vegetables just changes their flavor and texture in a way I can't enjoy. I also often find other's pie too sweet. I don't like it savory, mind you, but I don't want it to be syrupy either. This started out as the recipe from the back of a can of Libby's pumpkin, I think. Then my mom tweaked it, and then I tweaked it even more. I really like the balance. I use the frozen pumpkin puree I put up every fall. The frozen, not canned, puree gives this pie a fresh flavor that can't be beat. To me, it's the perfect pumpkin pie.
Pumpkin Pie
Yield: one 9-inch pie
2 eggs
1 1/2 cup pumpkin puree (preferably not canned)
1/4 cup white sugar
1/4 cup brown sugar
1/2 tsp salt
1 tsp cinnamon
1/2 tsp dry ginger
1/4 tsp cloves
1 1/2 cups evaporated milk (one 12 oz. can) or light cream
Prepare a 9-inch pie shell. If you want to be sure your pie shell does not get gummy (see note 2 below), blind bake it first in a 425° F oven for 10-15 minutes lined with a little foil and weighted down with pie weights or beans. Let pie shell cool completely before filling. Preheat the oven to 425° F. In a bowl, lightly beat eggs. Add the remaining ingredients and stir gently to mix. If you mix too aggressively, you will end up with foam on the top of your pie. It doesn't taste bad, your pie just won't be as pretty. Pour the filling into a prepared pie shell. Bake at 425 F for 15 minutes. Reduce the heat to 350° F and bake for another 45 minutes or until a knife comes out clean. Serve well chilled.
NOTE 1: I also like to make this as a custard, where I simply make the filling and bake it in a dish without a crust. Use a 9x9 inch glass/porcelain baking dish or similar. Otherwise, make exactly the same as for a pie. It's a great, easy, treat to make year round!
NOTE 2: The picture above shows a pie crust that I did not blind bake first. I was in a hurry, so I skipped that step. See how the crust looks like it has two layers? The inside layer here was chewy and not flaky at all like the outside half. The pie still tastes good, but the crust is not quite as delicious. I strongly recommend blind baking first, if you have the time and patience. If you do go this route, be prepared to lightly cover the edge crust with foil as it may begin to darken too much toward the end of the baking period.
Friday, November 25, 2011
Classic Apple Pie
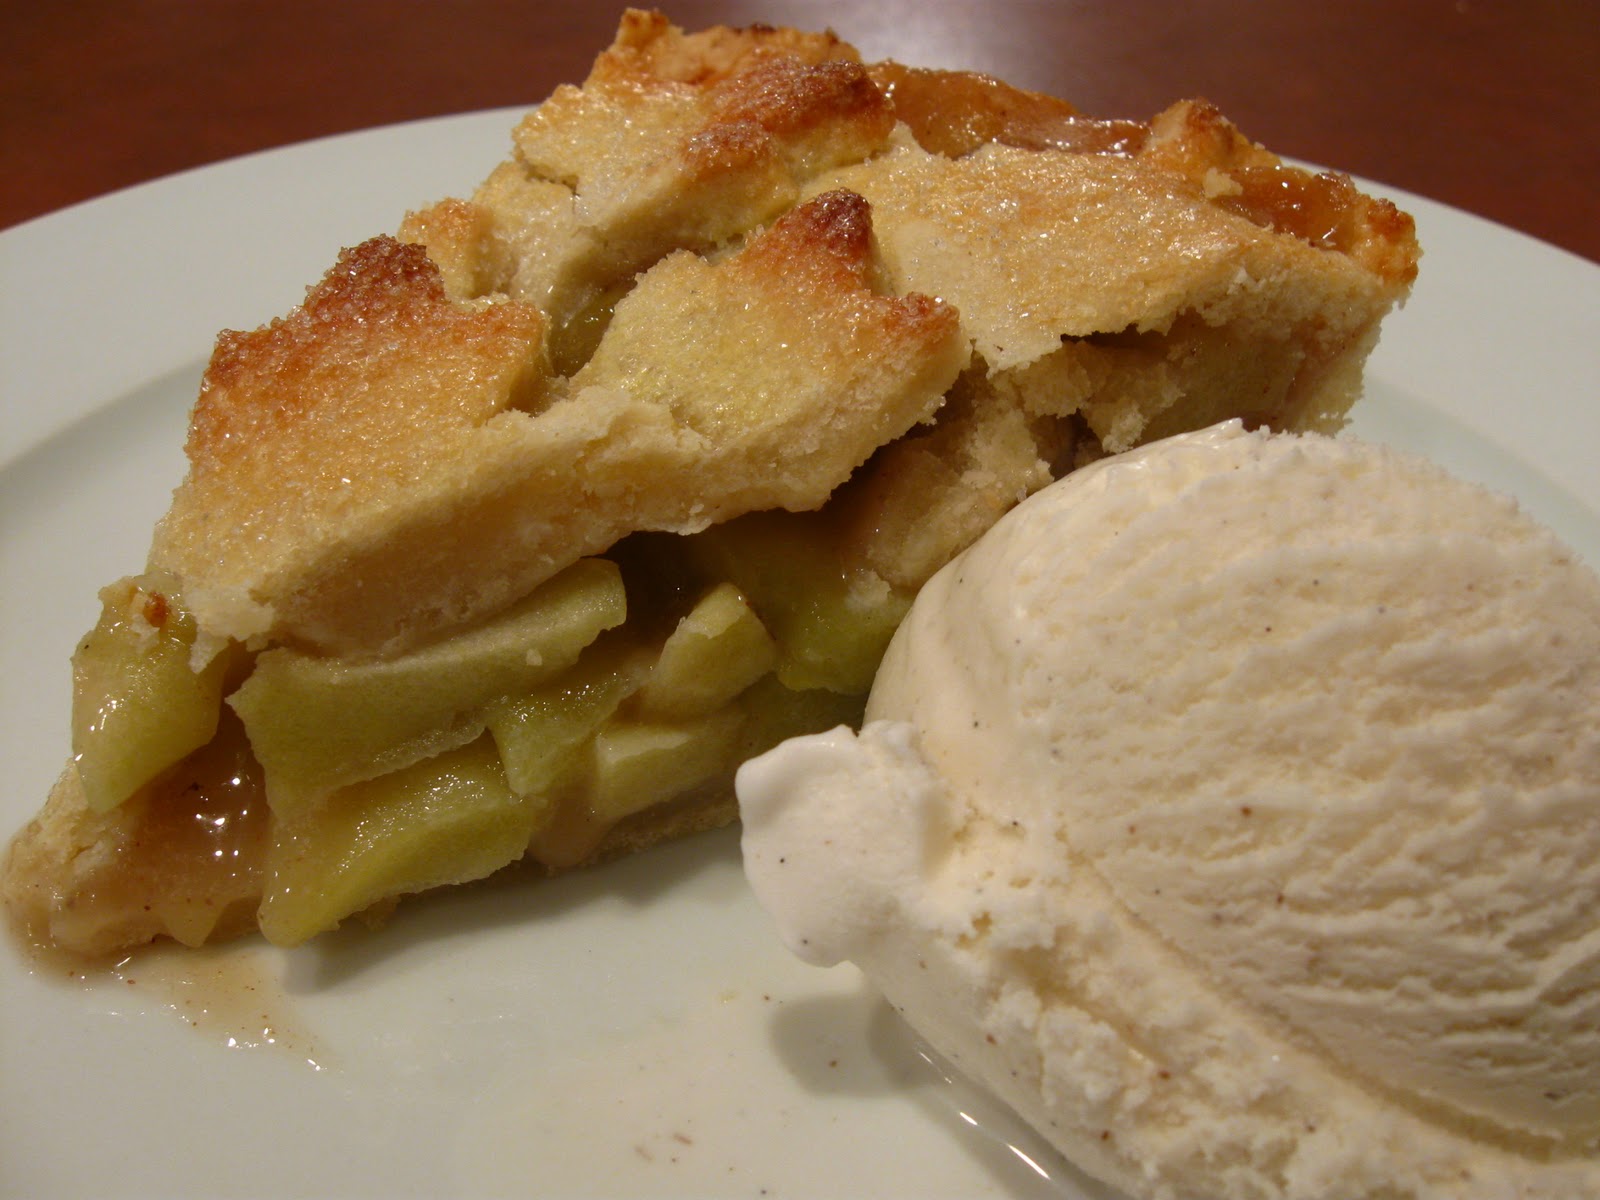
Because not everyone likes pumpkin pie, I decided to make an apple pie yesterday as well. It may have been the prettiest pie I ever made. A few years ago, I saw a picture in a magazine of a pie where the top crust was made of leaf cut outs. I guess because I more often make single crust pies, yesterday was my first chance to give it a go. It was so easy and so incredibly beautiful! The picture below does not do this pie justice. It was a work of art; I hated to cut into it!
As for making an apple pie, the best thing I ever changed about my technique was pre-cooking the filling. This step negates a number of potential apple pie problems I've had. When you simply throw the ingredients into the pie raw,you can't always be sure you have the right amount of sugar or thickener. The other issue is that when you put raw apples in the pie shell, their volume is much larger than when they're cooked; that usually means that the crust ends up "frozen" in place way above the actual end level of the pie. I hate it when you cut a pie and there is an inch of space between the top crust and the fruit! When you cook the filling first, the apples have already softened. When you place the top crust over it, you know that everything is in the place it will be once the pie is cooked. Just be sure you let the filling cool before adding it to the pie shell!
Classic Apple Pie
Yield: one 9 inch pie
Enough cored, peeled, and sliced apples to fill a 9 inch pie tin, mounded (use Granny Smith or another tart, firm apple, usually 5-10 apples, depending on size)
1/2-1 cup sugar
3-5 TBS flour
1/2 tsp cinnamon
dash nutmeg
1 TBS lemon juice
Place apples in a large pot. Start with the smallest amount of sugar and flour; add the spices and lemon. Stir thoroughly. Cook over medium low heat, covered, until the apples are slightly soft and the juice is thickened. Stir frequently to prevent scorching. Taste. Add sugar and flour as necessary until the sweetness and thickness are right. Remember that the filling will be thicker when it cools than it is when it is hot. The apples do not need to be fully cooked, as they will continue to soften when baked in the pie shell. To reduce the chance of lump formation when adding more flour, add it by placing the flour in a small strainer and tap a small amount into the filling at a time. Let filling cool before adding to an unbaked pie shell. Pour cooled filling into the pie shell, cover with the top crust. Be sure there are vents in the top of the pie to allow steam to escape. If desired, brush the top of the crust with an egg yolk wash and sprinkle with sanding sugar. Bake at 400° F for 25-35 minutes, or until the crust is nicely golden. Let pie cool before serving. Can be served at room temperature or chilled.
As for making an apple pie, the best thing I ever changed about my technique was pre-cooking the filling. This step negates a number of potential apple pie problems I've had. When you simply throw the ingredients into the pie raw,you can't always be sure you have the right amount of sugar or thickener. The other issue is that when you put raw apples in the pie shell, their volume is much larger than when they're cooked; that usually means that the crust ends up "frozen" in place way above the actual end level of the pie. I hate it when you cut a pie and there is an inch of space between the top crust and the fruit! When you cook the filling first, the apples have already softened. When you place the top crust over it, you know that everything is in the place it will be once the pie is cooked. Just be sure you let the filling cool before adding it to the pie shell!
Classic Apple Pie
Yield: one 9 inch pie
Enough cored, peeled, and sliced apples to fill a 9 inch pie tin, mounded (use Granny Smith or another tart, firm apple, usually 5-10 apples, depending on size)
1/2-1 cup sugar
3-5 TBS flour
1/2 tsp cinnamon
dash nutmeg
1 TBS lemon juice
Place apples in a large pot. Start with the smallest amount of sugar and flour; add the spices and lemon. Stir thoroughly. Cook over medium low heat, covered, until the apples are slightly soft and the juice is thickened. Stir frequently to prevent scorching. Taste. Add sugar and flour as necessary until the sweetness and thickness are right. Remember that the filling will be thicker when it cools than it is when it is hot. The apples do not need to be fully cooked, as they will continue to soften when baked in the pie shell. To reduce the chance of lump formation when adding more flour, add it by placing the flour in a small strainer and tap a small amount into the filling at a time. Let filling cool before adding to an unbaked pie shell. Pour cooled filling into the pie shell, cover with the top crust. Be sure there are vents in the top of the pie to allow steam to escape. If desired, brush the top of the crust with an egg yolk wash and sprinkle with sanding sugar. Bake at 400° F for 25-35 minutes, or until the crust is nicely golden. Let pie cool before serving. Can be served at room temperature or chilled.
Friday, November 4, 2011
Key Lime Pie
Fortunately, living in Florida, fresh key limes were in my neighborhood grocery. If you can't find fresh key limes in your area, you may be able to find bottled key lime juice. Regardless, you can always buy it online. In a pinch, you could use regular limes. But as you can see below, they are not the same. Key limes are small little things. A bugger to juice, truth be told. But the flavor is distinct. This pie is not overly sweet. It is tart and has a slight bitter twist to it, kind of like what I associate with most grapefruit.
Before you juice, you'll need to zest enough of them to obtain one loose tablespoon. Then you can cut the limes and juice away. Because they're so small, they can be tiring to juice. If you have one of those squeeze type juicers, you may be better off than I was. You need 2/3 cup of juice, which requires approximately one pound of key limes. Don't juice your limes too early, as the juice can develop additional bitterness when it sits too long.
Don't be dismayed if your crust comes out of the oven looking really funky. It tends to puff up when baking, but returns to normal dimensions as it cools. The first time I made this crust I thought I had ruined it when I first took it out of the oven Don't fret, it'll work itself out.
As the pie cools, you can mix up the filling. Start by mixing the egg yolks and zest together. Mix on medium-high for a few minutes until the mixture has increased slightly in volume and is thick and pale yellow (with green flecks in it, of course).
The next step is to add a can of sweetened condensed milk. This is some very thick, sweet stuff. So sweet, in fact, that it provides all the sweetness this pie needs. By the way, please note the proper color of this product. If you open your can and find that it is a caramel brown color, as I did when I first made this pie, perhaps you are not using sweetened condensed milk often enough, or, as in my case, not rotating your stock well. The date on my can of brown sweetened condensed milk? "Best by Nov 2004." Yikes! And, even more pressing, how many stinking military moves did that can of milk participate in, anyway, before I ended up throwing it away? Needless to say, I will be more vigilant.
Bake the pie at the same temperature as you baked the crust for 25 minutes. The pie filling will be set and maintain its shape upon gentle shaking, but will not be brown in any way. Remove from the oven and let cool to room temperature.
I think this pie requires a little sweet border to help balance it out. I like a whipped topping. You could make whipped cream right before serving, but I think piping a stabilized whipped cream border really looks like a million bucks. I like to then zest a little lime on the border for color. Be sure to thoroughly chill the pie before serving. This pie keeps well and can be made one to three days in advance.
Key Lime Pie
Yield: one 9" pie
Adapted from King Arthur Flour
Crust:
1 1/2 cups graham cracker crumbs (one pouch plus two whole crackers)
1/4 cup powdered sugar
1 egg yolk
1/3 cup melted butter
dash salt
Filling:
1 TBS loosely packed key lime zest
3 large egg yolks
1 14-ounce can sweetened condensed milk
2/3 cup fresh (or bottled) key lime juice
whipped cream and additional lime zest for garnish (optional)
Mix together the crust ingredients. Pour into a 9" pie pan. Spread evenly and pack down with a measuring cup. Bake at 325° F for 15 minutes. Crust may look uneven and strange upon removal from the oven, but will return to a more normal shape upon cooling. Let crust cool while preparing filling. Leave oven on at 325° F.
Beat the zest and egg yolks together on medium-high speed for a few minutes, until the yolks have increased in volume and become thickened and a pale yellow. Add the sweetened condensed milk and beat on a fairly high speed for 2-3 minutes. Lastly, add the lime juice. Stir until well incorporated, but do not over mix. Pour into the baked crust and return to the oven to bake for 25 minutes. The filling will be set and no longer loose in the middle, but will not be browned in any way. Let cool to room temperature. Prepare and pipe a border of stabilized whipped cream, if desired. Refrigerate for at least four hours before serving.
This pie keeps well and can be made 2-3 days in advance.
Monday, August 1, 2011
Fresh Blueberry Pie
I've picked a lot of blueberries in my life, but I've never been blueberry picking like this. I picked fourteen pounds in less than an hour. I simply had to put my bucket under a branch and rake my fingers through. The berries hung so heavy, thick, ripe, and sweet on the bush it was amazing! And the guy charged, get this... one dollar a pound! I felt like I had died and gone to heaven.
While there are all kinds of blueberry recipes out there, this is quite possibly my favorite. My mom made a version of it when I was growing up and if ever there were left overs, they would mysteriously disappear... into my tummy! I was a food sneak as a kid. Dang, who am I kidding? I still am!
I love a traditional cooked blueberry pie as much as the next gal, but the fresh berries in this pie just are so pleasing in flavor and texture, you've got to give it a try!
First, bake an empty pie shell. You can use any crust, homemade or store bought. Obviously, I would advocate the homemade one, but use your best judgement. In this case, I used a whole wheat crust for an added nuttiness.
In a medium sauce pan, combine one cup of the berries, the one cup of water, sugar, lemon juice, nutmeg, lemon zest, and corn starch together. Stir well and then place over medium high heat. The amount of sugar will depend on how sweet your berries are. I had really sweet berries, so I used only half a cup of sugar; if your berries are more tart, you'll want to increase the sugar to 3/4 or 1 cup. Separately, soften the gelatin in 2 tablespoons of water.Once the blueberry mixture has come to a boil and is nice and thick and well cooked, pour and then press through a sieve.

This process will leave you with a beautiful blueberry syrup. Add the softened gelatin, stir well, and then set aside to cool.
Once the blueberry syrup and the pie crust are cooled, mix the syrup with the remaining fresh blueberries. Toss well to be sure all berries are covered.
Lastly, pour the covered blueberries and syrup into the cooled pie shell. Cover and refrigerate at least four hours before serving.Fresh Blueberry Pie
Yield: 1 - 9" pie
1 baked pie crust shell
1 cup fresh blueberries
1 cup water
1/2 - 1 cup sugar (depends on berry sweetness)
1 TBS lemon juice
pinch nutmeg
pinch lemon zest
1 heaping TBS cornstarch
1 tsp unflavored gelatin
2 TBS cool water
3 more cups fresh blueberries
Mix the one cup of berries, one cup of water, sugar, nutmeg, zest, and cornstarch together in a medium sauce pan. Separately, mix the gelatin and 2 TBS water together in a small bowl and set aside. Heat the blueberry mixture over medium to medium high heat. Stir regularly until the mixture comes to boil and thickens well. Remove from the heat and press through a sieve, discarding solids. Stir in the softened gelatin mixture and set the syrup aside to cool.
Once the syrup and the pie crust (if necessary) are both cool, mix the remaining three cups of berries and the syrup together and pour into the pie shell. Chill at least four hours before serving.
Tuesday, November 24, 2009
Mincemeat Handpies
Hard to believe I almost forgot to post these little gems! While I love these with mincemeat in them, they would be great with any other kind of fairly firm pie filling you can think of. Mini-apple pies? Oh yeah. Mini-berry pies? Splendid. The trick is keeping the right ratio of pie to filling.To be honest, I think I got the ratio off a bit on this batch. You want to be sure to roll the crust thinly enough so that they aren't too doughy. The trick is finding where that line is. Shoot for about 1/8 of an inch and fiddle from there.
I typically use a traditional crust, but you could use any pastry crust adaptation you want. You could even use my Whole Wheat Pie Crust for an added nuttiness. I used the mincemeat I canned last year. I would love to post how to make it, but I would have to do it without any pictures, because that batch made a dozen quart jars... I won't need to make mincemeat for at least another two years! However, any store-bought mincemeat works, or you could easily cook a filling that is very mincemeat-like. My Ice Cream a la Pie recipe is pretty close.
The other thing I love about these little pies is that they freeze so well. One day of making these little pies, and you'll be able to enjoy them for many days to come. Simply bake them! No need to thaw first. I just bake them at a slightly lower temperature than when they are not frozen. Also, it helps to place them in the oven when you first turn it on so that they warm up with the oven.
Making the pies is fairly straight-forward. Roll out the dough until it is nice and thin. Again, go for thinner than what you see here, as I thought this batch turned out a bit crusty. I use a 3-inch biscuit cutter to cut the rounds out.
I place them on a parchment lined cookie sheet and spoon a small amount of filling into the middle. I use my #100 disher (about 2 tsp). Have some egg wash handy (one egg yolk beaten with 1 TBS of water) and brush the edges of the bottom crust.
Place the other crust over the top. Now, sealing takes a bit of practice to get a motion that will work for you. The important thing is to try and get any large pockets of air out. Seal the edges of the pies with the tines of a fork. Brush the tops with the egg wash and then sprinkle with sanding sugar (regular sugar works fine, too). Lastly, using a toothpick or cake tester, prick a few holes in the top to allow the steam to escape.
Bake in a 400 degree F oven for about 15-20 minutes, or until they are nicely browned. If you want to freeze some instead, freeze them unbaked on the baking sheet until they are nice and rigid. Remove from the sheets into a freezer container. I have used both zip top bags and plastic containers; both work well. When you are ready to serve the frozen pies, simply place on baking sheets and place in the oven right as you turn it on. Use a slightly lower temperature with frozen pies - about 375 degrees F. They will take slightly longer to bake, but they will taste just like they did on the day you made them!
Subscribe to:
Posts (Atom)