I am now blogging new recipes on my farm website.
Cooking from Scratch is on facebook! Click here to check it out!
Showing posts with label Quick & Easy Sides. Show all posts
Saturday, February 21, 2015
Samosa Inspired Cauliflower
I am always looking for new and delicious (and easy to make) side dishes. We love diverse ethnic seasonings from around the world, so I am also always looking for ways to include those favorite flavors in our everyday meals. Here is a perfect example of that attempt being very successful.
I saw a picture in a magazine in the last few months that inspired me. It had cauliflower and peas, and the cauliflower had a gorgeous yellow hue. Its flavor profile was close to one I had in my mind, but it had a whole bunch of ingredients I don't typically have on hand. I knew the flavor I wanted, but I wasn't quite sure how to get there (I had tried a similar dish with much less success once before). I wandered through a handful of cookbooks without really getting any closer to where I wanted to be. Suddenly, it dawned on me that the flavor I was thinking of (I suppose because of the peas and the obvious Indian spice inspiration) was the filling one finds in many samosas! I was off! I have a recipe for potato and pea samosa filling that I love and I simply adapted that here. The result was fantastic! What a delightful change of pace, and so tasty and beautiful, too.
Samosa Inspired Cauliflower
Yield: 4 servings
2 TBS vegetable oil
1 cup diced onion
1 head cauliflower, cut up
2 tsp grated ginger
2 tsp spice mix (see below)
3 TBS water
1 cup frozen peas
salt, to taste
Spice Mix:
1 tsp coriander
1 tsp garam masala
1 tsp cumin
1/4 tsp turmeric
1/8 tsp cayenne (or more, if you like spice)
Mix the spices together and set aside. Prepare the onion and cauliflower and then heat a medium skillet or Dutch oven over medium to medium-high heat. Add the oil, let it heat, and then cook the onion until soft and gently browned. Add the cauliflower, the ginger, 2 teaspoons of the spice mix, and the water and cook, covered, until the cauliflower is just tender (5-10 minutes). Remove the cover and add the frozen peas. Let heat through. Season with salt to taste. Serve immediately.
Labels:
Ethnic,
Quick & Easy Sides,
Sides,
Vegetarian
Saturday, July 20, 2013
Creamed Spinach
I just love really quick, simple, delicious, and healthy side dishes. I've been on a spinach kick in the last couple of years. Lately, I just can't seem to get enough of the stuff. Maybe that's because I've finally figured out some delicious ways to cook it (I've always liked it raw in salads). I posted a recipe for sauteed spinach with shallot and garlic, and I've posted a great combination of spinach and great northern beans. I've posted recipes using spinach in soups (here and here for instance), in a special tart/pie, stuffed in mushrooms, even put in stuffing! But what about that classic standby, creamed spinach?
Well, I was a little hesitant to dive in. Most of the recipes for creamed spinach that I've seen require copious amounts of heavy cream and are more white sauce than anything else - not that that is necessarily a bad thing, but I try not to go overboard with the heavy cream these days and I really want the spinach to be the star of the show. So, I set out to make a simple, light creamed spinach. What you see here is the result and it is darn quick and darn good. There's enough cream to add a nice rich edge to the spinach without overwhelming it. I love making this dish!
Creamed Spinach
Yield: 2 large servings or 4 small servings
1 TBS butter
1 tsp minced garlic
16 ounces fresh spinach
1/4 cup heavy cream
dash nutmeg
salt and pepper to taste
In a saute pan over medium-high heat, melt the butter. Add the garlic and cook for 3-4 minutes. Add the spinach and saute, turning frequently until it is mostly wilted. Add the heavy cream. Cook, stirring, until the cream has reduced and thickened slightly. Remove from the heat and add the nutmeg and salt and pepper. Let sit for five minutes before serving to allow the cream to thicken a bit more. Stir before serving to redistribute the cream.
Labels:
Quick & Easy Sides,
Sides
Monday, January 7, 2013
Farro Love
Curiosity about new foods is a key aspect of how I operate in the kitchen. Sometimes it takes a bit longer to get around to trying something than I might like to admit, but I'll get there eventually. Sometimes I get a little prompt by being presented a food while eating out elsewhere, and that's usually never a bad thing. Take this grain, for instance. I first had it about three months ago at a catered event and immediately fell in love. What a wonderfully flavorful, easy to cook, chewy, tasty delight!
Farro is a grain within the wheat family, but is botanically different enough that some people who are allergic to the modern wheat variety found most commonly in the grocery can tolerate farro. Farro is also known as emmer wheat, and while it appears to have been cultivated in antiquity (i.e. thousands of years ago), its modern resurgence is fairly recent (as in the early 1900s). Most farro available for purchase today in the United States is grown in Italy.
While farro berries look very much like wheat berries, they cook very differently because most farro you'll find has been pearled (had the outer husk and much of the bran removed). Removing this bran casing allows the grain to cook much more quickly. You can visually judge how much of the bran has been removed by looking at the color of the grain; the more bran that has been removed, the lighter in color the grain will be.
So, how do you cook farro? Easily! I usually cook about one cup of the grain at a time. This will leave you with between 2 and 2 1/2 cups of cooked farro. You can round out the taste of the farro by dry toasting the grain in the pot first before adding the water. Simply turn the heat to medium, add the grain, and stir periodically until the grain gives off a nice toasty aroma. At that point, add water to cover, about 2 cups if you are cooking 1 cup of farro. Bring to a boil and then reduce to a simmer. I have had equal success with cooking my farro covered or uncovered. Simmer until the grain is tender, about 30 minutes. It will still be chewy, but pleasantly so. Drain off any excess water and let sit for a few minutes to absorb any remaining moisture after draining.
You can then use the farro in any number of ways. I like it very much as is and there are plenty of recipes for farro salads that are really excellent. My favorite way to serve it, however, is as a side dish with a slight flavor boost. After draining, I add salt and pepper to taste. I then drizzle a tiny bit of extra virgin olive oil and a tiny drizzle of fresh squeezed orange juice into the grain and stir. Be cautious not to overdo it with the oil and juice; you want to highlight the natural flavor of the grain, not mask it. Stir and serve! Farro is another great way to include more whole grains into your diet!
Labels:
Quick & Easy Sides,
Sides,
Whole Grain
Wednesday, October 31, 2012
Spinach & Sage Dressing
This little side dish here is one of my favorites. The flavors go so well together. I love the savory flavor of the sage with the onions, mushrooms, and spinach. Dressing does not need to be a holiday exclusive dish! I like to prepare this dish year round. And, as you know, dressing from a box just isn't the same.
This recipe started as the filling for my stuffed mushrooms. Then, over the years, it's morphed into its own dish which I serve either alone as a side dish or use as a stuffing. You can roll it up in a pork tenderloin or stuff it in the center of a chicken breast. I'm telling you, this is some good stuff!
Spinach and Sage Dressing
Yield: 4 side servings or enough to stuff one pork tenderloin
3 TBS butter
1 cup diced onion
1 1/2 cup diced mushroom
2 cloves garlic, minced
6 oz fresh spinach, chopped
1 TBS ground sage
1/4 tsp salt
1/4 cup ground Parmesan
1/2 cup panko bread crumbs
Melt the butter in a saute pan. Saute the onions and mushrooms over medium-high heat until tender and lightly browned. Add the garlic and cook one minute. Reduce the heat to medium-low and add the spinach, stirring to wilt. Add the sage, salt, and Parmesan, stirring to mix. Lastly, add the bread crumbs, stirring to moisten. Serve immediately as a side dish or let cool before stuffing into pork loin or chicken breasts.
Labels:
Favorites,
Quick & Easy Sides,
Sides
Saturday, September 22, 2012
Cabbage Salad
For the longest time, I never thought I cared for eating raw cabbage. My only real experience with it had been traditional coleslaw, which I am don't care for. I have a problem with most mayonnaise based salads. So imagine my surprise when I went to a function a couple of years ago and found a German style coleslaw on the sideboard. German style coleslaw is basically sliced cabbage in a vinaigrette... there is no mayonnaise involved! Just my thing. What I found was that the cabbage is so nice and crispy and often actually quite sweet. I was sold!
This salad makes a lovely side dish and cabbage is very healthy for you! A cup of shredded, raw cabbage has only 22 calories and is chock full of dietary fiber, vitamins C and K, and a wide variety of other vitamins and minerals. While you can dress is ahead of time, I like it best freshly dressed... I like it when the cabbage is at its crispiest.
The salad shown above was very quick to make. I shredded the cabbage myself, but you could always use the pre-cut stuff. I added some shredded carrot and some Craisins. I then dressed it with my poppy seed vinaigrette. So easy and delicious... and, oh, so beautiful!
Labels:
Quick & Easy Sides,
Salad
Saturday, October 1, 2011
Parmesan Potatoes
Behold the most delicious potatoes ever! My mom made these for our family while we were growing up, and they have always been one of my favorite dishes. My only complaint is that she would stack the potatoes too much. As you might imagine, the best part of these potatoes is that golden, delicious crust on the outside of each slice. If you stack the potatoes too much, then only a small percentage of the potatoes have that crust. That state of being is an unfortunate and unnecessary occurrence. You may need to use a larger pan, or even two pans, so that the potatoes are spread as close to one layer thick as possible, but it is really, really worth it.The other thing I want to throw out there is that potatoes have really gotten a bum rap lately... kind of like what eggs went through in years past. While, obviously, if you always eat your potatoes deep fried or mashed with a stick of butter, they are not a very good meal choice. By themselves, however, potatoes are a healthy and delicious addition to any meal. They're definitely a better choice than pasta. In fact, serving for serving, I would even argue that potatoes are a better choice than brown rice! I love this nutrition data site and suggest you go compare the nutrition data of potatoes with your other side dish options if you have been hesitant to eat potatoes lately.
This dish is nice because you get all the flavor and "pow!" of a sinful side dish while actually being quite restrained. You can use any kind of potato. In this case, I used little red potatoes, but you can use russets or Yukon Gold, or... whatever. I like to leave the skin on. I like the way it looks; I like the way it tastes. Plus the skin has a large percentage of the fiber and nutrients of the potato. Slice the potatoes thinly, about 1/8 of an inch. I use a mandolin, but you can slice them the old fashioned way or with a food processor.
Be sure you've started your oven to preheating to 425° F. Spray a baking sheet with cooking oil. Place your potato slices in a bowl and toss with a little bit of melted butter. You only need a tiny bit! The potatoes just need to have a little bit of a sheen from the butter (or oil, if you prefer).Lay the potato slices out on the baking sheet as close to one layer thick as possible. In this case, I had plenty of room on my baking sheet. When things are a little tighter, I use a shingle pattern to maximize my use of space. Sprinkle the slices with a little salt (go easy, Parmesan is already pretty salty), some pepper, a little grated Parmesan cheese (I use the stuff in the green can for this application), and a little bit of paprika.
Bake until the potatoes are cooked through and golden. Depending on how many you are baking, it could be anywhere from 20-40 minutes. For best results, serve immediately!Parmesan Potatoes
Yield: 4 side servings
3-4 cups of sliced (1/8 inch thick) potatoes
1 TBS melted butter
3 TBS grated Parmesan cheese
dash paprika
salt & pepper to taste
Toss the potatoes in the melted butter. Lay out on a greased baking sheet as close to one layer thick as possible. Sprinkle with cheese and paprika. Salt and pepper to taste. Bake in a 425° F oven until the potatoes are cooked through and golden. Baking time will depend on how thickly you stack your potatoes, but start checking after 20 minutes. Serve immediately.
Labels:
Favorites,
Quick & Easy Sides,
Sides
Tuesday, May 31, 2011
Spinach and Great Northern Beans
Yield: 2 generous side servings
1 15 oz can great northern beans, drained and rinsed
8 oz fresh spinach
1 clove garlic, minced
1 TBS olive oil
salt and pepper to taste
Heat a saute pan over medium high heat. Add the oil and the garlic, letting them sizzle together for a minute or two. Add the spinach and toss occasionally so that it cooks evenly. When the spinach is mostly wilted, add the beans and cook for just so that the beans are heated through. Remove from the heat, add salt and pepper to taste, and serve. Be careful not to saute the beans too long or they will dry out and be less appealing.
Labels:
Quick & Easy Sides,
Sides
Saturday, October 16, 2010
Sauteed Spinach
There is so much flavor in this dish you will be amazed it is so full of vitamins and nutrients. I actually would recommend caramelizing the shallots (or onions) more than is shown in this picture. I was in a little bit of a hurry when I made the dish for this picture (although it still tasted great). The more caramelized the onions, the more flavor the end result will have.
While this dish takes around twenty minutes total because of the caramelization, it is very low maintenance. Start the onions and go work on other dinner preparations before taking one minute to finish the spinach dish at the last second.
Sauteed Spinach
Yield: 4-6 servings
2 TBS olive oil
1 TBS minced garlic
½ cup sliced shallots
½ tsp salt
¼ tsp cracked pepper
8-10 ounces fresh spinach
2 tsp lemon juice
Saute the garlic and shallots in the olive oil over medium high heat until they just start to brown. Add the salt and pepper. Reduce the heat and let the shallots caramelize over medium-low heat for 10-20 minutes, until they are nicely browned and sweet. Increase the heat to medium and add the spinach and lemon, tossing until the spinach is just wilted. Add more salt to taste, as needed.
Labels:
Quick & Easy Sides,
Sides
Thursday, June 3, 2010
Crumby Cauliflower
First of all, I want to make sure that you saw correctly that this is crum-BY cauliflower and not crum-MY cauliflower. Crummy cauliflower would - by definition - be no good, and that's not what I'm about here... at least I hope not! This cauliflower is good. It definitely does not fall into the crummy category. And it's a quick, easy side dish that can add some zing to your dinner.Back when I was just out of high school, being a silly young girl, I went and fell in love with a guy who lived in another state far, far away. Of course, that meant that I had to follow him to said state and set up playing house. While I could bore you with the details of my poor decision making skills at the tender age of 18, that's really not important here. The reason I bring it up is that I suddenly started doing a lot of cooking. For the entire time I was with this guy, it was not unusual for me to cook three meals a day. At the time, I wasn't exactly a bad cook, I was just without experience, and side dishes is where I was lacking creativity the most.
When cooking back then, I would often spend most of my time on the main course and the sides were almost an after-thought, usually a boiled or steamed vegetable and a boxed side of pasta or rice. Looking back, I don't think I realized how easy it can be to make really fabulous side dishes that can rival the best main course. This recipe is a perfect example of a simple side dish that really carries its own weight in the meal.
And here's where the crumbs come in. See that golden nugget there in the middle? There's gold in them thar hills! That nugget there is pure bliss. It's salty and slightly crunchy, buttery and chewy. The nuggets go perfectly with a vegetable that is somewhat creamy inside. Ooooo! Pavlovian response. I swear, one of these days my computer's going to short out. Must. Stop. drooling while writing posts.
So, here's how easy it is: melt a little butter over medium heat in a saute pan that has a tight-fitting lid. Add the cut up cauliflower, cover, and shake across the burner periodically to toss and turn the pieces. Be careful not to toss it too often or you won't end up with the nice, tasty caramelization. Continue cooking, about 5-8 minutes, until the cauliflower is tender through and has a nice golden crust on it. While the cauliflower is cooking, grate a small handful of cheese. I used Gruyere here, but Parmesan would work well, too. In a small bowl or on a paper towel, toss the cheese with a few tablespoons of bread crumbs. I've used both regular bread crumbs and panko. Both are delicious. Throw in a little dried parsley and toss to mix.
When the cauliflower is about done, remove the lid and throw in the cheese mixture. Stir and then continue to cook over medium heat until the cheese mixture is cooked through and nicely golden. Some of it will stick to the cauliflower, some will stick to itself and form nuggets. It's a win-win, I tell you. Add salt and pepper to taste and serve!
Labels:
Quick & Easy Sides,
Sides
Tuesday, September 8, 2009
Creamy Pesto Pasta
I love this dish, not only because it is sooooooo quick to make but because it is sooooooo delicious. Tonight was one of those nights. But just because I can't spend a lot of time making a meal doesn't mean that I don't' want to eat well. Tonight, it was steaks with sauteed mushrooms. With the steaks, I made steamed squash and broccoli with a browned butter drizzle and this pasta.If you've been one of those folks that reaches for pasta in a box on those quick meal nights, give this a try. I think it's actually faster than any box could hope to be. The trick is to always have pesto in your freezer. I make mine in the summer when the basil is plentiful and then freeze it in ice cube trays. I pop them out of the trays and store in zip top bags. Ready to go at a moment's notice!
Boil your pasta and drain. In this case, I used the remnants from two bags. If you look closely, we had small shells and some large alphabet pasta from Trader Joe's. Thaw the pesto in a small dish in the microwave. For ice cube sized hunks, it only takes a few seconds (literally! start with 15 seconds). Pour the pesto over the pasta, add a good splash of cream (heavy or light, whatever you've got), and a nice shake of Parmesan cheese. For this recipe, I just shake it right out of the green can. On nights like these, I can't be bothered to grate fresh. That's it! Stir it around and then eat it up. Just make sure you make enough. This is one of those dishes that when I go to do the dishes, I have to have a few more spoonfuls. Sssshhhhh. Don't tell!
Labels:
Quick & Easy Sides,
Sides
Friday, August 21, 2009
Steamed Mixed Veggies

I almost didn't post this. I thought that maybe it was too simple. I mean its only vegetables, butter, and sesame seeds. Well, and some salt and pepper. But they don't really count as ingredients, do they? The problem is, I just couldn't not post it. Look at that picture! The colors! The shapes! It's like happiness on a plate. Every time I look at this picture, I want to eat some more of this dish. When you make it, be sure you make enough for seconds; you're going to want them.
Obviously, you could use any combination of vegetables you want. I chose these because of the color combination and because they just seemed like they'd go together. No, I'm lying. I was cleaning out the refrigerator and this is what was left. I had a bunch of small bits of veggies; nothing was enough to cook on its own, so, by default, I cooked them together. I love serendipity.
Again, I took advantage of those steaming bags I mentioned in my post on Pad See Ew. I have really come to love these things, especially when I am preparing a dish where certain parts have to be pre-cooked. In this case it was the carrots (cut fairly thinly) and broccoli that needed a head start on the steaming. I placed them in the steaming bag and zapped them in the microwave for about two and a half minutes.
In a large skillet, I melted two tablespoons of butter (not oil, I was going for the browned butter thing here). When the butter was nice and bubbly, I added the red bell pepper and sugar snap peas. Don't forget the pull the strings off those peas before you cook them. It's really hard to pick them off at the table without losing some sense of dignity. Add the steamed broccoli and carrots and toss occasionally over medium-high heat until the vegetables are all just tender and have some nice caramelization on them in places. Add salt and pepper to taste and a pinch of sesame seeds. That's it! Sit back and enjoy the fruits of your labor... oh wait, that may have been too easy to involve any labor! Even better.
Labels:
Quick & Easy Sides,
Sides
Saturday, July 18, 2009
Sauteed Summer Squash
When summer comes and you are inundated in summer squash, this is a life-saver recipe. It's also good any old time you want to indulge in some tasty, flavorful vegetables. This is another one of those quick and easy side dishes of which I am such a fan. Usually, when I am preparing a meal, I choose one of the dishes to focus my main energies on. For instance, if I am making an involved main course, I'll be sure that the side dishes are all simple and easy like this one. I also often make this dish as a great lunch. You can even change it up to suit your needs. Sometimes I add pieces of chicken, maybe some mushrooms. Hey, it's good with onions, too. But, to be honest, I think I like it best in its most simple format.The first step is to slice up some summer squash. Yellow crookneck is my favorite, but you can also use small zucchinis or a mix. I slice them about 3/8 inch thick.
This is one of those dishes that involves no measuring. Slice up as much squash as you think you need to feed everyone. Mince up a few garlic cloves, however much you want based on how well you like garlic. If you're trying to keep the vampires away, use a bunch. If, on the other hand, you are planning a romantic evening with your sweetie, maybe use a little less.
Get your saute pan heating over medium-high heat with some butter. You can use olive oil, but I really like the flavor that browned butter imparts to this dish. Don't use too much. You don't want the butter flavor to overpower the flavor of the squash. Saute over relatively high heat, stirring occasionally to keep things from getting too dark. You do want the squash to caramelize a bit, so let it sit as long as you can before stirring. You may need to turn the heat down if it is blackening too quickly. There is no need to cook the squash completely through, either. If you cook it too much, it just ends up getting all limp and floppy, which - in my book - just isn't that appealing. Don't forget to add some salt and pepper for seasoning. Right when it's about done, splash a little (again, not too much) white wine to deglaze the pan. Remove from the heat and serve hot.
Labels:
Quick & Easy Sides,
Sides
Wednesday, July 1, 2009
Roasted Cauliflower
For years I ignored cauliflower. I'm not sure why. Perhaps it's because I don't particularly care for it raw and I subconsciously decided that meant I didn't want to eat it cooked. But that's some really faulty logic because there are all kinds of vegetables that I love cooked and am not a huge fan of raw.Well, we can't always be rational, now can we?
About a year ago, my husband and I ate at an Afghani restaurant in San Diego. I had the kofta challow (a middle eastern meatball dish which I will post in the very near future) and it was served with cauliflower. I loved the cauliflower. Really, really loved it. Every time I make kofta challow now, it means that I have to buy a head of the stuff.
But sometimes, cauliflower heads are huge. Gargantuan huge. So, I found myself the other day. What do I do with the left over? Roasting vegetables tends to bring out their best, so I thought I'd give it a go.
You. Must. Try. This.
A. S. A. P.
The cauliflower gets tender and creamy and has the most wonderful flavor. The browned bits are absolute perfection. And - unlike some vegetables - they roast up very fast.
It almost seems silly to post such a simple thing, but if you're like me, maybe you just never thought about roasting cauliflower... and you really should.
Roasted Cauliflower
Preheat the oven to 425 degrees F. Line a baking sheet with parchment or foil. Lightly spritz with cooking spray. Cut the cauliflower into florets. Drizzle with olive oil and sprinkle with kosher or sea salt and fresh ground pepper. Make sure that the pieces of cauliflower are well spread out on the sheet. Place in the oven and roast until it becomes tender and nicely browned, about 20-30 minutes.
Labels:
Quick & Easy Sides,
Sides
Thursday, May 7, 2009
Glazed Carrots
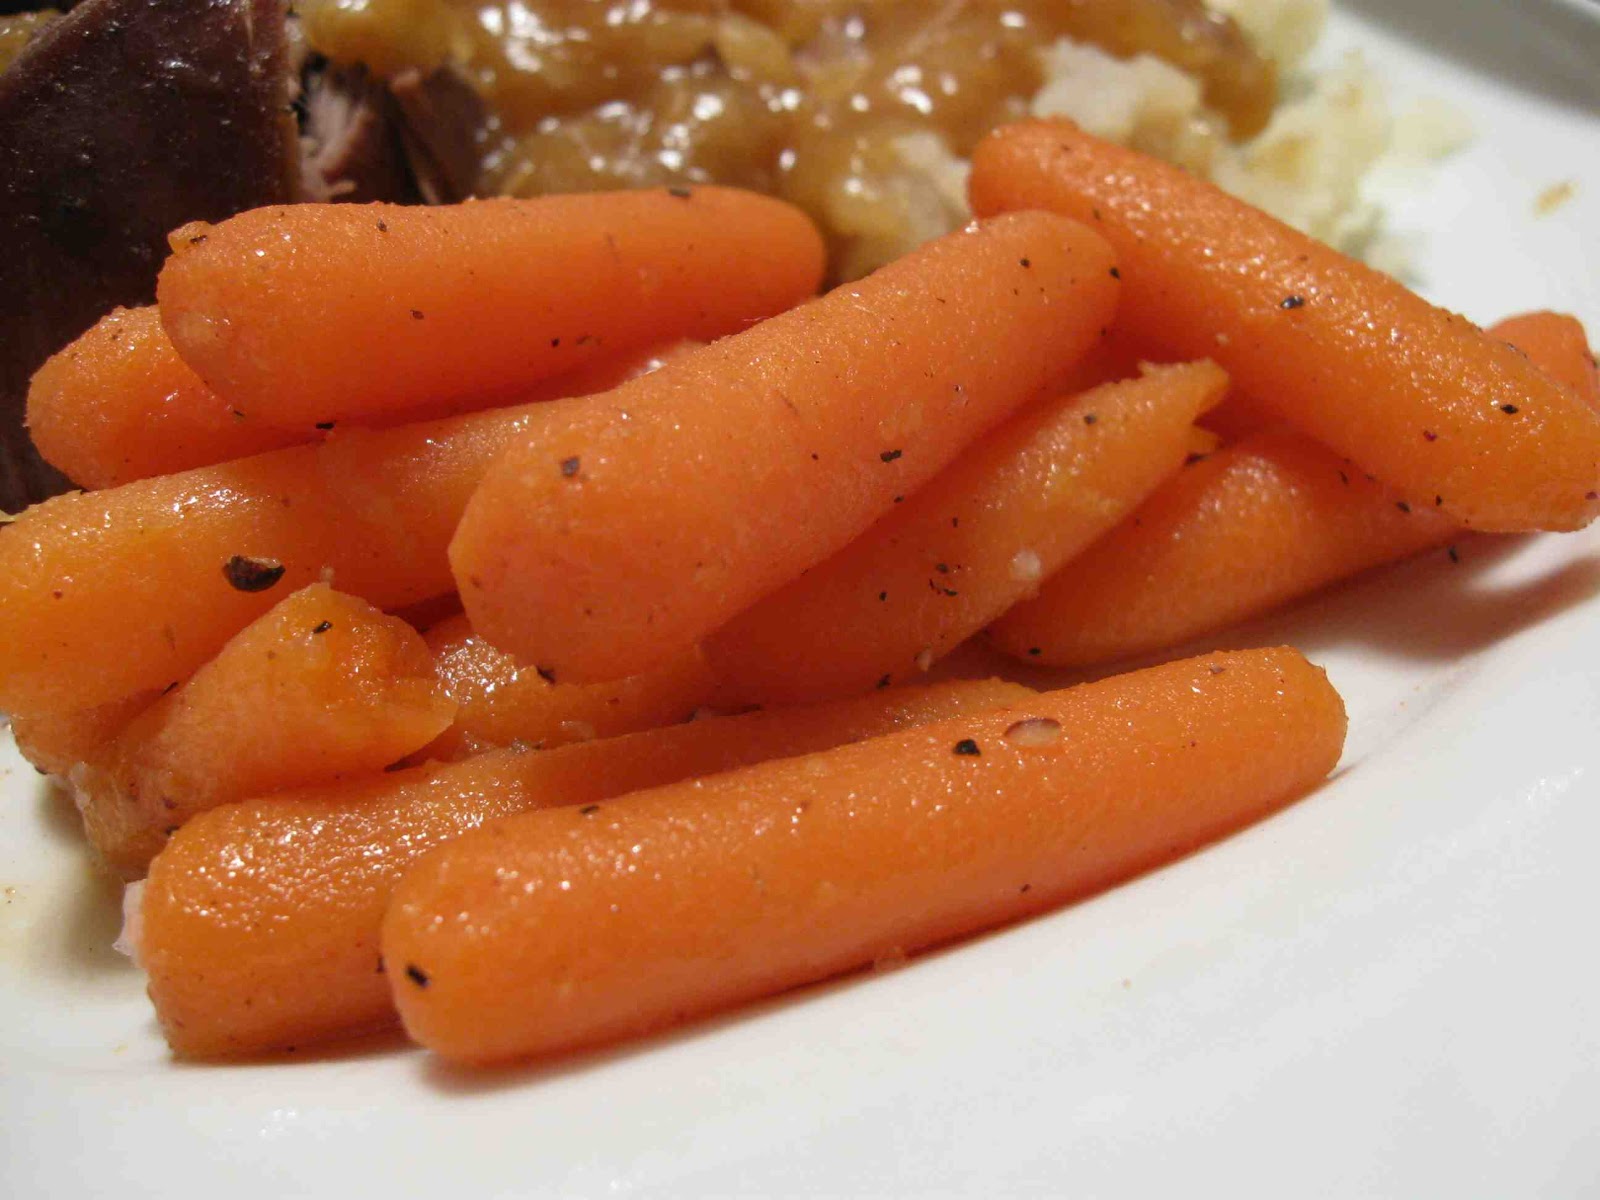
I made a pot roast last night and one of my favorite companions for roast is glazed carrots. They are super easy and fast to make (especially if you use the baby cut carrots in a bag) and taste delicious. For some reason, I think that carrots have fallen by the wayside slightly as a cooked vegetable and this is a sad state of affairs. Give these carrots a try and you will want to work carrots into your menu on a regular basis.
I have made the recipe to feed four, but to be honest, when I make it, I usually just throw the ingredients in to whatever amount of carrots I want. As long as you get the proportions roughly close, these carrots will turn out great.
Glazed Carrots
Yield: 4 side servings
1 small bag (16 oz) of baby cut carrots OR 1 lb peeled carrots sliced into coins
1 TBS butter
2 TBS brown sugar
1 TBS lemon juice
pinch of lemon zest
pinch of ground nutmeg
salt & pepper to taste
Boil carrots in water until they are fork tender. Drain and add remaining ingredients immediately, while carrots are still hot (you want to butter and sugar to melt together). Stir to coat. Serve while still hot.
Labels:
Quick & Easy Sides,
Sides
Sunday, April 26, 2009
Italian Green Beans
I really like vegetables just as God made them (OK, so God didn't make them with butter, but, you get the idea). But sometimes, I like to give them a little dressing up. This recipe is quick and easy and changes the ordinary green bean into a very tasty side dish.Italian Green Beans
Yield: 3-4 side servings
2-3 cups pared, cut green beans
1/2 cup diced onion
2 garlic cloves, minced
1 TBS olive oil
2 tsp oregano
1 tsp basil
salt & pepper to taste
1 15oz cans diced tomatoes with juice
Steam green beans in a sauce pan until fork tender. Meanwhile, saute onion, garlic, salt/pepper and herbs in the olive oil. Add the tomatoes and cook to reduce. Reduce until sauce is nice and thick. When green beans are done, add to the tomato mixture. Stir to coat and serve.
Labels:
Quick & Easy Sides,
Sides
Wednesday, April 8, 2009
Fresh Creamed Corn
While this dish is absolutely at its best in the summer when you can make it with freshly cut from the cob corn, it's pretty darn good with frozen corn too. When you make it with the fresh corn, be sure not to cook it much after adding the cream; the best part is its fresh, crispy texture. I don't usually have fresh red bell peppers on hand, so when they are plentiful from the garden or on sale at the market, I simply cut them up and freeze them loosely tossed on a parchment lined sheet. Once they're frozen, I break them apart and transfer them to a zip top bag. It's by far the best way to keep peppers on hand.If you really want to make a creamed corn that wows your socks off, add a teaspoon of cumin before serving. I'm not sure what it is about the combination of cumin and corn, but it is for sure a match made in heaven. The picture shown here is the cumin variety, which causes the sauce to have a slightly darker color. When you don't add the cumin, the cream has a nice pinkish hue from the red peppers; very pretty!
Fresh Creamed Corn
Yield: 2 cups
2 cups fresh or frozen corn kernels
1 TBS butter
1/4 cup diced onion or shallot
1/4 cup diced red bell pepper
1 TBS sugar
1/2 tsp salt
dash pepper
1/3 cup light cream (like half-and-half)
Saute onion in butter in a sauce pan until translucent. Add pepper, saute 1 minute.
If using freshly cut corn from the cob: Add fresh corn and remainder of ingredients. Stir thoroughly. Cook only until heated through, 2-3 minutes.
If using frozen corn from a bag: Add frozen corn and remaining ingredients to pan. Stir to mix. Bring to a boil, reduce heat and simmer covered for 6-10 minutes.
Labels:
Quick & Easy Sides,
Sides
Subscribe to:
Posts (Atom)