I am now blogging new recipes on my farm website.

Cooking from Scratch is on facebook! Click here to check it out!

Sunday, October 9, 2011

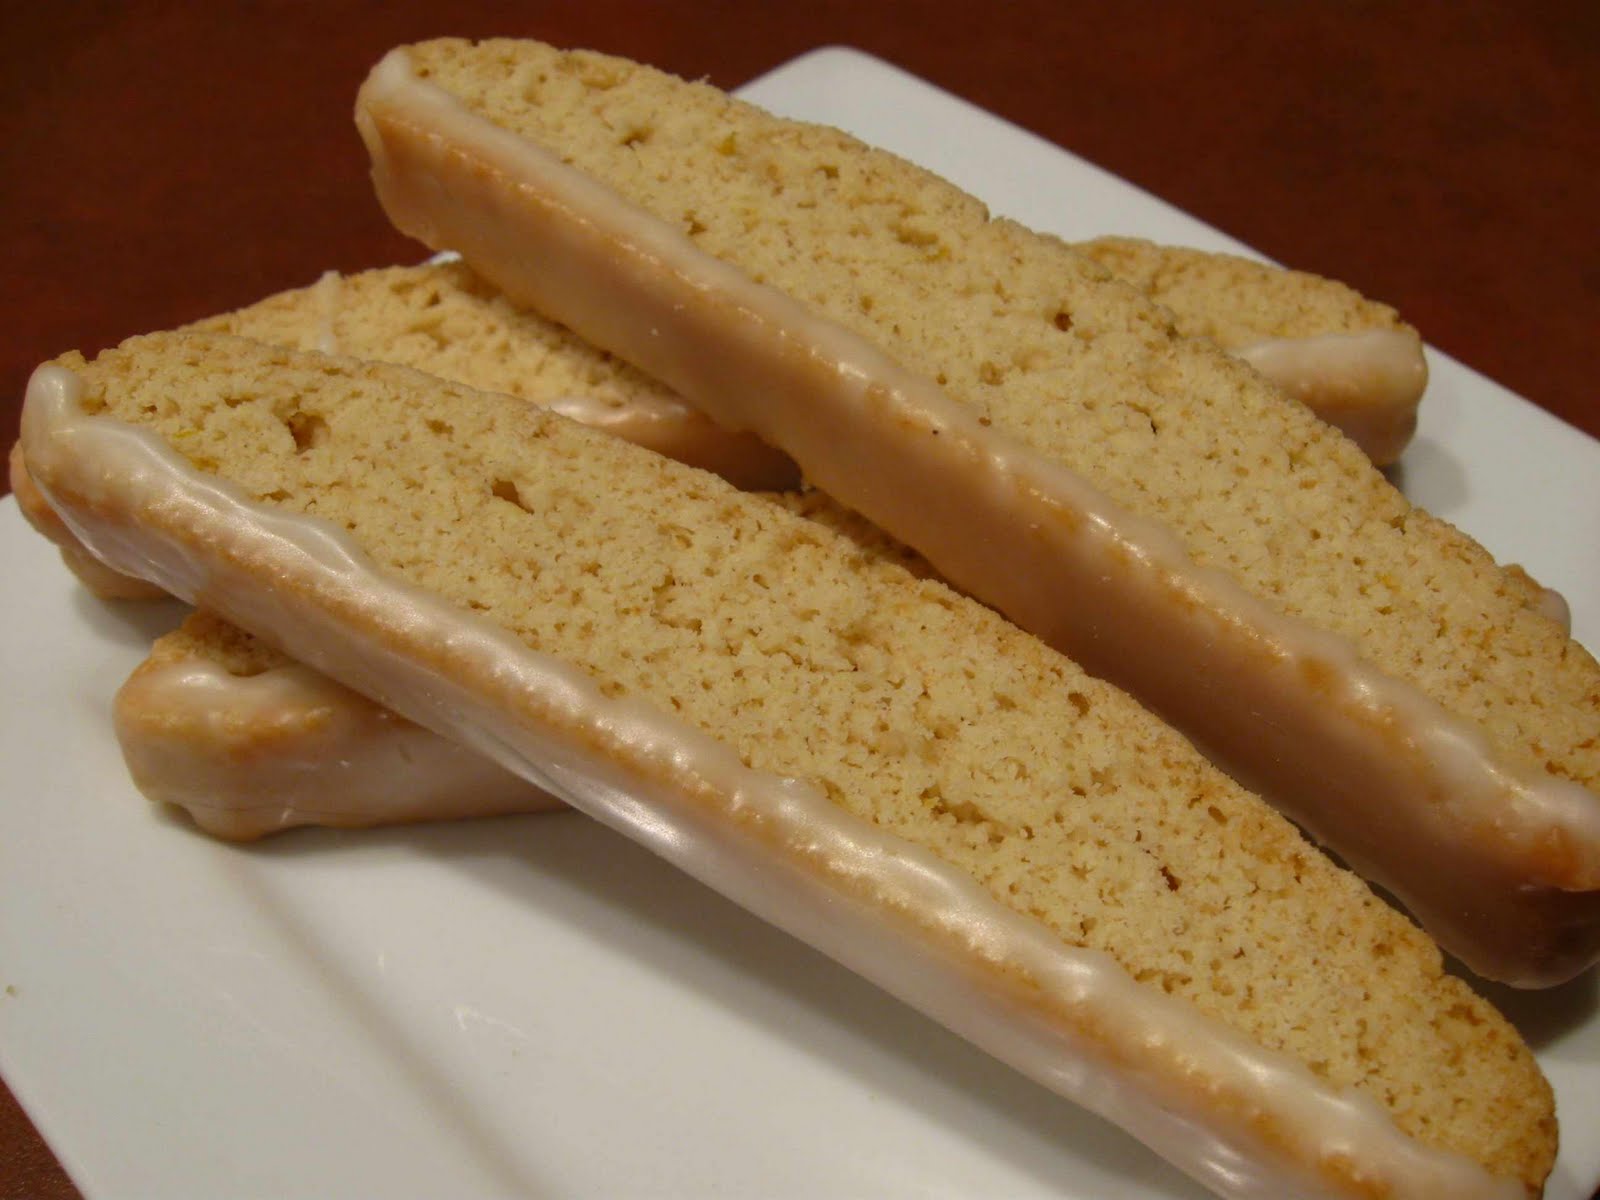
Lemon Biscotti

I just love these little cookies. They're lemony and have a nice bite. They have a different texture than a lot of cookies. They're not crispy in the same way a lot of cookies are, but then again, they also have half the calories and a third of the fat content of your typical cookie (like chocolate chip or snickerdoodle).

Traditionally, biscotti do not have any fat in them. No butter, no shortening, no oil. However, I found those cookies to have a somewhat less than satisfying texture, so I started experimenting. What I came up with is a nice in between, I think. There's enough butter in them to have a nice flavor and a little bit of snap, but not so much as to be overwhelming. I think you'll really like them. I sure do.

While these twice baked little snacks involve a little more effort than a normal cookie, they're still pretty straight forward. And they are so darn cute!

You start by mixing together all of the cookie ingredients. I use my stand mixer, but the dough is soft enough, you could probably mix them fairly easily by hand. Turn the dough out onto the counter and roll into a log. Divide the dough in half and shape each half into a eight to ten inch long roll. Press each log flat.

These will rise a bit, so you want to start them off fairly thin. Shoot for about a half inch thickness.

Bake the cookies in a 350° F oven for about 40 minutes. Be sure the cookies have started to brown before pulling them out. If you pull them out before they brown a little, the inside often has an undercooked flavor that won't go away even after the second baking.

Remove from the oven and carefully transfer them to a cooling rack. Reduce the heat in the oven to 325° F. Carefully slice the loaves across at half inch intervals using a serrated blade. You should end up with 13-15 slices plus two small ends. I eat the ends at this point. It's the cook's prerogative.


Place an oven safe rack in the cookie sheet and lay the slices wide side down; spread them out as much as possible. Bake for 10 minutes. Flip the cookies over and bake another 10 minutes. Let them cool completely before icing.

Mix together the icing ingredients until they are smooth. Use enough milk to obtain a consistency that allows the icing to pour easily. Place in a flat bottomed dish that allows you to easily dip the bottom of the biscotti into the icing.

Let the excess icing drip off and then lay them upside down on a cookie sheet to dry. Allow at least an hour for drying.

These biscotti keep well in a plastic bag or other air tight container for at least a week. They are very attractive if wrapped in small bags and given as gifts.


Lemon Biscotti
Yield: 25-30 biscotti

3 cups flour
1 cup sugar
2 tsp baking powder
1 1/2 tsp lemon zest
2 TBS fresh lemon juice
1/2 cup butter, softened
3 eggs

For the icing:
1 1/2 cup powdered sugar
1 TBS fresh lemon juice
1/2 tsp lemon zest
2-4 TBS milk

Preheat the oven to 350° F. Mix the flour, sugar, baking powder, and lemon zest together. Add the lemon juice, eggs, and butter and beat until well mixed. Turn out on a counter and form into a log about one foot long. Divide into two logs. Shape each log until they are about 8-10 inches long. Press until they are each about one half inch thick. Place onto a parchment lined baking sheet. Bake until they start to turn golden, about 40 minutes. Cool for 10 minutes on a wire rack.
Reduce the oven temperature to 325° F. Using a serrated knife, slice into half inch wide cookies. Place the wire rack onto the cookie sheet and lay the slices, wide side down, on the rack, spread out as much as possible. Bake for 10 minutes, flip, and then for ten minutes more. Cool completely before icing.

Mix the icing ingredients together. Use enough milk to make a fairly thin icing; the icing should pour easily. Place in a flat bottom dish or bowl and dip the bottom of each biscotti into the icing. Let drain slightly and then place upside down on a baking sheet to dry. Let dry at least one hour. Store in an air tight container up to one week.

Wednesday, October 5, 2011

Cottage Cheese

I received an email last week asking about dry curd cottage cheese and whether my Super Easy Cheese would be similar. Unfortunately, they are not the same. The good news is that even though it is often hard to find dry curd cottage cheese at the market, it is fairly easy to make at home. The recipe I am about to show you will make regular cottage cheese or dry curd cottage cheese; the main difference is whether you add additional cream at the end.

I think the only hang up with this cheese is the length of time it must sit. It requires a packet of starter (available from cheese supply companies) but no rennet. As such, it must develop curds solely through bacterial action. That takes time... almost a full day. Fortunately, the actual work time in this cheese is fairly minimal. Here's how it goes:

First, pour a gallon of milk into a heavy duty, nonreactive pot. You can use any type of cow's milk from skim to whole. I used 1% for a nice low fat product. Heat the milk to 72° F. Because most of us have to use store bought, homogenized milk, it helps to add a little calcium chloride. Homogenization makes it a little harder for the milk to form firm curds and the calcium chloride helps to mitigate this issue. Add the calcium chloride mixed with a little water after the milk has reached this target temperature.

Add the starter packet, stir, and then cover. Set aside to let the milk set for about a day. Shoot for a room temperature around 70-74° F. After a day, the milk should have set and show a clean break. A clean break is where when you cut the milk, you can still see the cut when the knife is removed.

Cut the curd into roughly 1/4 inch pieces. Cut one way and then at an angle the other way. Don't forget that you need to cut the curds in pieces from the bottom of the pot up to the top as well. Let the cut curds sit for 15 minutes. See how you can clearly see the break in the curd in this picture? If your mixture does not do this, it probably needs to set a little longer.

Heat the curd gently, increasing the temperature slowly to 100° F and then hold at this temperature for 10 minutes. Stir periodically. If some of your curds seem a little too large, don't worry, they'll break down as you heat and stir them. Increase the temperature to 112° F slowly (about a degree per minute). Once at 112° F, hold this temperature as best you can, stirring regularly until the curds are firm. The whey will be completely separated from the curds long before they are firm. Go here if you need a picture of what the whey looks like when separated from the curds. This last firming step can vary in time, but be prepared for anywhere from 30-60 minutes.

You can test curd firmness by squishing one between your fingers. You want to have a little resistance, not pudding. When the curds are firm enough, drain them into a cheesecloth lined colander. Let drain. Meanwhile, prepare a bowl of cold water in which to wash the curds. Dip the curd filled cheesecloth into the cold water. This step has two purposes. First, it chills down the curds, firming them and it also rinses the curd to reduce their sour flavor. If you like more sour curds, only dip them the once. If you prefer a more mild cottage cheese, dip the curds a few times, changing the water between dips. Remove the curds from the water bath and let them drain for about five minutes.

Dump the drained curds into a bowl. Use a spoon to stir the salt into them, breaking up any clumps that may have formed. At this point, you have dry curd cottage cheese. If you prefer the more traditional style, simply mix in a little cream.

Curds may be stored in an airtight container in the refrigerator for up to one week. Eat plain or with fruit, or use in cooking. This is a versatile, flavorful cheese!

NOTE: You may find that you have a hard time keeping the milk at the exact temperatures specified. Don't fret. In my experience, you do the best you can and it works out fine. Just remember to check the temperature of the milk in the middle of the pot (versus the edge) and stir frequently to avoid hot spots.


Cottage Cheese
Yield: 1 1/2 pounds
Adapted from Ricki Carroll's Home Cheese Making

1 gallon milk (skim, 1%, 2%, or whole)
1/8 tsp calcium chloride in 1/4 cup distilled water (optional)
1 packet direct-set mesophilic starter
1 tsp kosher salt (or to taste)
cream (optional)

Heat the milk in a heavy pan to 72° F. Stir in the calcium chloride mixture, if using. Then add the starter and stir. Cover and let sit in a 70-74° F room for 18-24 hours.

At this point, the curds should have set and the milk should show a clean break. Cut the curd into 1/4 inch cubes. Let sit for 15 minutes and then begin heating gently up to 100° F. Hold at 100° F for ten minutes, stirring occasionally. Increase the heat slightly and heat slowly (aim for 1 degree per minute) until the curd reaches 112° F.

Hold the milk at 112° F, stirring regularly, until the whey separates from the curd completely and the curds become firm. The whey will separate long before the curds are firm. Times may vary widely depending on your milk; be prepared for 30-60 minutes. Test the curd's firmness by squeezing one between your fingers; it should have some resistance and not squish like pudding.

Once the curds are firm enough, drain them in a cheesecloth lined colander. Fill a bowl with cold water and rinse the curds. If you prefer a milder flavored cheese, rinse 2-3 times, changing water between each dip. Drain the curds for five minutes and then pour into a large bowl. Salt the curds, mixing to evenly distribute. At this point, you have dry curd cottage cheese. If you prefer and more traditional style, add cream to taste. Cheese will keep in a refrigerated air tight container for one week.

Saturday, October 1, 2011

Parmesan Potatoes

Behold the most delicious potatoes ever! My mom made these for our family while we were growing up, and they have always been one of my favorite dishes. My only complaint is that she would stack the potatoes too much. As you might imagine, the best part of these potatoes is that golden, delicious crust on the outside of each slice. If you stack the potatoes too much, then only a small percentage of the potatoes have that crust. That state of being is an unfortunate and unnecessary occurrence. You may need to use a larger pan, or even two pans, so that the potatoes are spread as close to one layer thick as possible, but it is really, really worth it.

The other thing I want to throw out there is that potatoes have really gotten a bum rap lately... kind of like what eggs went through in years past. While, obviously, if you always eat your potatoes deep fried or mashed with a stick of butter, they are not a very good meal choice. By themselves, however, potatoes are a healthy and delicious addition to any meal. They're definitely a better choice than pasta. In fact, serving for serving, I would even argue that potatoes are a better choice than brown rice! I love this nutrition data site and suggest you go compare the nutrition data of potatoes with your other side dish options if you have been hesitant to eat potatoes lately.

This dish is nice because you get all the flavor and "pow!" of a sinful side dish while actually being quite restrained. You can use any kind of potato. In this case, I used little red potatoes, but you can use russets or Yukon Gold, or... whatever. I like to leave the skin on. I like the way it looks; I like the way it tastes. Plus the skin has a large percentage of the fiber and nutrients of the potato. Slice the potatoes thinly, about 1/8 of an inch. I use a mandolin, but you can slice them the old fashioned way or with a food processor.

Be sure you've started your oven to preheating to 425° F. Spray a baking sheet with cooking oil. Place your potato slices in a bowl and toss with a little bit of melted butter. You only need a tiny bit! The potatoes just need to have a little bit of a sheen from the butter (or oil, if you prefer).

Lay the potato slices out on the baking sheet as close to one layer thick as possible. In this case, I had plenty of room on my baking sheet. When things are a little tighter, I use a shingle pattern to maximize my use of space. Sprinkle the slices with a little salt (go easy, Parmesan is already pretty salty), some pepper, a little grated Parmesan cheese (I use the stuff in the green can for this application), and a little bit of paprika.

Bake until the potatoes are cooked through and golden. Depending on how many you are baking, it could be anywhere from 20-40 minutes. For best results, serve immediately!

Parmesan Potatoes
Yield: 4 side servings

3-4 cups of sliced (1/8 inch thick) potatoes
1 TBS melted butter
3 TBS grated Parmesan cheese
dash paprika
salt & pepper to taste

Toss the potatoes in the melted butter. Lay out on a greased baking sheet as close to one layer thick as possible. Sprinkle with cheese and paprika. Salt and pepper to taste. Bake in a 425° F oven until the potatoes are cooked through and golden. Baking time will depend on how thickly you stack your potatoes, but start checking after 20 minutes. Serve immediately.

Monday, September 26, 2011

A Strange, Strange Dream

So, I had a very strange dream last night... it wasn't really a nightmare, but it was a little stressful. It actually woke me up!

This last month has been a whirlwind of travel. First I went home to Washington to visit family and friends for a week. Then my husband and I went on our first real vacation in the last five years. We went on a lovely cruise up the New England coast. For the most part, it was a great time. It was a nine day trip. Unfortunately, on day six, we both woke up and went, "Ugh." Apparently, hanging out in a confined space with 2,400 other individuals from all over the globe was more than our immune systems could handle. Fortunately, we still managed to have some fun.

Anyway, we got home Saturday afternoon. Sunday, I slept a lot, trying to kick this stupid cold's you-know-what. I didn't even go out to get any groceries, even though it was some serious Mother Hubbard's cupboard around here. Then last night, I had this strange dream.

Like most dreams, some of the details are fuzzy. As you might imagine, the "why" is a little mysterious, but in this dream, I was tasked with preparing a three dish "meal" in a limited amount of time. While I had two other dishes in the bag, for some reason, I felt compelled to make eclairs.

Perhaps it was because I partook of a substandard eclair on our trip. In Boston, we ate in the North End Italian district and stopped in a pastry shop afterwards where I purchased an eclair that was so unsatisfying, I threw most of it away. Now, anyone that knows me, knows that this is a rare event indeed. Actually, come to think of it, I also had a very substandard profiterole on the cruise ship. I think these two disturbing events may have prompted my dream... that and the fact that there was no heavy whipping cream in my refrigerator last night.

So, here I am in my dream, attempting to make eclairs when I realize that I do not have enough time to make pastry cream, let it cool, and pipe it into said pastries. Being the resourceful gal I am, I decide to go for making whipped cream filled profiteroles, but - I didn't have any whipping cream! I became so distraught in my dream that I actually woke up!

I lay awake for some time, trying to calm myself enough to fall back asleep, which I finally did. However, when I woke up this morning, the first thing I felt compelled to do was go grocery shopping! Apparently, I cannot rest (literally) until there is at least a pint of whipping cream in my fridge awaiting the call of duty.

Sunday, September 18, 2011

Croissant Dough Gems

These little gems were devised out of necessity while I was making all those croissants. What was I to do with those dough scraps I cut off the ends? I certainly couldn't throw them away! I mean really, duh! So, I thought that I might toss them in some cinnamon and sugar and see what happened.

Wow! I mean, double, triple, holy fantastic, wow. Wow, like, I may just make batches of this croissant dough to make these, wow. I made these twice. The first time I had the proportions more right than the second. The first time, I had more sugar than butter and the end result was an almost crunchy, caramelized crust on the outside of each dough ball. The second time, I must have used less sugar and, while they were still good, they ended up a bit too rich and did not have quite the tasty crunch from the sugar. Moral of the story? Use more sugar and less butter.

Snip your left over dough into one inch pieces using a pair of kitchen shears. Mix together a small amount of soft butter with a lot of sugar and cinnamon. Obviously, how much you need would depend on how many scraps you have. I think a ratio of butter to sugar of 1:3 is probably good. Add cinnamon based on your taste preferences. I would err on the side of too little... cinnamon is pretty strong and a little goes a long way. Add the butter mixture to the dough bits and stir to coat.

Spray a shallow baking dish with cooking oil. You want the dough bits to only be one layer thick, so plan accordingly. Let the dish sit in a warm place for 30 minutes to let the dough rise slightly. Place in a preheated 425° F oven. Bake until very golden, maybe 20-30 minutes. Let cool slightly before eating. That sugar will be hot!

Friday, September 16, 2011

Oiling Utensils

Like most people these days, I use a lot of wooden utensils in the kitchen. I love them for a variety of reasons, not the least of which is they are relatively cheap, don't mess up my non-stick pans, and are fairly durable. I even put them in the dishwasher with great success. I do this mainly because wood does tend to absorb stuff and I like to think that my utensils are free of any bacteria and food odors.

A key step in improving the life and utility of your wooden utensils (and cutting boards) is to periodically oil them with mineral oil. As you can see in the picture above, there is a big difference between that gnarly, feathery fork like thing and the freshly oiled spoon behind it. And after oiling my cutting boards, it never ceases to amaze me how much easier they are to clean (I hand wash them). I love to see the water bead up on the surface! Just don't forget to be sure you use a food safe mineral oil. I got mine at a kitchen supply store for less than five bucks. It's lasted me years and there is still plenty left.

I simply use a pastry brush to apply the oil and then use a clean rag to wipe off the excess. Suddenly, my wooden utensils look brand, spanking new!

Friday, August 26, 2011

Croissants - Mastered!

Aaaacckkk! I just went to make a batch of these and realized, the hard way, that there was a typo in my recipe. I have made the adjustment below so it is now correct; I had an extra cup of water written into the recipe. I'm so sorry if anyone ran into problems because of this!


I am so excited to share this with you today. I absolutely love it when I finally get something right. After my initial flops and then the tasty, but not quite the real thing attempt, it just makes me giddy to get it right. You should have seen me crouched in front of the oven the other night giggling with excitement as I watched these bad boys bake.

I've made three batches of these things in the last four days. The first batch was good, but wasn't folded enough (I'll talk about that later). The last two batches were a controlled experiment where I only changed the type of yeast (and I'll talk about that later too). All in all, after these three batches, I feel very confident that I could whip out croissants with success whenever I want. I like that feeling! I like it a lot. And now I am excited to share it with you so that you can jump right to that success part without having to eat croissants for breakfast, lunch, and dinner for four days straight.

Don't worry, it's a sacrifice I am only too happy to make for you! .:burp:.

The first step is making the dough. There is absolutely nothing strange about making the dough. It's like making any other basic bread dough. I like to use my stand mixer, but it's a dough that could easily be made by hand. Knead for about five minutes and then place in an oiled, covered bowl and let rise at room temperature for one hour. Knock the dough down by folding it over on itself two or three times. Cover it back up and refrigerate for 8-16 hours.

In my previous attempts at croissants, I tried too hard to simplify the butter process. For proper flakiness, you must follow this process exactly! Fortunately, it's not a hard process, just a little involved.

The first step is to prepare the butter packet. To make a well shaped butter packet, let a piece of parchment do the work for you. This is a half-sheet of parchment that I folded into a roughly 7x9 inch envelope. If you have a roll of parchment, that might even be better; the more overhang you have on your folds, the less they want to open on you while you are rolling the butter.

Once the packet if folded, open it up and place your butter. One batch of croissants requires two sticks, or half a pound, of butter. You want it cold, but not rock hard. If it's too hard, just let it sit for a few minutes. Now, these are the long skinny butter sticks; in some places you may have the short fat butter sticks. Don't worry, you just may want to cut them a little more to facilitate pounding them out. In this case, notice how the butter has no more than an inch to spread in any direction.

Fold the packet back up and place with the folds down. Get your rolling pin out and get crazy! As you might imagine, you may not want to do this while the baby is napping. It's noisy! My dog was very concerned at first. Pound, pound, pound! It may be necessary in the beginning to rearrange the parchment slightly to maintain your packet shape. Once it's pounded fairly flat, then you can start rolling the butter toward the edges.

It softens up as you work, so it ends up being fairly easy to make a nice flat packet. Once it's finished, stick it in the refrigerator to firm back up for at least thirty minutes.

After your butter packet is chilled, get your dough out. Dump it onto a lightly floured board and start to roll it out. Use flour as necessary to minimize sticking, but try not to use too much. Roll the dough into a rectangle of such a size that your butter packet will sit in the middle as shown. The nice thing is that you can actually use your wrapped butter packet to test your size. Once you have it right, peel off the butter from the parchment and onto the dough.

Fold over the ends so that they match evenly in the middle. Pinch together to seal. Also pinch the edges together to seal. Notice that the butter did not go right to the very edge of the dough; that gives a little room to press the edges together.

Rotate the dough 90 degrees so that the sealed ends are now at your 12 and 6 o'clock position. Roll the dough out, again adding flour as necessary to keep the dough moving nicely, until it is about the width of your rolling pin and a little over two feet long. Don't forget to rotate before starting to roll! It is very hard to roll against the folds.

Once it is long enough, cut off the uneven edges. Cut off about one inch from each end. Not only does this tidy up the impending seam, but it ensures that the butter now goes to the very end of the dough. Discard or save the dough for some other purpose (
more on that another day!).

Now, fold the dough into a tri-fold brochure. Make sure to keep the edges as even and neat as possible. Wrap it in plastic wrap and refrigerate for at least thirty minutes. After thirty minutes (or longer), roll out again with the folds on the side and the open edges at top and bottom. Roll out to the same dimensions as before and make the same tri-fold brochure (called a "single fold" in the pastry world). Refrigerate for thirty minutes before doing it one last time. All in all, you will complete this roll and fold scheme three times. Again, work carefully to keep things as straight and even as possible.

After the last fold and chill routine, roll out the dough the same way as before, but this time, try to get it fairly thin. Shoot for at least 2 1/2 to 3 feet long (still less than a rolling pin wide). It will fight you at this point and will not want to get much thinner than a quarter of an inch. The gluten in the dough may also be making things a little challenging, but don't worry, it will all work out in the end. Use a pizza cutter or sharp knife to cut triangles out of the dough. You can experiment with croissant size, but a four inch wide base is a good starting point.

Cut a small notch in the base of the triangle and then stretch the dough out a bit. Place the triangle back on the counter and pull the two notched edges apart slightly and then start rolling toward the peak of the triangle. Place the now rolled croissant with the point down onto a parchment lined baking sheet.

Brush the rolled croissants with egg wash and let sit to rise at room temperature until at least double. Depending on your household temperature, this process may take one to two hours. I recommend against covering since they are so delicate at this point. If they seem like they are drying out at all along the way, brush them again with egg wash. Once they are nice and puffy, brush them one last time with egg wash and place into a preheated 425° F oven to bake for 20-25 minutes. Do not remove them until they are nicely browned. The outside should not start browning significantly until the inside is well baked. Gently remove to a cooling rack to finish cooling. To store for less than 24 hours, simply wrap is a flour sack towel. If storing for more than 24 hours, place into an air tight container after they are completely cooled.

Now, a couple additional points of interest. This picture here shows what happens if the dough is not folded enough. See how the flakes of dough are very easy to see? Each time you complete a single fold, the dough between each layer of butter gets thinner, leading to more flakiness. These croissants were good, but the texture was not quite as flaky as you expect from a true croissant.

The other point I want to mention is yeast type. When making enriched and/or laminated doughs that have a lot of fat or sugar in them, it is recommended that you use osmotolerant instant yeast. (I got mine here.) Most of the literature I've read describes the need to use osmotolerant yeast in high sugar dough because sugar tends to rob the yeast of moisture, which can lead to uneven rising. While I've found no discussion on how osmotolerant yeast helps high fat dough, most of the professional formulas I've seen for high fat dough call for this special type of yeast.

How important is it? Well, as you can see from the picture below, in croissants, not hugely so. The croissant on the left was made with osmotolerant yeast while the one on the right was made with regular instant yeast. Notice that the crumb of the croissant on the left is a little more open? It did make a difference, but not enough that you should worry about making croissants without it. If you're an absolute perfectionist in the kitchen like I am, then you'll probably want to order some, otherwise, soldier on.


Croissants
Yield: 8-16 croissants, depending on size

3 3/4 cup bread flour
1/4 cup granulated sugar
1 1/4 tsp table salt
2 tsp (osmotolerant) instant yeast
1/2 tsp malt powder (see note below)
1/2 cup milk
1 1/2 TBS butter
3/4 cup + 2 TBS warm water

Butter packet: 1/2 lb butter (2 sticks)

In a stand mixer, stir together the first five ingredients. Heat the milk and butter together in a microwave until lukewarm. Add the milk/butter mixture and the water to the mixer bowl and, using a dough hook, mix on speed 2 until it starts to form a ball. Once it forms a ball, mix on 2nd speed for another five minutes. Place dough into an oiled bowl and cover with plastic wrap. Let sit at room temperature for one hour. Knock dough down by folding it over on itself 2-3 times. Return to the bowl, recover, and place in the refrigerator for 8-16 hours.

Prepare the butter packet by folding a sheet of parchment into a roughly 7x9 inch envelope. Slice two sticks of butter in half the long way and lay into the middle of the parchment envelope. Close the parchment and pound and then roll the butter until it has evenly filled the parchment and is nice and flat. Chill for at least 30 minutes before using.

Roll the chilled dough out on a lightly floured counter until it is a rectangle slightly larger than twice the size of your butter packet. Place the butter packet in the middle of the dough so that it is sitting long ways across the short direction of the dough (see photos). Fold the dough around the butter packet, pinching to seal.

Rotate the dough ninety degrees so that the folds are on the sides and the pinched edges are along the top and bottom. Roll into a long rectangle a little more than 2 feet long and about the width of your rolling pin. Carefully fold the dough into a tri-fold brochure, making sure the edges are nice and neat. Wrap in plastic wrap and place in the refrigerator for at least thirty minutes. Repeat the roll out, fold, and chill routine two more times. Always be sure to place the dough and roll with the folds on the sides and the "open" ends at top and bottom.

After the last chill period, roll the dough out (folds on sides again) so that it is the width of the rolling pin and 2-3 feet long. Use a pizza cutter or sharp knife to cut into long triangles with the base around four inches wide (you can play with this dimension to adjust the size of your croissants). Cut a small slit in the middle of the base of the triangle and then stretch the triangle slightly. Pull the edges of the base of the triangle and roll up. Place with the point tucked on the bottom onto a parchment lined baking sheet. Brush with egg wash and let rise, uncovered, until doubled and puffy. Brush with egg wash again before baking. Bake in a preheated 425° F oven for 20-25 minutes, until nicely golden. Carefully move to a cooling rack to cool completely. If storing for less than 24 hours, wrap in a flour sack towel. If storing for more than 24 hours, store in an air tight container.

NOTE: While the malt is not technically required for this recipe, I think it really adds to the authentic flavor of these croissants. I used diastatic malt powder, but it doesn't really matter if you use diastatic or non-diastatic malt powder, as in this case, you are only using it for the flavor.

Tuesday, August 23, 2011

Chocolate Cherry Almond Cookies

Now here's a cookie to get you going. I initially came up with the idea... well, to be honest, I'm not sure what the thought process was. It just seemed like it would be a really good combination of flavors. And it is! I often snack on chocolate chips and almonds or chocolate chips and dried tart cherries; this seemed like a natural extension.

These are really good. The cookies are somewhat crispy on the outside with a pleasant chew on the inside. The nuttiness of the almonds are divine, and when you hit one of the chewy, tart cherries? Bingo! You're average six year old may not see their worth, but you will.

Start by creaming the butter and sugar together. Then add the cocoa to this mixture. Start this process slowly, lest you end up with a cocoa cloud in your kitchen.

Beat the eggs and extracts. Add the remaining ingredients save for the "add-ins" and mix. In this case, that refers to the nuts and cherries. I always hand mix the add-ins. It gives me the heebie jeebies when the chips and nuts scrape behind the paddle in my mixer. It's not quite nails on chalkboard, but I can't help but thinking it's not good for the mixer or the add-ins.

Be sure you toast your almonds before adding them to the dough. I like to use the slivers and then I give them a few extra rough chops before throwing them in there.

Drop onto cookie sheets. I use a size 40 disher, which is about 1 3/4 TBS. Dampen your fingers and press cookie balls somewhat flat, until they're about a half inch thick. Bake at 375° F for about 12-15 minutes. It's a little harder to tell when they are ready, because you can't easily see when they are starting to brown. What I look for is a certain "dryness" of the cracks that form in the surface of the cookie. When the cookies are done, those cracks won't glisten quite so much anymore. Let cool for a few minutes before transferring to a cooling rack.

Chocolate Cherry Almond Cookies
Yield: approximately 40 cookies

1 cup butter (2 sticks)
1 1/2 cup sugar
2/3 cup cocoa powder
1 tsp vanilla extract
1/2 tsp almond extract
2 eggs
1 2/3 cup flour
1 tsp baking soda
1 tsp salt
1 cup toasted slivered almonds, roughly chopped
1 cup dried tart cherries

Cream together the butter and sugar. Slowly mix in the cocoa powder until well incorporated. Add the vanilla and almond extracts and the eggs. Beat together well. In a separate bowl, mix together the flour, soda, and salt. Add to the butter mixture and mix just until incorporated. Mix in the almonds and cherries by hand.

Drop onto a parchment lined baking sheet using a #40 disher, or by dropping approximately 1 3/4 TBS mounds. Dampen your fingers and press the dough balls until they are about one half inch thick. Bake in a preheated 375° F oven for approximately 14 minutes. It can be difficult to tell when they are done based on color alone. Doneness can be determined by looking at how "shiny" the cracks in the cookie surface are. Look for the wet-look of the dough in those cracks to disappear. Let cool slightly on the cookie sheet before removing onto a rack to cool completely.

Saturday, August 13, 2011

Pizza Crust

The other day I posted a recipe for a great calzone in which I urged you to make your own crust. I suppose if I am going to do that, I should probably suggest a good recipe to you. This is the crust I use most of the time when I am making full size pizzas (versus my pizza crust rounds, which I make and freeze in individual portion crusts).

I exclusively use instant yeast in my kitchen, but if you use active dry, just check out the note at the end of the recipe for conversion instructions. Lastly, while this dough is super easy to make in a stand mixer, it is also very hand-making friendly. Simply mix in a bowl leaving out half a cup of the flour and then knead that last bit of flour in by hand.

I really like the hint of sweetness and complexity of flavor the honey adds in this recipe, but you may omit it if you desire.

Pizza Crust
Yield: approx. 1 pound of dough

1 1/2 tsp instant yeast
3 cups flour (all purpose or bread)
1 tsp table salt
2 TBS vegetable oil
3 TBS honey (optional)
1 cup warm water

Mix all ingredients together in the bowl of a stand mixer outfitted with a dough hook. Process on medium low until the dough become smooth and elastic, about 6-8 minutes. Place the dough in an oiled bowl covered with plastic wrap and set aside to rise for 45 minutes to an hour. Knead the dough a few times to deflate and cover with the plastic wrap to sit for 4-5 minutes; this lets the gluten relax slightly and makes it much easier to work with. Roll out on a floured board. Top and bake at 425° F. If you a topping fiend, I recommend baking the crust slightly before topping.

NOTE: if you use active dry yeast instead of instant, use 2 tsp instead and mix it with the water and a dollop of the honey and let it sit for 5 minutes before proceeding with the recipe as usual.

Thursday, August 11, 2011

Prosciutto and Cheese Calzone

The simplicity of this dish belies its absolute deliciousness. The filling is simple and straight forward, and it takes mere minutes to put together, but the end result is so fabulous. This calzone is a flavor explosion in your mouth. Of course, you can never go wrong in my book with a dish containing prosciutto. Cured meats are always a good thing... flavor-wise at least. Then throw in a nice mixture of mozzarella and chèvre (soft goat's cheese), a little minced garlic, and fresh thyme, and you are on your way to paradise.

Make your own crust or use store bought. I've done it both ways and it is delicious either way. This is also a great dish to serve at a party; it's the perfect finger food. It's yummy hot out of the oven or at room temperature. And, though I haven't had this issue very often, it's also quite good cold the next day. Yum!

First, mix together the mozzarella cheese, chèvre, garlic, and thyme in a bowl.

Roll out your dough into a large rectangle. If you made your own dough, shoot for a 16 x 20 inch rectangle. That will set you up to fit nicely on a half sheet pan when you fold it over in half. If you are using rolled pizza dough out of a can, you will need two cans, one for the bottom and one for the top. Spread the cheese mixture over half the dough. Notice that it does not need to be too thick. Moderation is key here. I've found that too much filling can make a somewhat overbearing calzone.

By the way: be smarter than me. Place the dough on the baking sheet after you roll and before you fill... that's much easier than what I had to do to move this thing onto the pan after I had it all prepared. Hindsight is such a great thing, isn't it?

Then spread thin slices of prosciutto over the cheese mixture. Again, you don't need a lot to end up with a great flavor profile. Fold the dough over and crimp the edges. Brush the top with some egg wash to end up with a lovely golden crust. Bake at 425° F until nice and golden, about 20-30 minutes. Let cool slightly before serving.

Prosciutto and Cheese Calzone
Yield: 4-6 main course servings

1 lb pizza dough

3 cups shredded mozzarella cheese
1/2 cup crumbled chèvre (soft goat's milk cheese)
1 TBS minced garlic
1 tsp fresh minced thyme
1-2 oz thinly sliced prosciutto

1 egg yolk & 1 TBS water for egg wash

Roll out the pizza dough fairly thinly. Mix together the cheeses, garlic, and thyme. Spread over half the dough. Lay the prosciutto evenly on top of the cheese mixture. Cover the cheese and prosciutto with the other half of the dough. Roll up and crimp the edges. Brush the top with egg wash and bake in a 425° F oven 20-430 minutes or until nicely golden. Let cool slightly before serving.