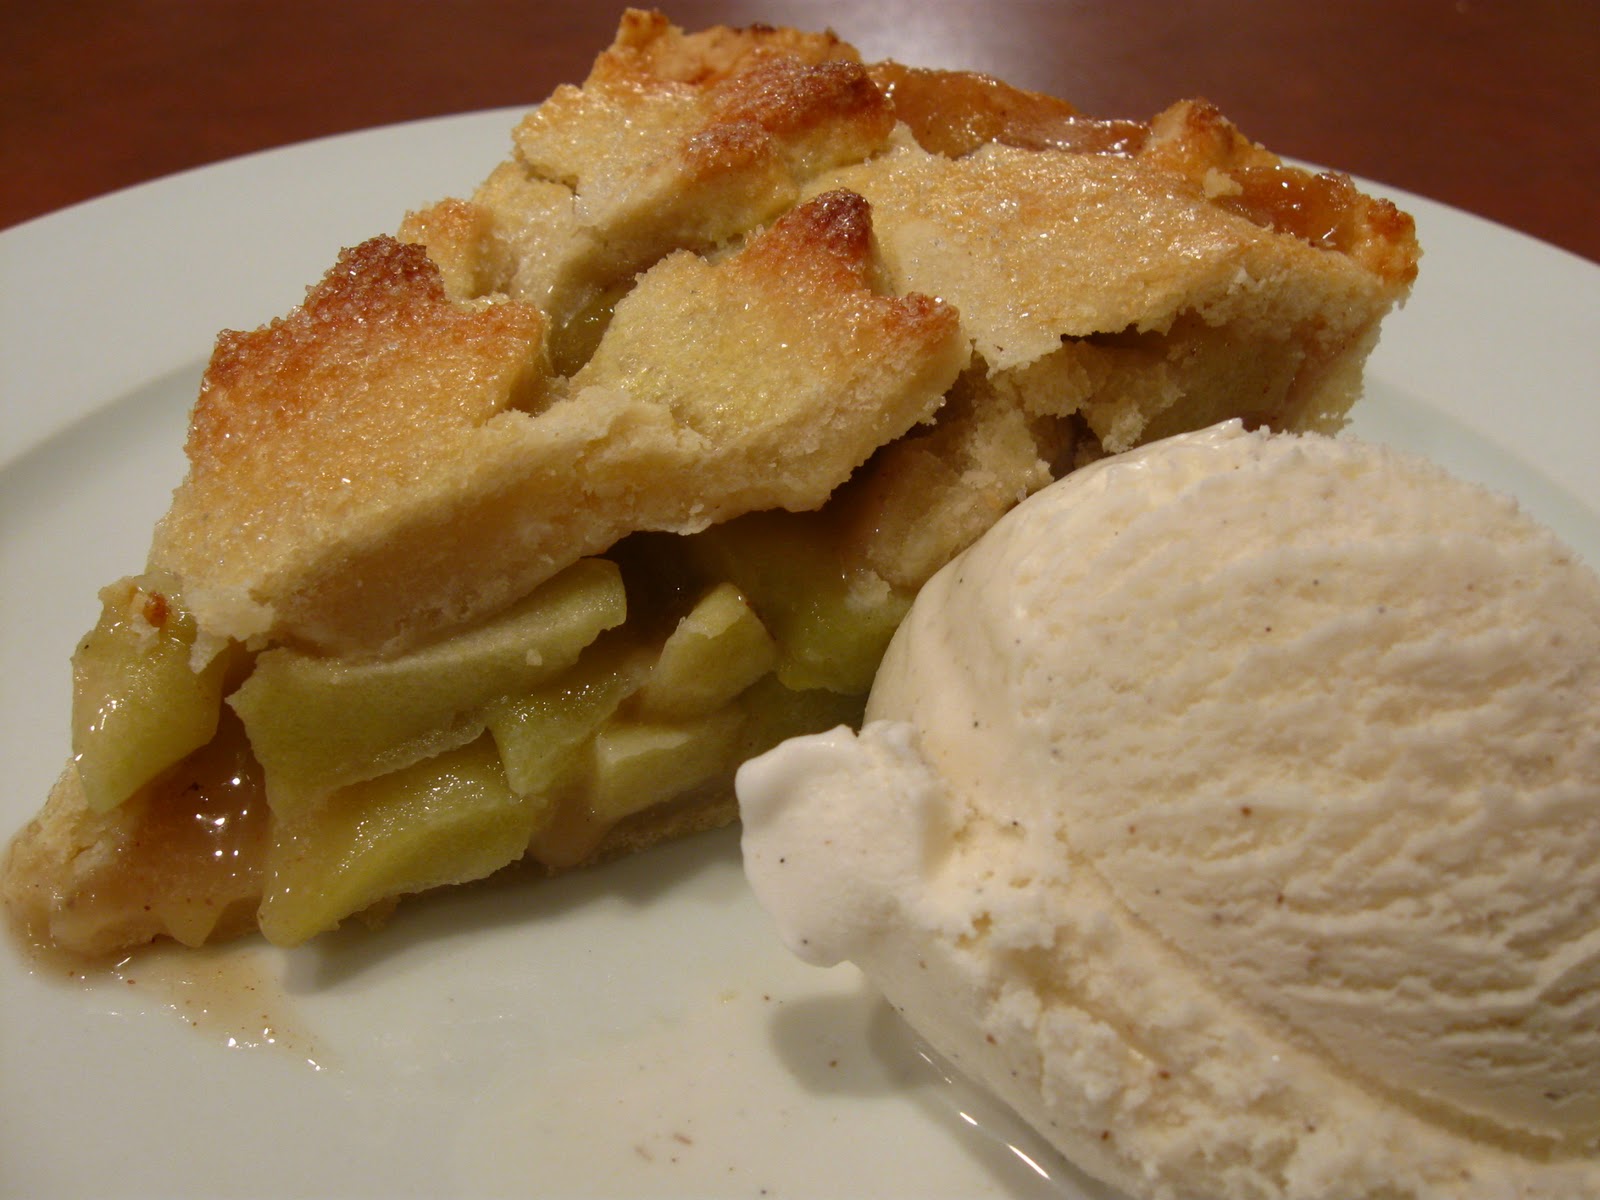
Because not everyone likes pumpkin pie, I decided to make an apple pie yesterday as well. It may have been the prettiest pie I ever made. A few years ago, I saw a picture in a magazine of a pie where the top crust was made of leaf cut outs. I guess because I more often make single crust pies, yesterday was my first chance to give it a go. It was so easy and so incredibly beautiful! The picture below does not do this pie justice. It was a work of art; I hated to cut into it!
As for making an apple pie, the best thing I ever changed about my technique was pre-cooking the filling. This step negates a number of potential apple pie problems I've had. When you simply throw the ingredients into the pie raw,you can't always be sure you have the right amount of sugar or thickener. The other issue is that when you put raw apples in the pie shell, their volume is much larger than when they're cooked; that usually means that the crust ends up "frozen" in place way above the actual end level of the pie. I hate it when you cut a pie and there is an inch of space between the top crust and the fruit! When you cook the filling first, the apples have already softened. When you place the top crust over it, you know that everything is in the place it will be once the pie is cooked. Just be sure you let the filling cool before adding it to the pie shell!
Classic Apple Pie
Yield: one 9 inch pie
Enough cored, peeled, and sliced apples to fill a 9 inch pie tin, mounded (use Granny Smith or another tart, firm apple, usually 5-10 apples, depending on size)
1/2-1 cup sugar
3-5 TBS flour
1/2 tsp cinnamon
dash nutmeg
1 TBS lemon juice
Place apples in a large pot. Start with the smallest amount of sugar and flour; add the spices and lemon. Stir thoroughly. Cook over medium low heat, covered, until the apples are slightly soft and the juice is thickened. Stir frequently to prevent scorching. Taste. Add sugar and flour as necessary until the sweetness and thickness are right. Remember that the filling will be thicker when it cools than it is when it is hot. The apples do not need to be fully cooked, as they will continue to soften when baked in the pie shell. To reduce the chance of lump formation when adding more flour, add it by placing the flour in a small strainer and tap a small amount into the filling at a time. Let filling cool before adding to an unbaked pie shell. Pour cooled filling into the pie shell, cover with the top crust. Be sure there are vents in the top of the pie to allow steam to escape. If desired, brush the top of the crust with an egg yolk wash and sprinkle with sanding sugar. Bake at 400° F for 25-35 minutes, or until the crust is nicely golden. Let pie cool before serving. Can be served at room temperature or chilled.
I am now blogging new recipes on my farm website.
Cooking from Scratch is on facebook! Click here to check it out!
Friday, November 25, 2011
Tuesday, November 22, 2011
Green Bean Casserole from Scratch
I have always been a fan of the idea of green bean casserole. I mean who wouldn't be? Fresh green beans swimming in a savory mushroom sauce with crunchy onions on top? Sounds pretty good when it's put that way, huh? Unfortunately, being a scratch girl, not only do I never have canned cream of mushroom soup on hand, I am not a big fan of it's commercial taste. The use of frozen green beans over canned was an automatic; there was no debate there at all.
Last week I decided to make my own green bean casserole, from scratch. What that means is simply making a homemade sauce versus opening a can. It's pretty quick and easy, and boy was it good! I'm going to make it again later this week for the big day. Here's how it goes...
Green Bean Casserole from Scratch
Yield: 8-12 servings
3 TBS butter
1 medium onion, diced
8 oz baby bella mushrooms, diced
1/4 cup cream sherry
1/8 tsp garlic powder
1/2 cup flour
1 tsp salt (or to taste)
1/4 tsp pepper
4 cups whole milk, warmed
2 1/2 lbs frozen cut green beans, cooked and drained
1 1/2 cups french fried onions
Preheat the oven to 375° F. Melt butter in a deep skillet. I prefer using a stainless pan so I get better browning on the bottom, leading to a richer flavored sauce. Add the onions and cook over medium high heat until translucent and starting to caramelize. Add the mushrooms and cook until they are tender and browned. Add the sherry and stir vigorously to deglaze the pan and lift up all the browned bits on the bottom of the pan.
Mix the flour, salt, pepper, and garlic powder together. Add to the skillet and stir to mix. Slowly add the warmed milk, stirring as you go to minimize lumps. Once all the milk is added, cook, stirring continuously until it just comes to a boil and is thick. It will thicken more as it bakes and then cools. Add the green beans and stir to coat. Pour the mixture into a greased 9x12x1 inch baking dish (or similar). Sprinkle the top evenly with the french fried onions. Bake at 375° F until bubbly through and the onions are nicely browned, about thirty minutes. Cool slightly before serving.
Friday, November 4, 2011
Key Lime Pie
Fortunately, living in Florida, fresh key limes were in my neighborhood grocery. If you can't find fresh key limes in your area, you may be able to find bottled key lime juice. Regardless, you can always buy it online. In a pinch, you could use regular limes. But as you can see below, they are not the same. Key limes are small little things. A bugger to juice, truth be told. But the flavor is distinct. This pie is not overly sweet. It is tart and has a slight bitter twist to it, kind of like what I associate with most grapefruit.
Before you juice, you'll need to zest enough of them to obtain one loose tablespoon. Then you can cut the limes and juice away. Because they're so small, they can be tiring to juice. If you have one of those squeeze type juicers, you may be better off than I was. You need 2/3 cup of juice, which requires approximately one pound of key limes. Don't juice your limes too early, as the juice can develop additional bitterness when it sits too long.
Don't be dismayed if your crust comes out of the oven looking really funky. It tends to puff up when baking, but returns to normal dimensions as it cools. The first time I made this crust I thought I had ruined it when I first took it out of the oven Don't fret, it'll work itself out.
As the pie cools, you can mix up the filling. Start by mixing the egg yolks and zest together. Mix on medium-high for a few minutes until the mixture has increased slightly in volume and is thick and pale yellow (with green flecks in it, of course).
The next step is to add a can of sweetened condensed milk. This is some very thick, sweet stuff. So sweet, in fact, that it provides all the sweetness this pie needs. By the way, please note the proper color of this product. If you open your can and find that it is a caramel brown color, as I did when I first made this pie, perhaps you are not using sweetened condensed milk often enough, or, as in my case, not rotating your stock well. The date on my can of brown sweetened condensed milk? "Best by Nov 2004." Yikes! And, even more pressing, how many stinking military moves did that can of milk participate in, anyway, before I ended up throwing it away? Needless to say, I will be more vigilant.
Bake the pie at the same temperature as you baked the crust for 25 minutes. The pie filling will be set and maintain its shape upon gentle shaking, but will not be brown in any way. Remove from the oven and let cool to room temperature.
I think this pie requires a little sweet border to help balance it out. I like a whipped topping. You could make whipped cream right before serving, but I think piping a stabilized whipped cream border really looks like a million bucks. I like to then zest a little lime on the border for color. Be sure to thoroughly chill the pie before serving. This pie keeps well and can be made one to three days in advance.
Key Lime Pie
Yield: one 9" pie
Adapted from King Arthur Flour
Crust:
1 1/2 cups graham cracker crumbs (one pouch plus two whole crackers)
1/4 cup powdered sugar
1 egg yolk
1/3 cup melted butter
dash salt
Filling:
1 TBS loosely packed key lime zest
3 large egg yolks
1 14-ounce can sweetened condensed milk
2/3 cup fresh (or bottled) key lime juice
whipped cream and additional lime zest for garnish (optional)
Mix together the crust ingredients. Pour into a 9" pie pan. Spread evenly and pack down with a measuring cup. Bake at 325° F for 15 minutes. Crust may look uneven and strange upon removal from the oven, but will return to a more normal shape upon cooling. Let crust cool while preparing filling. Leave oven on at 325° F.
Beat the zest and egg yolks together on medium-high speed for a few minutes, until the yolks have increased in volume and become thickened and a pale yellow. Add the sweetened condensed milk and beat on a fairly high speed for 2-3 minutes. Lastly, add the lime juice. Stir until well incorporated, but do not over mix. Pour into the baked crust and return to the oven to bake for 25 minutes. The filling will be set and no longer loose in the middle, but will not be browned in any way. Let cool to room temperature. Prepare and pipe a border of stabilized whipped cream, if desired. Refrigerate for at least four hours before serving.
This pie keeps well and can be made 2-3 days in advance.
Friday, October 28, 2011
Jelly Candies
You know what? They weren't right. I was so disappointed because they were cloyingly sweet. Fortunately, I have a fix for that. I got out the old citric acid granules and - voila! - a wonderful orange version of the lemon jellies was born. When I make orange jellies, I add about one half teaspoon of citric acid to the hot mix. If you really want a nice, tart treat, you can also add a little pinch to the dredging sugar.
So, if you want to make a nice, colorful assortment of jellies that looks adorable gifted in little cellophane bags or piled high in a candy dish, make a batch of lemon, orange, and lime jellies. Just be sure to add some citric acid to the orange and lime ones!
Labels:
Candies,
Dessert,
Gift Ideas
Sunday, October 23, 2011
Stablilized Whipped Cream
But I knew there had to be a way. I mean, really, look at all those diners that have pies with beautiful whipped edges. Therefore, when I was taking a pie to another dinner last Saturday, I was determined to figure it out. Enter stabilized whipped cream, the answer to all my prayers.
By the way it is made, stabilized whipped cream is sort of like a mousse. You whip the cream and add gelatin for stability. It then holds its shape beautifully in the refrigerator for hours and hours (even days!). While the end texture is not quite the same as freshly whipped cream, it is still delicious and its beauty and convenience make it a winning choice!
Stabilized Whipped Cream
Yield: approx. 2 cups
1 tsp unflavored gelatin
4 tsp cool water
1 cup heavy whipping cream
1/4 cup powdered sugar
Mix the gelatin and water in a small microwave safe bowl. When the gelatin is soft, after a few minutes, place the bowl in the microwave and heat gently at ten second intervals until the mixture is melted and warm, but not hot. Mix the cold whipping cream and powdered sugar together in a glass or metal bowl. Mix on low speed until the sugar is incorporated, then increase to high speed.
When the cream reaches soft peaks, slowly add half the gelatin mixture (you will discard the remainder). Continue whipping until stiff peaks develop. Pipe onto your dessert and keep refrigerated until serving. If you want to make a double batch, double the cream and sugar, but simply use all the gelatin mixture.
NOTE: I mix twice the gelatin mixture needed for the single batch because it is easier to measure and because with such a small amount, so much ends up sticking to the inside of the bowl. Feel free to add any additional flavorings to your whipped cream as usual, such as vanilla, chocolate, lemon or lime zest, etc.
Labels:
Dessert
Sunday, October 9, 2011
Lemon Biscotti
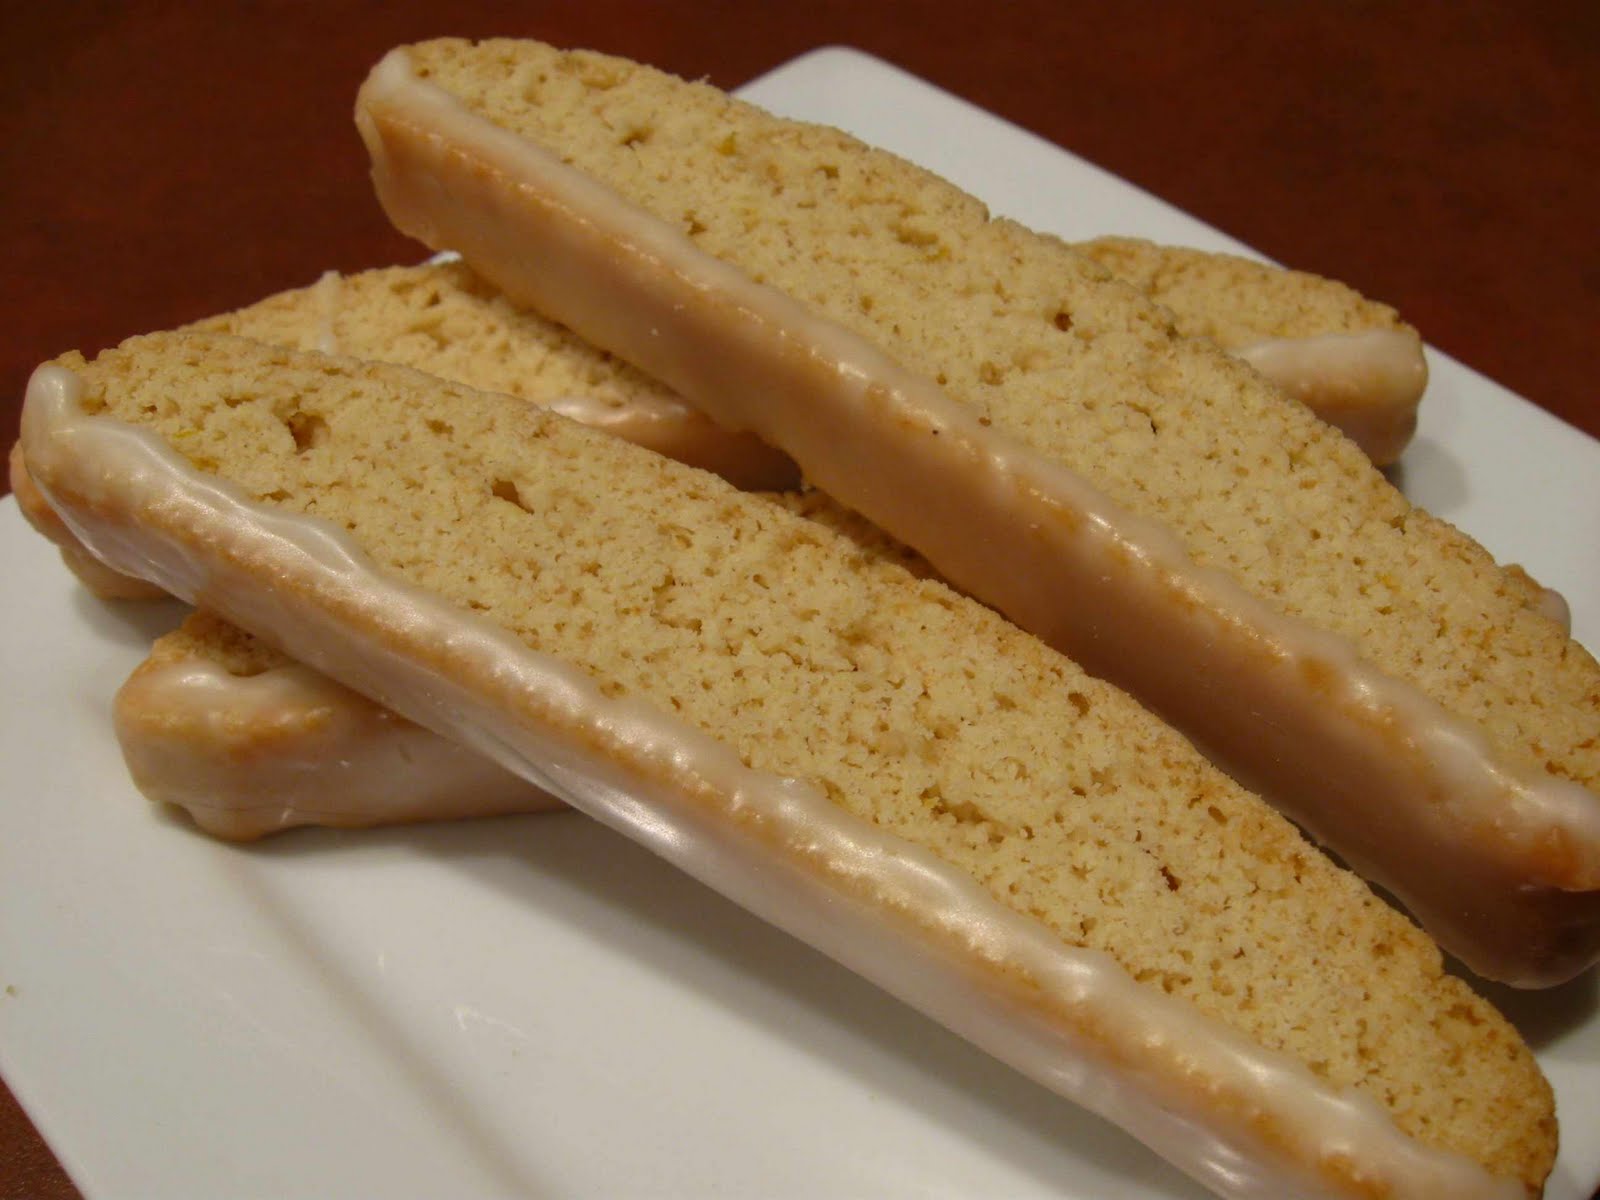
I just love these little cookies. They're lemony and have a nice bite. They have a different texture than a lot of cookies. They're not crispy in the same way a lot of cookies are, but then again, they also have half the calories and a third of the fat content of your typical cookie (like chocolate chip or snickerdoodle).Traditionally, biscotti do not have any fat in them. No butter, no shortening, no oil. However, I found those cookies to have a somewhat less than satisfying texture, so I started experimenting. What I came up with is a nice in between, I think. There's enough butter in them to have a nice flavor and a little bit of snap, but not so much as to be overwhelming. I think you'll really like them. I sure do.
While these twice baked little snacks involve a little more effort than a normal cookie, they're still pretty straight forward. And they are so darn cute!
You start by mixing together all of the cookie ingredients. I use my stand mixer, but the dough is soft enough, you could probably mix them fairly easily by hand. Turn the dough out onto the counter and roll into a log. Divide the dough in half and shape each half into a eight to ten inch long roll. Press each log flat.
These will rise a bit, so you want to start them off fairly thin. Shoot for about a half inch thickness.
Bake the cookies in a 350° F oven for about 40 minutes. Be sure the cookies have started to brown before pulling them out. If you pull them out before they brown a little, the inside often has an undercooked flavor that won't go away even after the second baking.Remove from the oven and carefully transfer them to a cooling rack. Reduce the heat in the oven to 325° F. Carefully slice the loaves across at half inch intervals using a serrated blade. You should end up with 13-15 slices plus two small ends. I eat the ends at this point. It's the cook's prerogative.

Place an oven safe rack in the cookie sheet and lay the slices wide side down; spread them out as much as possible. Bake for 10 minutes. Flip the cookies over and bake another 10 minutes. Let them cool completely before icing.
Mix together the icing ingredients until they are smooth. Use enough milk to obtain a consistency that allows the icing to pour easily. Place in a flat bottomed dish that allows you to easily dip the bottom of the biscotti into the icing.
Let the excess icing drip off and then lay them upside down on a cookie sheet to dry. Allow at least an hour for drying.
These biscotti keep well in a plastic bag or other air tight container for at least a week. They are very attractive if wrapped in small bags and given as gifts.
Lemon Biscotti
Yield: 25-30 biscotti
3 cups flour
1 cup sugar
2 tsp baking powder
1 1/2 tsp lemon zest
2 TBS fresh lemon juice
1/2 cup butter, softened
3 eggs
For the icing:
1 1/2 cup powdered sugar
1 TBS fresh lemon juice
1/2 tsp lemon zest
2-4 TBS milk
Preheat the oven to 350° F. Mix the flour, sugar, baking powder, and lemon zest together. Add the lemon juice, eggs, and butter and beat until well mixed. Turn out on a counter and form into a log about one foot long. Divide into two logs. Shape each log until they are about 8-10 inches long. Press until they are each about one half inch thick. Place onto a parchment lined baking sheet. Bake until they start to turn golden, about 40 minutes. Cool for 10 minutes on a wire rack.
Reduce the oven temperature to 325° F. Using a serrated knife, slice into half inch wide cookies. Place the wire rack onto the cookie sheet and lay the slices, wide side down, on the rack, spread out as much as possible. Bake for 10 minutes, flip, and then for ten minutes more. Cool completely before icing.
Mix the icing ingredients together. Use enough milk to make a fairly thin icing; the icing should pour easily. Place in a flat bottom dish or bowl and dip the bottom of each biscotti into the icing. Let drain slightly and then place upside down on a baking sheet to dry. Let dry at least one hour. Store in an air tight container up to one week.
Wednesday, October 5, 2011
Cottage Cheese
I think the only hang up with this cheese is the length of time it must sit. It requires a packet of starter (available from cheese supply companies) but no rennet. As such, it must develop curds solely through bacterial action. That takes time... almost a full day. Fortunately, the actual work time in this cheese is fairly minimal. Here's how it goes:
First, pour a gallon of milk into a heavy duty, nonreactive pot. You can use any type of cow's milk from skim to whole. I used 1% for a nice low fat product. Heat the milk to 72° F. Because most of us have to use store bought, homogenized milk, it helps to add a little calcium chloride. Homogenization makes it a little harder for the milk to form firm curds and the calcium chloride helps to mitigate this issue. Add the calcium chloride mixed with a little water after the milk has reached this target temperature.
Add the starter packet, stir, and then cover. Set aside to let the milk set for about a day. Shoot for a room temperature around 70-74° F. After a day, the milk should have set and show a clean break. A clean break is where when you cut the milk, you can still see the cut when the knife is removed.
Cut the curd into roughly 1/4 inch pieces. Cut one way and then at an angle the other way. Don't forget that you need to cut the curds in pieces from the bottom of the pot up to the top as well. Let the cut curds sit for 15 minutes. See how you can clearly see the break in the curd in this picture? If your mixture does not do this, it probably needs to set a little longer.
Heat the curd gently, increasing the temperature slowly to 100° F and then hold at this temperature for 10 minutes. Stir periodically. If some of your curds seem a little too large, don't worry, they'll break down as you heat and stir them. Increase the temperature to 112° F slowly (about a degree per minute). Once at 112° F, hold this temperature as best you can, stirring regularly until the curds are firm. The whey will be completely separated from the curds long before they are firm. Go here if you need a picture of what the whey looks like when separated from the curds. This last firming step can vary in time, but be prepared for anywhere from 30-60 minutes.
You can test curd firmness by squishing one between your fingers. You want to have a little resistance, not pudding. When the curds are firm enough, drain them into a cheesecloth lined colander. Let drain. Meanwhile, prepare a bowl of cold water in which to wash the curds. Dip the curd filled cheesecloth into the cold water. This step has two purposes. First, it chills down the curds, firming them and it also rinses the curd to reduce their sour flavor. If you like more sour curds, only dip them the once. If you prefer a more mild cottage cheese, dip the curds a few times, changing the water between dips. Remove the curds from the water bath and let them drain for about five minutes.
Dump the drained curds into a bowl. Use a spoon to stir the salt into them, breaking up any clumps that may have formed. At this point, you have dry curd cottage cheese. If you prefer the more traditional style, simply mix in a little cream.
Curds may be stored in an airtight container in the refrigerator for up to one week. Eat plain or with fruit, or use in cooking. This is a versatile, flavorful cheese!NOTE: You may find that you have a hard time keeping the milk at the exact temperatures specified. Don't fret. In my experience, you do the best you can and it works out fine. Just remember to check the temperature of the milk in the middle of the pot (versus the edge) and stir frequently to avoid hot spots.

Cottage Cheese
Yield: 1 1/2 pounds
Adapted from Ricki Carroll's Home Cheese Making
1 gallon milk (skim, 1%, 2%, or whole)
1/8 tsp calcium chloride in 1/4 cup distilled water (optional)
1 packet direct-set mesophilic starter
1 tsp kosher salt (or to taste)
cream (optional)
Heat the milk in a heavy pan to 72° F. Stir in the calcium chloride mixture, if using. Then add the starter and stir. Cover and let sit in a 70-74° F room for 18-24 hours.
At this point, the curds should have set and the milk should show a clean break. Cut the curd into 1/4 inch cubes. Let sit for 15 minutes and then begin heating gently up to 100° F. Hold at 100° F for ten minutes, stirring occasionally. Increase the heat slightly and heat slowly (aim for 1 degree per minute) until the curd reaches 112° F.
Hold the milk at 112° F, stirring regularly, until the whey separates from the curd completely and the curds become firm. The whey will separate long before the curds are firm. Times may vary widely depending on your milk; be prepared for 30-60 minutes. Test the curd's firmness by squeezing one between your fingers; it should have some resistance and not squish like pudding.
Once the curds are firm enough, drain them in a cheesecloth lined colander. Fill a bowl with cold water and rinse the curds. If you prefer a milder flavored cheese, rinse 2-3 times, changing water between each dip. Drain the curds for five minutes and then pour into a large bowl. Salt the curds, mixing to evenly distribute. At this point, you have dry curd cottage cheese. If you prefer and more traditional style, add cream to taste. Cheese will keep in a refrigerated air tight container for one week.
Labels:
Cheesemaking
Saturday, October 1, 2011
Parmesan Potatoes
Behold the most delicious potatoes ever! My mom made these for our family while we were growing up, and they have always been one of my favorite dishes. My only complaint is that she would stack the potatoes too much. As you might imagine, the best part of these potatoes is that golden, delicious crust on the outside of each slice. If you stack the potatoes too much, then only a small percentage of the potatoes have that crust. That state of being is an unfortunate and unnecessary occurrence. You may need to use a larger pan, or even two pans, so that the potatoes are spread as close to one layer thick as possible, but it is really, really worth it.The other thing I want to throw out there is that potatoes have really gotten a bum rap lately... kind of like what eggs went through in years past. While, obviously, if you always eat your potatoes deep fried or mashed with a stick of butter, they are not a very good meal choice. By themselves, however, potatoes are a healthy and delicious addition to any meal. They're definitely a better choice than pasta. In fact, serving for serving, I would even argue that potatoes are a better choice than brown rice! I love this nutrition data site and suggest you go compare the nutrition data of potatoes with your other side dish options if you have been hesitant to eat potatoes lately.
This dish is nice because you get all the flavor and "pow!" of a sinful side dish while actually being quite restrained. You can use any kind of potato. In this case, I used little red potatoes, but you can use russets or Yukon Gold, or... whatever. I like to leave the skin on. I like the way it looks; I like the way it tastes. Plus the skin has a large percentage of the fiber and nutrients of the potato. Slice the potatoes thinly, about 1/8 of an inch. I use a mandolin, but you can slice them the old fashioned way or with a food processor.
Be sure you've started your oven to preheating to 425° F. Spray a baking sheet with cooking oil. Place your potato slices in a bowl and toss with a little bit of melted butter. You only need a tiny bit! The potatoes just need to have a little bit of a sheen from the butter (or oil, if you prefer).Lay the potato slices out on the baking sheet as close to one layer thick as possible. In this case, I had plenty of room on my baking sheet. When things are a little tighter, I use a shingle pattern to maximize my use of space. Sprinkle the slices with a little salt (go easy, Parmesan is already pretty salty), some pepper, a little grated Parmesan cheese (I use the stuff in the green can for this application), and a little bit of paprika.
Bake until the potatoes are cooked through and golden. Depending on how many you are baking, it could be anywhere from 20-40 minutes. For best results, serve immediately!Parmesan Potatoes
Yield: 4 side servings
3-4 cups of sliced (1/8 inch thick) potatoes
1 TBS melted butter
3 TBS grated Parmesan cheese
dash paprika
salt & pepper to taste
Toss the potatoes in the melted butter. Lay out on a greased baking sheet as close to one layer thick as possible. Sprinkle with cheese and paprika. Salt and pepper to taste. Bake in a 425° F oven until the potatoes are cooked through and golden. Baking time will depend on how thickly you stack your potatoes, but start checking after 20 minutes. Serve immediately.
Labels:
Favorites,
Quick & Easy Sides,
Sides
Monday, September 26, 2011
A Strange, Strange Dream
This last month has been a whirlwind of travel. First I went home to Washington to visit family and friends for a week. Then my husband and I went on our first real vacation in the last five years. We went on a lovely cruise up the New England coast. For the most part, it was a great time. It was a nine day trip. Unfortunately, on day six, we both woke up and went, "Ugh." Apparently, hanging out in a confined space with 2,400 other individuals from all over the globe was more than our immune systems could handle. Fortunately, we still managed to have some fun.
Anyway, we got home Saturday afternoon. Sunday, I slept a lot, trying to kick this stupid cold's you-know-what. I didn't even go out to get any groceries, even though it was some serious Mother Hubbard's cupboard around here. Then last night, I had this strange dream.
Like most dreams, some of the details are fuzzy. As you might imagine, the "why" is a little mysterious, but in this dream, I was tasked with preparing a three dish "meal" in a limited amount of time. While I had two other dishes in the bag, for some reason, I felt compelled to make eclairs.
Perhaps it was because I partook of a substandard eclair on our trip. In Boston, we ate in the North End Italian district and stopped in a pastry shop afterwards where I purchased an eclair that was so unsatisfying, I threw most of it away. Now, anyone that knows me, knows that this is a rare event indeed. Actually, come to think of it, I also had a very substandard profiterole on the cruise ship. I think these two disturbing events may have prompted my dream... that and the fact that there was no heavy whipping cream in my refrigerator last night.
So, here I am in my dream, attempting to make eclairs when I realize that I do not have enough time to make pastry cream, let it cool, and pipe it into said pastries. Being the resourceful gal I am, I decide to go for making whipped cream filled profiteroles, but - I didn't have any whipping cream! I became so distraught in my dream that I actually woke up!
I lay awake for some time, trying to calm myself enough to fall back asleep, which I finally did. However, when I woke up this morning, the first thing I felt compelled to do was go grocery shopping! Apparently, I cannot rest (literally) until there is at least a pint of whipping cream in my fridge awaiting the call of duty.
Labels:
Commentary
Sunday, September 18, 2011
Croissant Dough Gems
Wow! I mean, double, triple, holy fantastic, wow. Wow, like, I may just make batches of this croissant dough to make these, wow. I made these twice. The first time I had the proportions more right than the second. The first time, I had more sugar than butter and the end result was an almost crunchy, caramelized crust on the outside of each dough ball. The second time, I must have used less sugar and, while they were still good, they ended up a bit too rich and did not have quite the tasty crunch from the sugar. Moral of the story? Use more sugar and less butter.
Snip your left over dough into one inch pieces using a pair of kitchen shears. Mix together a small amount of soft butter with a lot of sugar and cinnamon. Obviously, how much you need would depend on how many scraps you have. I think a ratio of butter to sugar of 1:3 is probably good. Add cinnamon based on your taste preferences. I would err on the side of too little... cinnamon is pretty strong and a little goes a long way. Add the butter mixture to the dough bits and stir to coat.
Subscribe to:
Posts (Atom)