I am now blogging new recipes on my farm website.

Cooking from Scratch is on facebook! Click here to check it out!

Sunday, December 25, 2011

Chocolate Bowls

It's hard to believe that I am thinking about food at this moment... considering the fact that I ate so much today that I feel like I might explode. But, nonetheless, I have some down time now that everyone is in a food stupor to post something I've been meaning to share for a few months now.

I absolutely adore making these cute little chocolate bowls. They are so easy and fun and they never cease to amaze. Because I always make and consume them within the same day, I don't worry about tempering the chocolate. I just try to be sure that I do not let my chocolate get too hot in my double boiler. The risk there is that too high a temperature can cause the chocolate to end up not hardening at all. Not a good thing, obviously.

Melt enough semi-sweet chocolate in a bowl over some lightly simmering water. Prepare a sheet pan with some parchment, wax paper, or a Silpat. The first step is to make a small puddle of chocolate that will become the base of your bowl. Keep the puddle somewhat small, you don't want it oozing all over the place!

Then inflate some small balloons. I use the size that you typically use to make water balloons. Obviously, you can make your bowls whatever size you want, but if you want to make small bowls, you want to use small balloons. Under-inflated balloons tend not to have a smooth bottom on them, which can deform your bowl. Dip the balloon into the chocolate. I usually dip a couple of times to make sure I have a good, solid coat. Too thin a coat becomes a nightmare when you go to remove the balloons later. You can dip the balloons with one even motion for a straight edged bowl...

Or dip them at an angle four to five times around the balloon to form a scalloped edge that is very pretty.

Place the dipped balloon into the puddle you previously poured. Usually, they stand on their own fairly well, but if you get a troublesome one, just hold it for a minute or two until the chocolate firms up a bit. (It's best to work with chocolate in a somewhat cool room).

When making bowls, always do a few extra because it is not unheard of for one or two to break one while removing the balloon. Place the tray in the refrigerator to harden for 30-60 minutes. To remove the balloon, be ready to work quickly! If the chocolate softens just a little too much, I find it makes removing the balloon more challenging. Take a straight pin and - pinching the top of the balloon - carefully poke a hole in it. Slowly let the air out. As the balloon deflates, you can start to peel it away from the bowl. Deflating the balloon too rapidly will usually result in a broken bowl, so go easy! Once the balloons are removed, chances are you'll want to keep them in the refrigerator. If you'd rather have bowls that are more shelf stable and can be made ahead of time, you can do that, you'll just have to be sure to temper the chocolate then. Serve with ice cream or mouse... or anything that goes well with chocolate and is served in a bowl!

Sunday, December 18, 2011

So Pretty!

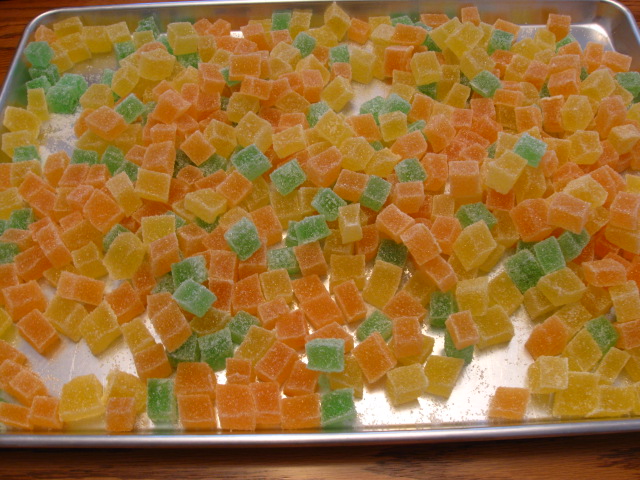
I've posted a few times already about making these cute little jelly candies. I originally posted about the lemon ones, but recently posted about making them in orange and lime as well. Well, I finally had an opportunity to make all three in the same time frame so that I could photograph them together. How cute they turned out! Yellow, and orange, and green, oh my!


Sunday, December 11, 2011

Pumpkin Pie

Everyone has their favorite pumpkin pie recipe, I guess... unless you always get yours from the store. As a scratch cooker, obviously, I can't condone such actions. ;-) I am, however, a serious pumpkin pie snob. Pretty much, unless I've made it, I usually don't eat it.

I have a number of problems with most of the pumpkin pie out there, not the least of which is that canned pumpkin tastes, well, like canned pumpkin. It's the same reason I don't eat canned peas or green beans. Canning vegetables just changes their flavor and texture in a way I can't enjoy. I also often find other's pie too sweet. I don't like it savory, mind you, but I don't want it to be syrupy either. This started out as the recipe from the back of a can of Libby's pumpkin, I think. Then my mom tweaked it, and then I tweaked it even more. I really like the balance. I use the frozen pumpkin puree I put up every fall. The frozen, not canned, puree gives this pie a fresh flavor that can't be beat. To me, it's the perfect pumpkin pie.

Pumpkin Pie
Yield: one 9-inch pie

2 eggs
1 1/2 cup pumpkin puree (preferably not canned)
1/4 cup white sugar
1/4 cup brown sugar
1/2 tsp salt
1 tsp cinnamon
1/2 tsp dry ginger
1/4 tsp cloves
1 1/2 cups evaporated milk (one 12 oz. can) or light cream

Prepare a 9-inch pie shell. If you want to be sure your pie shell does not get gummy (see note 2 below), blind bake it first in a 425° F oven for 10-15 minutes lined with a little foil and weighted down with pie weights or beans. Let pie shell cool completely before filling. Preheat the oven to 425° F. In a bowl, lightly beat eggs. Add the remaining ingredients and stir gently to mix. If you mix too aggressively, you will end up with foam on the top of your pie. It doesn't taste bad, your pie just won't be as pretty. Pour the filling into a prepared pie shell. Bake at 425 F for 15 minutes. Reduce the heat to 350° F and bake for another 45 minutes or until a knife comes out clean. Serve well chilled.

NOTE 1: I also like to make this as a custard, where I simply make the filling and bake it in a dish without a crust. Use a 9x9 inch glass/porcelain baking dish or similar. Otherwise, make exactly the same as for a pie. It's a great, easy, treat to make year round!

NOTE 2: The picture above shows a pie crust that I did not blind bake first. I was in a hurry, so I skipped that step. See how the crust looks like it has two layers? The inside layer here was chewy and not flaky at all like the outside half. The pie still tastes good, but the crust is not quite as delicious. I strongly recommend blind baking first, if you have the time and patience. If you do go this route, be prepared to lightly cover the edge crust with foil as it may begin to darken too much toward the end of the baking period.

Saturday, December 10, 2011

Gingerbread Cutouts

I've been in serious cookie making mode lately. Last week I made an army of these cute little guys for a "cookie caper" on base, where volunteers bring in homemade cookies and then they are packaged and distributed to airmen. (I also made a double batch of my sugar cookie holly cutouts.) What I love about gingerbread men is that the cookie is not overly sweet and has a nice spiciness to it. I often make and give them as gifts. They can be packaged in such cute ways and everyone loves to receive them!

The dough is very easy to mix. Probably the hardest part is grating the ginger, but a microplane makes short work of the task. Just be sure that the fresh ginger is ground into a paste; you want it to mix evenly into the dough. Mix the wet ingredients together first.

Then mix the dry ingredients in a separate bowl before adding the flour mixture to the wet mixture. I've tried a lot of gingerbread cookie recipes, and I love the combination of spices in this one.

Form the dough into a log and wrap in plastic wrap, letting it firm up in the refrigerator for at least an hour. Once it has firmed up, cut the dough into four or five large slices and roll one disk out at a time. Roll it fairly thin, about one eighth of an inch is best. Use a gingerbread cutter to make figures. Bake on a greased cookie sheet or a parchment lined pan. For best flavor, bake until the cookies are nicely browned. I've found if they are under cooked, the flavor is a bit lackluster.

Once they are baked and completely cooled, pipe decorations in royal icing (I use the recipe on the package of Wilton meringue powder). Let the cookies sit out for at least a few hours until the icing is dried hard. Then package them up! They keep fairly well in an air tight container. I like to maximize my time, so I always do the same decoration on them, but you can certainly get creative! You can use a variety of colors and small candy decorations if you want. Make your gingerbread army however you see fit!

Gingerbread Cutouts
Yield: approx. 70 3-inch cutouts

3/4 cup brown sugar, firm packed
1/2 cup butter, softened
2 eggs
1/4 cup molasses
1 tsp fresh ginger, grated
3 1/4 cup flour
1 1/2 tsp baking soda
2 tsp powdered ginger
1/2 tsp allspice
1/2 tsp cinnamon
1/2 tsp nutmeg
1/2 tsp salt

Beat the sugar and butter together until smooth. Add eggs, molasses, and fresh ginger. Mix thoroughly. In a separate bowl, mix the remaining ingredients. Stir well. Add slowly to the wet ingredients, stirring until well mixed. Shape dough into a log and wrap in plastic. Chill for at least one hour. Slice log into four or five disks. Roll out one disk at a time. Roll fairly thin, about 1/8 of an inch. Place on greased or parchment lined cookie sheets. Bake at 350° F for about ten minutes, or until nicely browned. Cool completely before decorating with royal icing.

Tuesday, December 6, 2011

A few more thoughts on tempering...

In the first few months after starting this blog, I posted a whole series on making chocolates. In my Tempering Chocolate 101 post, I discussed the technique involved in making sure your chocolate cools in the right crystalline form. Improper crystallization results in the development of an unappealing fat "bloom" in the final product. The amount of bloom shown here is excessive, and is the amount I typically see - for instance - with the chocolate that is leftover after dipping truffles that gets collected and thrown in the back of the pantry for eight months. It also can happen with a chocolate bar that is left in a car on a hot day and then eaten a week later. While it doesn't look appropriate when making chocolate confections, I do think it's pretty in its own, strange way. It may have something to do with my geology background regarding the crystallization of minerals, but I find fat bloom in chocolate fascinating.

Unfortunately, it's not very fascinating when it happens to the results of my hard work. I try very hard to be sure my chocolate is in temper before I dip a batch of truffles. I made a batch the other day for the first time in a while. I tried some new things; I tried to perfect some old things. In the end, I decided I had a few additional thoughts to add regarding tempering:
  • Tempering is a pain in the butt. There are no ifs, ands, or buts about it. So I often catch myself pushing the envelope of what I deem acceptable when testing whether my chocolate is in temper. Tempering is a pain, but it's even more of a pain when you jump the gun and coat a bunch of truffles with chocolate that dries with horrible looking streaks, or - even worse - won't properly harden at all. In the end, it's always better to be safe than sorry. If you have to go through the procedure again to ensure a good temper, do it!
  • I have found that I don't usually have great luck getting proper temper using the seed method (see my other post for a refresher). It's been three times in a row now of tempering chocolate when I try to do the seed method first, am not satisfied, and then go through the longer but very straight-forward seed-free method. In the future, I may just start with that method. Again, it takes longer, but you can be doing other things for the vast majority of the time.
  • Although I described a series of things to look for to determine the level of temper in your chocolate, the frustrating thing is that you often can't be totally sure you got it right until the next day. Sometimes, it all looks right, but by the next day, those darn streaks have shown up! The moral here is that I never make truffles the same day or day before I expect to give them away. I like to be able to make sure that fat bloom doesn't show up after the fact!
  • In my previous post, I only discussed dark chocolate. If you want to use milk chocolate or white chocolate, you still have to temper them, but they require slightly lower temperatures. As a guideline, use temperatures 2-3 degrees less than what you use for dark chocolate. Speaking of white chocolate... it's pretty darn hard to find real white chocolate these days. Virtually all white chips sold in stores today are not chocolate at all. You have to look closely. If it doesn't actually say "white chocolate" and have cocoa butter in the ingredient list, you are using a totally different beast. White "chips", such as Ghirardelli or Nestle, do not need to be tempered (but they don't really taste that good either). Real white chocolate must be tempered to ensure proper set up, gloss, and shininess. Baker's brand white chocolate blocks are the only real white chocolate I've seen around in a long, long time.
  • Remember that chocolate can build up heat very rapidly. Be sure to heat it slowly. If you get impatient and crank the heat up too much, there will be too much residual heat and even once you remove the chocolate from the heat source, chances are it will continue heating another 5-10 degrees. So go slow and easy. Patience is key.
  • Lastly, you really do get what you pay for. The cost of chocolate is typically proportional to how pure it is. Cheap brands have more sugar and other fillers in them and can be more challenging to work with. Most confectioneries use couverture when dipping truffles because it has more cocoa butter and is easier to work with and has a nicer mouth feel. Unfortunately, it's really expensive. I've had very good luck using Ghirardelli's 60% cacao chips and find it to be a nice middle ground compromise.

Friday, November 25, 2011

Classic Apple Pie

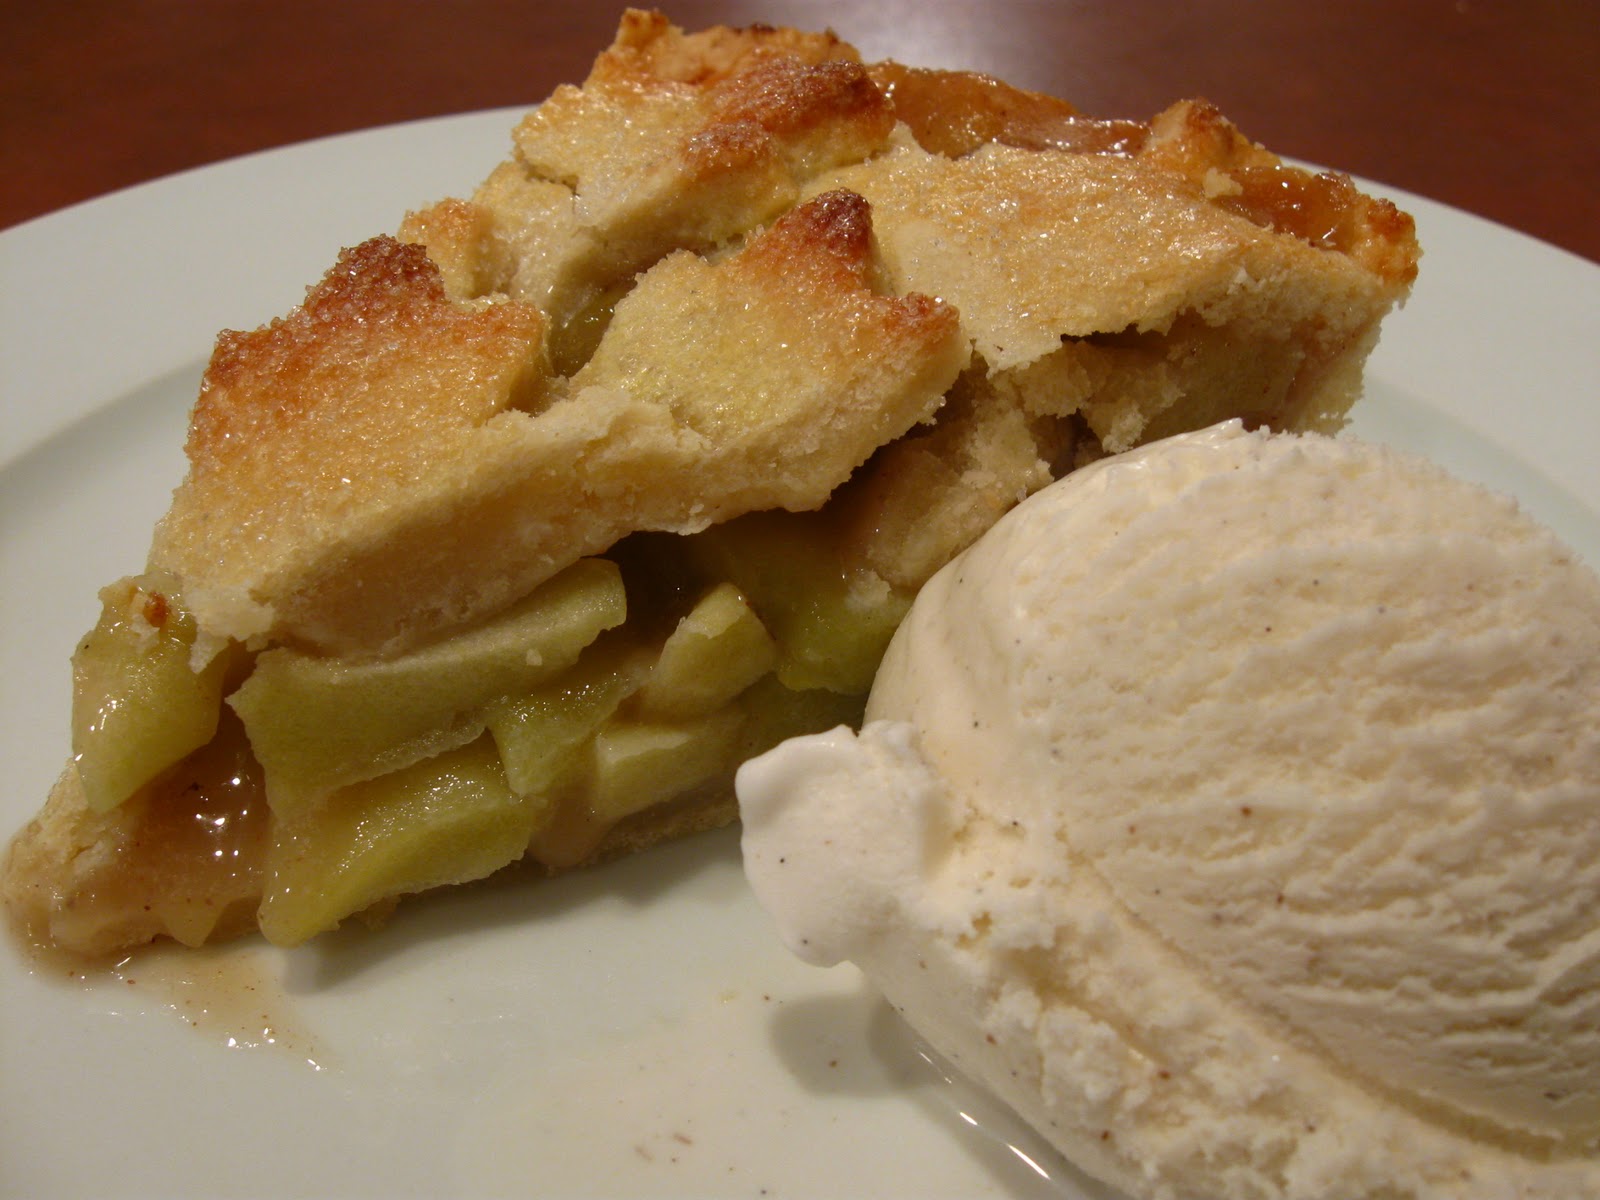
Because not everyone likes pumpkin pie, I decided to make an apple pie yesterday as well. It may have been the prettiest pie I ever made. A few years ago, I saw a picture in a magazine of a pie where the top crust was made of leaf cut outs. I guess because I more often make single crust pies, yesterday was my first chance to give it a go. It was so easy and so incredibly beautiful! The picture below does not do this pie justice. It was a work of art; I hated to cut into it!

As for making an apple pie, the best thing I ever changed about my technique was pre-cooking the filling. This step negates a number of potential apple pie problems I've had. When you simply throw the ingredients into the pie raw,you can't always be sure you have the right amount of sugar or thickener. The other issue is that when you put raw apples in the pie shell, their volume is much larger than when they're cooked; that usually means that the crust ends up "frozen" in place way above the actual end level of the pie. I hate it when you cut a pie and there is an inch of space between the top crust and the fruit! When you cook the filling first, the apples have already softened. When you place the top crust over it, you know that everything is in the place it will be once the pie is cooked. Just be sure you let the filling cool before adding it to the pie shell!


Classic Apple Pie
Yield: one 9 inch pie

Enough cored, peeled, and sliced apples to fill a 9 inch pie tin, mounded (use Granny Smith or another tart, firm apple, usually 5-10 apples, depending on size)
1/2-1 cup sugar
3-5 TBS flour
1/2 tsp cinnamon
dash nutmeg
1 TBS lemon juice

Place apples in a large pot. Start with the smallest amount of sugar and flour; add the spices and lemon. Stir thoroughly. Cook over medium low heat, covered, until the apples are slightly soft and the juice is thickened. Stir frequently to prevent scorching. Taste. Add sugar and flour as necessary until the sweetness and thickness are right. Remember that the filling will be thicker when it cools than it is when it is hot. The apples do not need to be fully cooked, as they will continue to soften when baked in the pie shell. To reduce the chance of lump formation when adding more flour, add it by placing the flour in a small strainer and tap a small amount into the filling at a time. Let filling cool before adding to an unbaked pie shell. Pour cooled filling into the pie shell, cover with the top crust. Be sure there are vents in the top of the pie to allow steam to escape. If desired, brush the top of the crust with an egg yolk wash and sprinkle with sanding sugar. Bake at 400° F for 25-35 minutes, or until the crust is nicely golden. Let pie cool before serving. Can be served at room temperature or chilled.

Tuesday, November 22, 2011

Green Bean Casserole from Scratch


I have always been a fan of the idea of green bean casserole. I mean who wouldn't be? Fresh green beans swimming in a savory mushroom sauce with crunchy onions on top? Sounds pretty good when it's put that way, huh? Unfortunately, being a scratch girl, not only do I never have canned cream of mushroom soup on hand, I am not a big fan of it's commercial taste. The use of frozen green beans over canned was an automatic; there was no debate there at all.

Last week I decided to make my own green bean casserole, from scratch. What that means is simply making a homemade sauce versus opening a can. It's pretty quick and easy, and boy was it good! I'm going to make it again later this week for the big day. Here's how it goes...

Green Bean Casserole from Scratch
Yield: 8-12 servings

3 TBS butter
1 medium onion, diced
8 oz baby bella mushrooms, diced
1/4 cup cream sherry
1/8 tsp garlic powder
1/2 cup flour
1 tsp salt (or to taste)
1/4 tsp pepper
4 cups whole milk, warmed
2 1/2 lbs frozen cut green beans, cooked and drained
1 1/2 cups french fried onions

Preheat the oven to 375° F. Melt butter in a deep skillet. I prefer using a stainless pan so I get better browning on the bottom, leading to a richer flavored sauce. Add the onions and cook over medium high heat until translucent and starting to caramelize. Add the mushrooms and cook until they are tender and browned. Add the sherry and stir vigorously to deglaze the pan and lift up all the browned bits on the bottom of the pan.

Mix the flour, salt, pepper, and garlic powder together. Add to the skillet and stir to mix. Slowly add the warmed milk, stirring as you go to minimize lumps. Once all the milk is added, cook, stirring continuously until it just comes to a boil and is thick. It will thicken more as it bakes and then cools. Add the green beans and stir to coat. Pour the mixture into a greased 9x12x1 inch baking dish (or similar). Sprinkle the top evenly with the french fried onions. Bake at 375° F until bubbly through and the onions are nicely browned, about thirty minutes. Cool slightly before serving.


Friday, November 4, 2011

Key Lime Pie

We've recently joined a dinner club. Each month we get together to have dinner with three other couples and, each month, there is a different theme. Last month the theme was "Florida Cuisine" and I was responsible for bringing a dessert. After some web searches, it became obvious that the only choice for dessert was a key lime pie.

Fortunately, living in Florida, fresh key limes were in my neighborhood grocery. If you can't find fresh key limes in your area, you may be able to find bottled key lime juice. Regardless, you can always buy it online. In a pinch, you could use regular limes. But as you can see below, they are not the same. Key limes are small little things. A bugger to juice, truth be told. But the flavor is distinct. This pie is not overly sweet. It is tart and has a slight bitter twist to it, kind of like what I associate with most grapefruit.

You start with the crust. This is a graham cracker crust. It has a little extra sugar in the crust, again to help balance that tart punch. I mix mine in a food processor and then dump it into a pie pan. Spread it out with your hands and then use a cup of some kind to press it down and make it even. Bake the pie crust while you prepare the limes.

Before you juice, you'll need to zest enough of them to obtain one loose tablespoon. Then you can cut the limes and juice away. Because they're so small, they can be tiring to juice. If you have one of those squeeze type juicers, you may be better off than I was. You need 2/3 cup of juice, which requires approximately one pound of key limes. Don't juice your limes too early, as the juice can develop additional bitterness when it sits too long.

Don't be dismayed if your crust comes out of the oven looking really funky. It tends to puff up when baking, but returns to normal dimensions as it cools. The first time I made this crust I thought I had ruined it when I first took it out of the oven Don't fret, it'll work itself out.

As the pie cools, you can mix up the filling. Start by mixing the egg yolks and zest together. Mix on medium-high for a few minutes until the mixture has increased slightly in volume and is thick and pale yellow (with green flecks in it, of course).

The next step is to add a can of sweetened condensed milk. This is some very thick, sweet stuff. So sweet, in fact, that it provides all the sweetness this pie needs. By the way, please note the proper color of this product. If you open your can and find that it is a caramel brown color, as I did when I first made this pie, perhaps you are not using sweetened condensed milk often enough, or, as in my case, not rotating your stock well. The date on my can of brown sweetened condensed milk? "Best by Nov 2004." Yikes! And, even more pressing, how many stinking military moves did that can of milk participate in, anyway, before I ended up throwing it away? Needless to say, I will be more vigilant.

Bake the pie at the same temperature as you baked the crust for 25 minutes. The pie filling will be set and maintain its shape upon gentle shaking, but will not be brown in any way. Remove from the oven and let cool to room temperature.

I think this pie requires a little sweet border to help balance it out. I like a whipped topping. You could make whipped cream right before serving, but I think piping a stabilized whipped cream border really looks like a million bucks. I like to then zest a little lime on the border for color. Be sure to thoroughly chill the pie before serving. This pie keeps well and can be made one to three days in advance.


Key Lime Pie
Yield: one 9" pie
Adapted from King Arthur Flour

Crust:
1 1/2 cups graham cracker crumbs (one pouch plus two whole crackers)
1/4 cup powdered sugar
1 egg yolk
1/3 cup melted butter
dash salt

Filling:
1 TBS loosely packed key lime zest
3 large egg yolks
1 14-ounce can sweetened condensed milk
2/3 cup fresh (or bottled) key lime juice

whipped cream and additional lime zest for garnish (optional)

Mix together the crust ingredients. Pour into a 9" pie pan. Spread evenly and pack down with a measuring cup. Bake at 325° F for 15 minutes. Crust may look uneven and strange upon removal from the oven, but will return to a more normal shape upon cooling. Let crust cool while preparing filling. Leave oven on at 325° F.

Beat the zest and egg yolks together on medium-high speed for a few minutes, until the yolks have increased in volume and become thickened and a pale yellow. Add the sweetened condensed milk and beat on a fairly high speed for 2-3 minutes. Lastly, add the lime juice. Stir until well incorporated, but do not over mix. Pour into the baked crust and return to the oven to bake for 25 minutes. The filling will be set and no longer loose in the middle, but will not be browned in any way. Let cool to room temperature. Prepare and pipe a border of stabilized whipped cream, if desired. Refrigerate for at least four hours before serving.

This pie keeps well and can be made 2-3 days in advance.

Friday, October 28, 2011

Jelly Candies

About a year ago, I posted a recipe for lemon jellies. These cute little lemon candies are so tasty and such a cheerful lemon hue. I absolutely adore them, but what is good in lemon must be good in orange and other citrus flavors, right? So I made a batch of orange ones. I made them exactly how I made the lemon ones, except that I substituted oranges and used orange coloring.

You know what? They weren't right. I was so disappointed because they were cloyingly sweet. Fortunately, I have a fix for that. I got out the old citric acid granules and - voila! - a wonderful orange version of the lemon jellies was born. When I make orange jellies, I add about one half teaspoon of citric acid to the hot mix. If you really want a nice, tart treat, you can also add a little pinch to the dredging sugar.

So, if you want to make a nice, colorful assortment of jellies that looks adorable gifted in little cellophane bags or piled high in a candy dish, make a batch of lemon, orange, and lime jellies. Just be sure to add some citric acid to the orange and lime ones!

Sunday, October 23, 2011

Stablilized Whipped Cream

A couple of weeks ago, I made a chocolate pie for company. I wanted to include a whipped cream border that I could apply before my guests arrived and would hold until I was ready to serve my pie. I knew better. I really did. I knew that piped whipped cream would be all weepy and deflated by the time I went to cut that pie. And it did. It looked horrible.

But I knew there had to be a way. I mean, really, look at all those diners that have pies with beautiful whipped edges. Therefore, when I was taking a pie to another dinner last Saturday, I was determined to figure it out. Enter stabilized whipped cream, the answer to all my prayers.

By the way it is made, stabilized whipped cream is sort of like a mousse. You whip the cream and add gelatin for stability. It then holds its shape beautifully in the refrigerator for hours and hours (even days!). While the end texture is not quite the same as freshly whipped cream, it is still delicious and its beauty and convenience make it a winning choice!

Stabilized Whipped Cream
Yield: approx. 2 cups

1 tsp unflavored gelatin
4 tsp cool water
1 cup heavy whipping cream
1/4 cup powdered sugar

Mix the gelatin and water in a small microwave safe bowl. When the gelatin is soft, after a few minutes, place the bowl in the microwave and heat gently at ten second intervals until the mixture is melted and warm, but not hot. Mix the cold whipping cream and powdered sugar together in a glass or metal bowl. Mix on low speed until the sugar is incorporated, then increase to high speed.

When the cream reaches soft peaks, slowly add half the gelatin mixture (you will discard the remainder). Continue whipping until stiff peaks develop. Pipe onto your dessert and keep refrigerated until serving. If you want to make a double batch, double the cream and sugar, but simply use all the gelatin mixture.

NOTE: I mix twice the gelatin mixture needed for the single batch because it is easier to measure and because with such a small amount, so much ends up sticking to the inside of the bowl. Feel free to add any additional flavorings to your whipped cream as usual, such as vanilla, chocolate, lemon or lime zest, etc.