I am now blogging new recipes on my farm website.

Cooking from Scratch is on facebook! Click here to check it out!

Sunday, February 20, 2011

Bruschetta

This little dish is a favorite of mine. It's also one of those ones where it's different every time I make it. Bruschetta is an Italian appetizer that involves toasted bread and a topping, often of tomatoes and garlic. This iteration was a little more traditional, but I've also made toppings with sauteed mushrooms and tomatoes, which is just jim dandy, too.

This version here was basically a raw salsa of tomatoes, onions, garlic, and herbs. It came about because I started to make guacamole and then realized my avocado had passed its prime. It was a sad day until I realized that I could give that salsa mixture new life.

Cut a baguette on a diagonal so that you have slightly larger slices. In my experience, if your slices are too thin, the stuff just keeps falling off. I cut mine about one centimeter thick. Brush with olive oil and then broil in the oven, flipping halfway through, until both sides are gently golden.

Chop up a few seeded Roma tomatoes, purple onion, and garlic. The ratios are up to you depending on your fondness for each ingredient. Don't forget a little kosher or sea salt to bring out the flavors. A little pepper wouldn't be a mistake either. Throw in some dry or fresh oregano and basil. Stir the mixture and spoon onto the tops of the toasted bread. You can serve them like this, but I like to add a little Parmigiano Reggiano to the top. I then put them under the broiler for just a few moments to melt the cheese. You don't want to broil them too long or your tomatoes will turn mushy and the juices will start oozing all over your nice crisp toast.

Serve at room temperature. They can be served right away or can sit tight for an hour or so, if necessary.

Oh, and in case you've been wondering where I've been... well, perhaps you will forgive me if I've been loath to spend more time in front of my computer lately than is absolutely necessary. It's just been gorgeous here lately. I've got to enjoy it while I can before the gates of hell open up! I hope the weather hasn't been too miserable in your neck of the woods.

Tuesday, February 8, 2011

Home Fried Chicken

This is one of those down-home comfort meals that really pleases. However, you have to be aware that home fried chicken does not taste the same as store bought fried chicken. That's the point, right?

Home fried chicken has a classic flavor and texture all its own. It's skin is not break your teeth crunchy but is instead delicately crisp and flavorful. The flesh is so luxuriously moist - and not because it's squirting grease everywhere either. It's so moist, you'll wonder what they're doing wrong at those chain chicken places. If you like super greasy, super crunchy fried chicken, then do yourself a favor and just go order take out. If you want a less boisterous but more flavorful fried chicken, then give this a try.

I like to use all legs when making fried chicken. There are a few reasons for this, not the least of which is that legs are my favorite. However, I also really like cooking pieces that are all the same size and structure. It makes cooking them evenly soooooo much easier. I also like legs because they are smaller and, therefore, cook faster. Mine spend less than thirty minutes cooking. You can use other pieces, but you'll have to adjust the time they spend cooking. I would still recommend at least using all the same type of parts for the best results.

The trickiest part about making this chicken is you have to have patience. You start out cooking the chicken over decently high heat just to set the crust, but then you have to turn it way down. I used to have the hardest time doing that when I was younger. Every time I was at the stove it was all about high heat all the time. Trust me, that just doesn't work at all when making fried chicken. I can't tell you how often I ended up with raw chicken with a burnt crust. Yuck! If you want the chicken cooked all the way through before the crust browns too much, you have to go low and slow for the majority of the time.

Home Fried Chicken
Yield: 8- 10 legs

8-10 chicken legs, skin on or off
2 cups all purpose flour
1 tsp table salt
1/2 tsp ground black pepper
1/2 tsp paprika
1/2 tsp garlic powder
2 eggs
1/2 cup milk
vegetable oil, for frying

Mix the flour and spices together in shallow bowl or plastic container. In a separate container, lightly beat the eggs and milk together. Dip each chicken leg in the flour, shaking off any excess. Then dip the leg into the egg mixture, being sure to coat all sides. Finally, dip the leg back into the flour mixture, rolling to coat thoroughly. Set the leg on a sheet tray while coating the remaining legs.

Heat 1/4 to 1/2 an inch of oil in a large skillet over medium to medium high heat. I use a small piece of the flour/egg mixture that invariably ends up stuck to my finger to check the heat of the oil. You are looking for that piece of dough to instantly start fizzing vigorously. Once the oil is hot, add the legs and cook, turning occasionally to brown all sides for about five minutes. You may want a spatter shield during this time period.

After the initial browning, turn the heat down to medium low and cover. For normal sized legs, cook about 15-20 minutes, checking periodically with a meat thermometer. When the internal temperature is around 145° F, remove the cover and turn the heat back up to re-crisp the crust, about five minutes. Cook until the crust is nicely golden and crispy. Remove chicken and place on a cooling rack lined with paper towels to drain and cool slightly.

Monday, January 31, 2011

Moroccan Style Chick Pea Soup

Everyone seems to assume that because I currently live in Florida that it's all sunshine and warm weather for us all winter. While I can't say we never experience that combination, in the panhandle, there's plenty of cold and dreary to go around. It seems we go through little phases of the not so nice weather. The difference between here and real winter up north is that we get a lot more breaks of beautiful weather through the winter.

It seems like we've been going through one of those not so nice phases. While two days ago was a stunningly beautiful day, today and many of the other days in the last two weeks have been cold and/or dreary. And you know what cold and dreary means? Soup! Lots and lot of soup!

This soup is wonderful for a couple of reasons. The first is that it can easily be made in less than half an hour. Another reason I like it is since there is no meat in it, I can make it spur of the moment on those evenings when I've forgotten to thaw out something for dinner. The last really great thing about it is the taste. Those Moroccan spices with the cinnamon and cumin really make this a warming soup. Yum!

Moroccan Style Chick Pea Soup
Yield: 4 servings

2 TBS extra virgin olive oil
1 medium onion, diced
2 large garlic cloves, minced
1/2 tsp ground cinnamon
2 tsp cumin powder
1/8 tsp cayenne powder
1/4 tsp onion powder
1/2 tsp sweet paprika
1/8 tsp fresh ground pepper
4 cups vegetable broth (I like Knorr vegetable broth cubes)
1 15-oz. can diced tomatoes, drained
2 15-oz cans chick peas, drained and rinsed
1 tsp sugar
2 cups fresh spinach

Saute the onion and garlic in the olive oil over medium heat in a 6 quart or larger pot. Cook until onions are soft and slightly browned. Add the spices and stir to mix. Add the broth, stirring to remove any browned bits from the bottom of the pan. Add the tomatoes, chick peas, and sugar. Let cook 15-20 minutes. Remove the soup from the heat and add the spinach, stirring to wilt it. Serve immediately.

Thursday, January 27, 2011

Palmiers

I've been disappointed lately. It just doesn't seem like my photos have been coming out very well in the last month or so. I wish I knew if it was operator error or if - somehow - my digital camera has decided to do its own thing. Either way, the end result is a bunch of photos that I just haven't been very excited to share with you. However, my mom convinced me that you might rather deal with less than perfect photos than no photos at all.

My husband is currently a squadron commander and, as you might imagine, there are some "wifely" responsibilities that often go along with that. Recently, I hosted a luncheon at my home as part of the social club. It was a fairly casual affair, and - since I've been busy - I didn't feel the need to go all out and prepare a multi-step dessert like profiteroles or something. Nope, just something nice and easy... provided you "cheat" and use store-bought puff pastry, that is.

I love these little pastries so much! I'd be completely content if palmiers were considered their own food group. In fact, after everyone left, I had absolutely no problem eating every single remaining pastry in less than an hour (and, please, don't ask me to admit how many there were!). These things are flaky and crunchy, sweet and oh so cute.

The first step is the thaw the frozen, store-bought, puff pastry on the counter for forty minutes or as instructed on the package. Then, sprinkle the counter liberally with granulated sugar. Lay out the pastry sheet on top of the sugar. Sprinkle the top with more sugar and then gently roll across the dough to imprint the sugar slightly. There is no need to roll too much or too hard. Gently brush off the excess sugar. If you have too much sugar clinging to your palmiers when they bake, not all of the sugar will be able to melt, leaving you with grainy palmiers... which is not the intent at all!

Start rolling the pastry up across the long side until you reach the middle and then do the same on the other side so that you end up with a double "scroll" roll of dough. Trim the ends so that they are even. Don't roll too loosely or you'll end up with gaping holes in your finished pastries.

With an oiled serrated blade, gently "saw" slits along the tri-fold seams of the puff pastry. This cut will help you evenly slice the rolls and insure you don't end up with weird un"seam"ly pastries. Ha, ha.

Sorry.

Once your initial divisions are made, slice the dough, using a sawing motion, into individual pieces. The recipe I have always followed specifies that they should be cut into half-inch sections. I always seem to end up with them thicker which isn't as good. The thicker ones don't seem to bake up as lightly. It may be worth the effor to get a ruler out to be sure they aren't too thick. Even erring on the side of a little thinner might be better. Depending on how you slice them, you'll get between twelve and twenty palmiers per sheet of dough.

Lay the palmiers out on a parchment lined baking sheet, cut edge up. You can adjust their shape if need be at this point.

Bake at 425° F for 12-15 minutes, until the tops are nicely golden and the pastry can be moved without falling apart. Remove the tray from the oven and flip the pastries using a pair of tongs. Return to the oven to continue baking to brown the reverse side, perhaps another 8-10 minutes.

Continue baking the other side until it is also golden, perhaps another 8-10 minutes. Place on a cooling rack as soon as they are removed from the oven. Cool completely before serving, at least one hour so that they are fully crisped. While you can store them in an air tight container for 2-3 days, I really think they are best enjoyed on that first day. That's why I ate all those left overs so quickly.

Really. You believe me... don't you?

Monday, January 17, 2011

Hazelnut Liqueur

This is one of those recipes that takes a long time from start to finish, but the work load is fairly low. In fact, the most frustrating thing may well be getting the skins off of the nuts. Needless to say, however, if you have any patience at all, you should try this recipe. Well, provided you like liqueurs. I'm not a huge fan, myself, of sipping liqueurs; to me they are too sweet to drink alone, so I enjoy mixing them and using them in cooking. There are a lot of folks out there though that really enjoy a good sipping liqueur, and this is one of them... another grand gift idea!

Of course, it starts with the nuts. I based this recipe from one I found in Linda Amendt's Blue Ribbon Preserves book. She was making an almond liqueur, but not once did she mention toasting the nuts. I think this is a crucial mistake.

You always want to toast the nuts, in my opinion. Toasting is what brings out their true nuttiness. For hazelnuts, toasting also allows you to remove most of their papery skin. Throw the nuts on a sheet pan and bake at 250 until the nuts are very fragrant, just slightly browning, and there are plenty of cracks in their skins. Remove from the oven and pour into a kitchen towel. Close the towel up and let the nuts steam themselves for a bit to loosen the skin. To remove the skin, simply rub the nuts together with the towel. You won't get all of the skin off, but you will remove a large portion of it.

Chop the nuts up and pour into a large glass jar. I used a half-gallon canning jar that can be found at Michael's or similar craft stores. Heat the vodka and sugar together, gently, until the sugar is completely dissolved. Let the mixture cool slightly and add to the nuts. Throw in the chopped up vanilla bean. Cover the top with a double layer of plastic wrap and put the lid on. Gently swirl the jar to mix the ingredients. Place in a cool, dark place for a month.

After a month, the mixture will have taken on a lovely hue. It will also be full of a bunch of goopy stuff. Have no fear! It will all strain off, leaving you a gorgeous liqueur.

Use a fine mesh strainer to remove the nuts and vanilla bean. Then set up a filtration system with a coffee filter. The first filtration will be the slowest since the filter fills up with goop the fastest. I did find that keeping the filter full results in a faster filtration. Filter the liqueur four or five times. If there is any remaining cloudiness, let the liqueur sit undisturbed for a week and then carefully pour off the top of the liqueur, leaving any sediment behind. Bottle the result in pretty bottles and enjoy!


Hazelnut Liqueur
Yield: about 3 cups
Adapted from Linda J. Amendt's Blue Ribbon Preserves

4 cups hazelnuts
3 cups vodka
1 1/3 cups sugar
1 whole vanilla bean, cup into pieces

Toast the hazelnuts on a sheet pan in a 250° F until they are fragrant, slightly browned, and the skins are well split, maybe 15-25 minutes. Remove nuts from oven and immediately pour into a kitchen towel, wrapping it closed so that the nuts can steam. After 10-15 minutes, rub the nuts with the towel to remove most of the papery skin. You don't want to remove all of it, as I believe the skin is what helps give the liqueur its gorgeous color.

While the nuts are toasting, place the vodka and sugar into a sauce pan and heat gently just until the sugar is dissolved. Do not heat the liquid to a boil. Remove from the heat and let cool slightly.
Chop the nuts coarsely and place in a large glass jar. Add the cut up vanilla bean and then pour the warm vodka/sugar mixture into the jar. Swirl to mix. Cover the top with some plastic wrap and then close with the lid. Place in a cool, dark place for a month.

After a month has passed, the liqueur should have a nice golden hue. Pour the mixture through a fine mess sieve to remove the nuts and vanilla bean. Filter the liqueur through paper coffee filters four or five times to remove all sediment. If the liqueur still has sediment after four or five filterings, let it sit in a cool place for a week to let the sediment fall to the bottom of the bottle and pour off the clear top liquid. Decant the final product into pretty glass bottles and enjoy!

NOTE: I have doubled the amount of nuts this recipe uses compared to how I first posted it (four cups instead of two). While the finished product was good with the two cups, I later decided it was not as nutty as I would like. If you're going to go to the trouble of making this, you want it to come out with a robust flavor! 

Tuesday, January 4, 2011

Shrimp Scampi

.:Phew:. I never know whether to be sad or relieved when the holidays are over. Perhaps I feel a little bit of both. I do know that driving fourteen hours in one day is a lot. I also know that suddenly being around little kids that are bathing in a pool of germs you're not used to swimming in can be rough on a gal's immune system. But I have persevered. .:Phew:.

Fortunately, I know some really easy dinners to get me through this recovery phase. This is what I made last night. Not only is it fairly healthy, provided you don't get carried away with the oil, but it is super-ooper-duper fast to make. Especially if you purchase your shrimp peeled and ready to go. I served it with garlic toast and green beans mixed with toasted almonds, a squirt of lemon juice, and a little butter. It was a great meal. Yummy and healthy!

Here are the main players for the shrimp. Of course, I realize now that I forgot to put the olive oil in the picture. I guess I had already drizzled it in the pan and put it away. Well, you get the general idea: a fairly simple cast of players. I used dry vermouth, but you could simply use any good white wine you have on hand.

I used Campari tomatoes. They're the only tomatoes I buy in the winter months of tasteless, crunchy store-bought tomatoes. They're a little more expensive and the small size is sometimes a hassle, but they actually taste like tomatoes. That makes it a no-brainer for me. Cut the tomatoes in half (across the tomatoes equator, separating top from bottom) and squeeze out the seeds. Then dice.

Once you have all the ingredients ready, turn the heat on and get going. Start with the garlic and then add the shrimp. I used a non-non-stick skillet for this. You can use a non-stick pan, but see all those dark bits stuck to the pan? There's flavor in them thar bits. You won't get as many of those bits if you use a non-stick pan. At the end of the process, you'll use the vermouth to loosen up those bits and deglaze the pan. Instant delicious sauce!


Shrimp Scampi
Yield: 2-3 servings

1-2 TBS olive oil
1 TBS garlic, minced
1/4 tsp red pepper flakes (or to taste)
1 lb peeled and deveined shrimp
1 TBS lemon juice
1/4 cup dry vermouth (or white wine)
1/2 cup seeded, diced tomatoes
salt and pepper to taste

Preheat a skillet over medium-high heat with the olive oil. When the pan and oil are hot, add the garlic and pepper flakes, stirring to keep from burning. When the garlic turns slightly golden, add the shrimp and lemon juice. Let the shrimp cook for 2-3 minutes per side without stirring very often. This will allow browned bits to stick to the pan which will provide extra flavor for the dish.

When the shrimp are completely pink, add the vermouth and stir to loosen the bits on the bottom of the pan. Add the tomatoes and stir. Add salt and pepper to taste. Serve immediately.

Sunday, December 26, 2010

Sangria Jelly


One of my favorite things about the holidays is that it gives me a great excuse to do all sorts of cooking that I can then give away as gifts. Every year, I prepare goody bags for family members. A lot of these recipes I have highlighted in my "Gift Ideas" section of this site and some of the others are forthcoming. This year, I included granola, chocolate cubed cookies, lemon jellies, pumpkin bread, butter toffee, and gingerbread men. For the kids, I included lollipops. For the adults, I included two kinds of jelly. One is this lovely sangria jelly. The other is a margarita jelly which I will post in the not too distant future.

I love making jelly to give as gifts. Of course, some are easier to make than others. Making jelly, with its crystal clear beauty, can be time consuming depending on the fruit being used. Some jellies can't be made at certain times of the year due to the lack of fresh fruit. That's why I especially like to make unusual jellies like this one which use mostly bottled or readily available juices and wine. I previously posted one of my favorite jellies to make, wine jelly. This recipe is a variant of that one. It still uses a bottle of wine, but it includes some fresh citrus juice, which moderates the wine flavor a bit. Its flavor is reminiscent of a gorgeous glass of sangria and it is just as beautiful.

This is a jelly that is quick and easy to make and is always appreciated as a gift. In fact, I can usually make a batch, start to finish, in less than half and hour.

The first step is to be sure you have all of your equipment set out ready to go. Here, you can see the jars I used. The jars should be washed but do not need to be sterilized since you will be processing them in a water bath. If you need a refresher on canning processes, go back and take a look at my Canning 101 post. The other equipment that should be handy is a jar lifter, jar funnel, small pan with hot water and tongs to warm the lids, a pot for cooking the jelly, and a large kettle for the water bath. What I really love about canning jelly recipes is that they typically make small amounts in small jars, which means I don't have to drag out my huge canning kettle; I can simply use a small stock pot. Don't forget to add a splash of vinegar to the water to keep your jars from ending up with mineral residue on them.


You will first gently heat the wine, triple sec, orange and lemon juices in a large pot. Remember, hot sugar syrups expand quite a bit when cooking, so give yourself plenty of room. When the mixture is warm, add the sugar and stir until the sugar is completely dissolved.

Be careful not to overheat this jelly or it may end up with a slightly bitter taste. When the mixture is just about at a simmer, remove the pan from the heat and add the pectin. Stir completely and remove any foam that may have formed on the surface.

Pour into the jars, leaving a quarter inch head space. Wipe the rims, and use the screw bands to hold the hot lids in place. Process in a water bath for ten minutes. Remove water bath from heat and let sit five minutes before removing jars from the water. This last step helps to keep hot jelly from oozing out of the jars which can happen if they are removed too suddenly from a hot water bath. Let jars sit 24 hours before removing screw bands to clean the jars for storage.


Sangria Jelly
Yield: 8 half-pint jars
Adapted from Blue Ribbon Preserves by Linda J. Amendt

3 cups pinot noir wine (or similar)
1/2 cup strained orange juice
1/4 cup strained lemon juice
1/4 cup triple sec liquor (or similar)
6 cups granulated sugar
2 3-ounce packets of liquid pectin

Heat the wine, juices, and liquor in a large pan over medium heat until it is warm. Add the sugar and stir, heating gently, until the sugar is completely dissolved. Heat until the mixture is almost to a simmer. Be careful not to overheat this jelly as it may develop a bitter flavor. Remove the pan from the heat and add the two packets of pectin, stirring completely. Skim off any foam and pour into eight 8-ounce jelly jars. Wipe the rims of the jars with a damp paper towel and screw on hot lids and bands.

Process in a water bath canner for ten minutes. Remember to only start timing once the water has returned to a boil. When the ten minutes is up, remove the canner from the heat and let the jars sit in the water for five minutes before removing jars from the canner to a towel lined counter. Let the jars sit undisturbed for 24-hours before removing screw bands and cleaning the outside of the jars, if necessary.

Friday, December 24, 2010

Easy Candied Pecans

Last year, I posted a recipe for candied nuts. They are delicious and beautiful. However, they are kind of a pain in the tuckus to make... relatively speaking, anyways. They're fine if you are making a dish of them to put out as appetizers or what not. What they're not so great for is that moment when you decide you're in the mood for a tasty salad with some candied pecans for crunch and you want them to basically prepare themselves while you put your salad together.

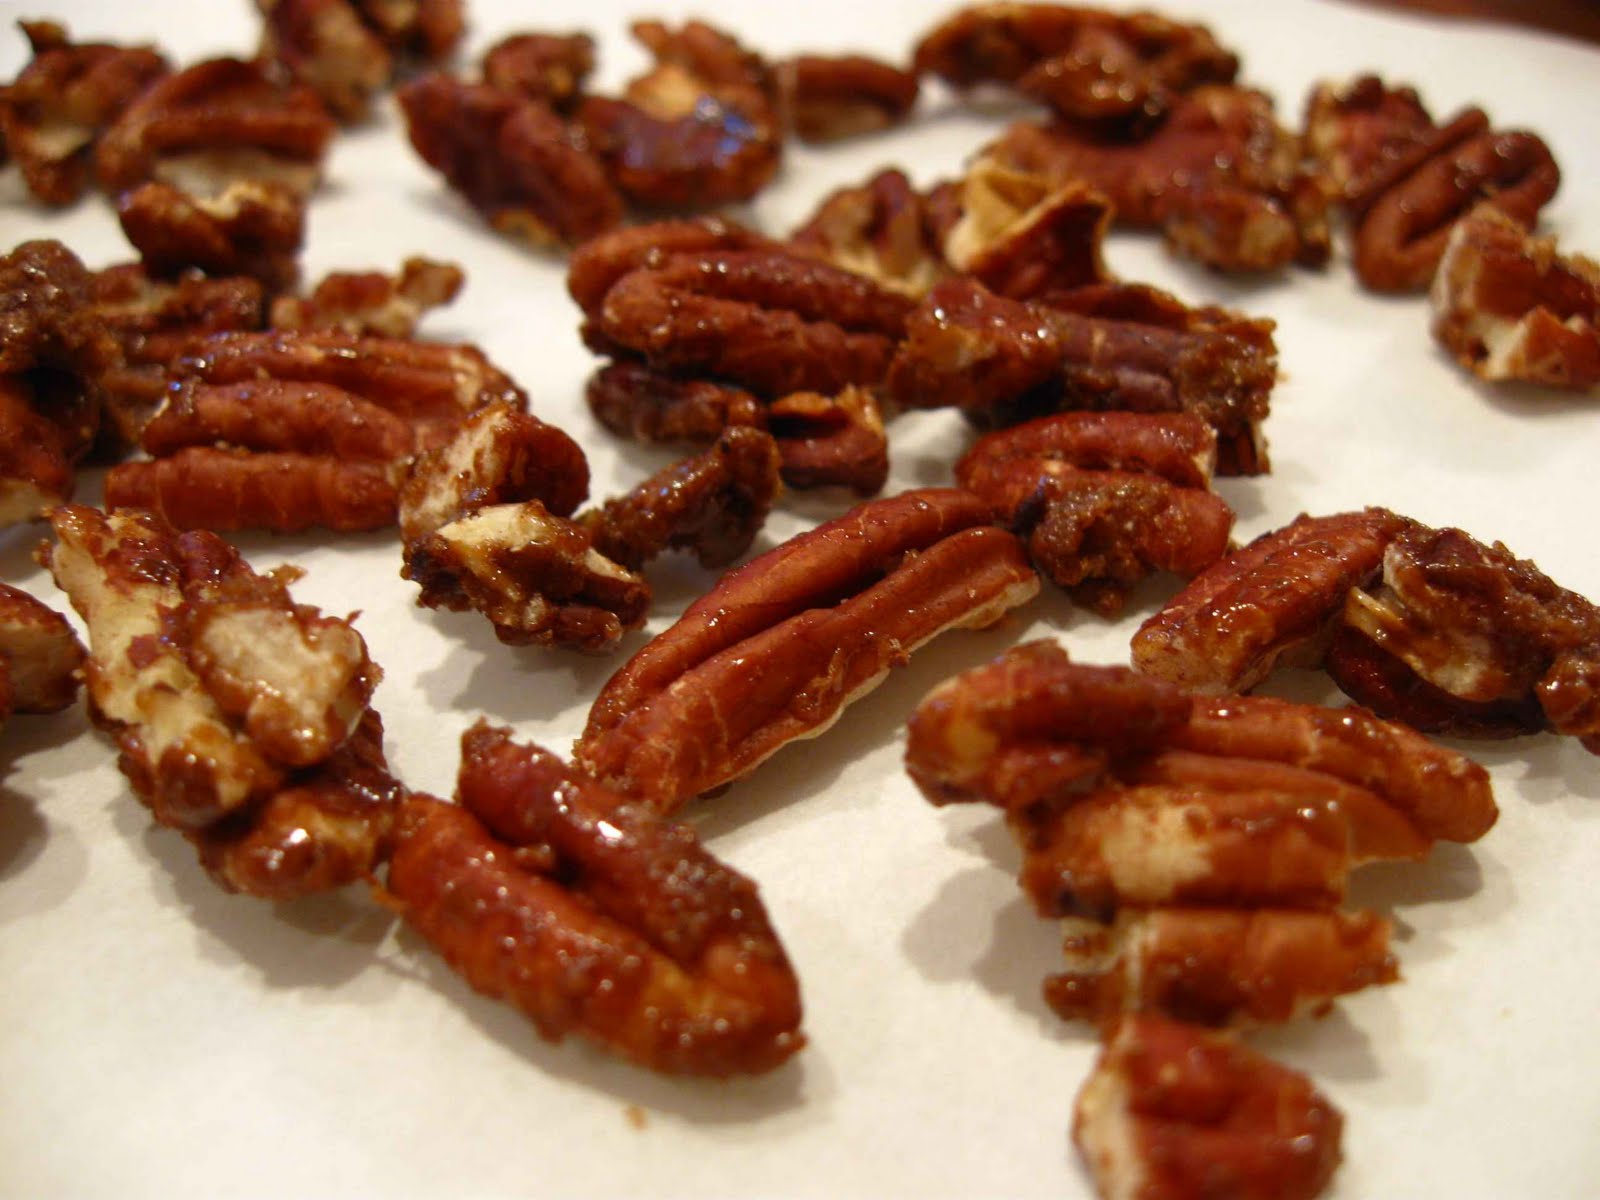
So, I came up with this little recipe. They are just as tasty as the original version, although they don't have quite as crunchy a kick. They aren't quite as pretty either, since they don't end up encased in beautiful sugar crystals. What they are is quick, easy, and delicious. I can put them on the stove when I start making my salad and they are typically done before I have finished putting the salad together.

The first step is to mix together a little brown sugar, kosher salt, and cinnamon. The proportions here are up to you. I usually mix together about two tablespoons of sugar, a dash of salt, and dash of cinnamon. I simply toss the three of them together with my fingers.

Throw your pecan pieces in a dry saute pan over medium to medium high heat. I store my nuts in the freezer, so it takes a few minutes for them to thaw out before they start toasting. Keep an eye on them and shake the pan periodically to move them about. When they start to brown and you can smell their toasty nuttiness, throw in some of the sugar. Don't go too crazy adding sugar; you don't want the nuts swimming in it. In the following picture you can get an idea of the proportions I use. Stir until all the sugar is melted and starting to brown a bit.

The last step is to pour the nuts out onto a sheet of parchment paper to cool. Some of the sugar will be left behind in the pan. Pull the nuts apart with a fork or other utensil, otherwise they'll all stick together as they cool. Give them about five minutes to cool and harden before serving.

Wednesday, December 22, 2010

Cream Puff Swans

Cream puff swans are the most impressive of the lot, which is why I saved them for last. What amazes me is that for such an impressive dessert, they're surprisingly easy. To make them, you simply need to pipe two different shapes out of pate a choux.

The first is the swan's neck. You always want to pipe a few more necks than you plan to need because invariably one will break or turn out deformed if you don't have any extras. To pipe the neck, use a Wilton #12 tip or similar to pipe out an S shape. Once it is piped, dip your fingers in water to pull one of the ends into a small point. This will give the finished product the graceful head that really makes these things look fabulous. In the photo below, that's my pinky finger for size reference.

The second shape, which forms the bodies and wings, is a large oval blob of pastry dough. I used a pastry bag without a tip to make the oval. I know that, unbaked, they kind of resemble a pile of you know what. But they'll look much better cooked, I promise! Because the necks and bodies are such different sizes, you'll either want to bake them on separate baking sheets or be prepared to pull the necks off of the baking sheet when they are ready lest they get too dark. If you look at the first picture, you can see that my necks got a little darker than I would prefer, so just be sure you keep an eye on them.

As soon as the bodies come out of the oven, use a serrated knife to open them up as shown in the following picture. You want to cut an oval out of the top of the body, leaving enough of the sides to have a decent container. Slice the cut away part into two, cutting the long way. These pieces will end up being the wings. Let all the parts cool before assembling the swans.

To assemble them, pour some kind of sauce in the center of the plate. Here I've used a chocolate sauce, but your swan can be swimming in whatever sauce you want. Place the neck into the body, and, while holding it in place, fill the swan's body with pastry cream or some other filling such as ice cream or mousse. The filling should hold the neck in place at this point. Place the wings into the body so that they sweep up and backward as shown. You can serve them as is or sprinkle them with powdered sugar. While the parts can all be prepared ahead of time, be sure to assemble only right before you plan to serve them.

Tuesday, December 21, 2010

Cream Puffs

Behold the humble cream puff. After what I've shown you so far this week, these guys need almost no instruction now. Whip up a batch of pastry cream and let it chill. Mix together a batch of pâte à choux pastry and pipe into small, one inch sized balls of dough. Use a damp finger to press the balls into a nice shape before baking. Be sure you read the tips about shaping and baking them in the pâte à choux pastry post and the tips about filling them in the eclairs post. This pastry recipe will make about 50 cream puffs.

Let them cool completely before piping them full (but not too full lest you create a pressure filled pastry "bomb") of pastry cream with a small diameter cake decorating tip. If you prefer, you can instead fill them with plain or flavored whipped cream. They can be dusted with powdered sugar if you choose as well.

These will stay fresh and delicious at room temperature the entire day they are made. If you want to save them for more than one day, be sure to refrigerate them since they are filled with a custard. I personally don't think they are nearly as good after the first day since the trip into the refrigerator softens the pastry up quite a bit. Theoretically, they can even be frozen and thawed to eat later. Again, not as good as the first day, but still worth the calories.

Check back tomorrow for the pièce de résistance:
Cream Puff Pastry Swans! A dessert to make your company swoon.