I am now blogging new recipes on my farm website.

Cooking from Scratch is on facebook! Click here to check it out!

Friday, May 18, 2012

Herbed Tenderloin Toasts

This gem of an appetizer is great because it is pretty darn easy to make. Not cheap... but easy. I suppose you could always substitute a different cut of beef for the tenderloin, but it's the butter-like consistency of the beef slice that makes it so memorable. The only real cooking involved in this appetizer is with the tenderloin, which is super easy.

To really make your life simple, purchase a two pound, trimmed center-cut tenderloin. The only tenderloin I could find without going to a specialty market was a whole "peeled" tenderloin (meaning the fat has been cut away but it still has the silver skin... which is a pain to remove). Preheat your oven to 425° F. Rub the tenderloin down with some vegetable oil and sprinkle with salt, garlic powder, pepper, and ground thyme. Place on a foil lined roasting pan and roast until a thermometer in the center of the cut reads 140-145° F. Depending on the size of your tenderloin, it can happen fairly quickly... as in less than a half hour. Let the roasted tenderloin cool to room temperature, wrap it tightly in plastic wrap, and then refrigerate until well chilled. Chilling the meat prior to slicing makes life much easier. You want thin slices! Once chilled, slice the tenderloin into approximately 1/8 inch thick slices. The roasting and slicing of the meat can be done up to 3 days ahead of time.

On the day you plan to serve this dish, slice a fresh baguette into 1/4 inch thick slices at a slight angle, so that they slice into longish ovals. Turn on your broiler. Brush or spray (I recommend spraying) both sides of each slice. Lay them out one layer thick on a sheet tray and toast until lightly golden, flip, and toast again on the other side.

Meanwhile, let a package of Boursin cheese (if you have never tried this spreadable cheese, you are missing out!) come to room temperature. Then open a jar of roasted red peppers and slice a bunch of thin strips, about an inch and a half long and 3/8 of an inch thick.

To assemble, spread a small bit of Boursin on the toast. Lay a small piece of sliced tenderloin on the cheese. Add another little spread of cheese on top of the meat and lay two slices of roasted red pepper in an X pattern. That'ts it! These are so yummy! They were one of the more popular dishes I served.

I made 75 of these with about two pounds of tenderloin, 2 baguettes, one decent sized jar (maybe 12 ounce range?) of roasted red peppers, and roughly 8 oz of Boursin cheese.

Wednesday, May 16, 2012

Smoked Salmon on Cucumber

Being a proud native Pacific Northwesterner, who grew up on smoked salmon, I just can't pass up any opportunity to introduce it to the masses. For the party I catered last week, I smoked a small filet and then mashed it together with a little cream cheese. I probably smoked about one and a half pounds of salmon (pre-cooking weight) and then once it had chilled in the refrigerator, I mixed it with approximately one 8 oz package of room temperature cream cheese. I crumbled all the fish first and added the cream cheese a bit at a time until I reached the consistency and taste I wanted. Add a little salt and pepper, if necessary.

Prepare these appetizers within an hour of serving. The salmon spread can be prepared a few days in advance, but the cucumbers get weepy and floppy if they are cut too early. If you do cut them ahead of time, be sure they are kept refrigerated until the last minute. Be sure to use the hothouse cucumbers for this dish and do not slice them too thickly. Aim for about 3/8 of an inch. If you use too much cucumber or the standard market cucumbers, the cucumber flavor can start to overwhelm the delicate nature of the smoked fish.

Use two spoons or your fingers to mound about a teaspoon or two of the salmon mixture onto the cucumber slice. Add a small bit of green herb to the top. I used curly parsley as it does not have an overwhelming flavor of its own in such a small piece. Lastly, and this part is optional, I ground a little Salish Smoked Salt to finish it off. Looks good and adds a small burst of smokey salt when you first put the round in your mouth.

These little appetizers are so gorgeous and the contrast of the fresh, crisp cucumber with the smooth, smokey taste of the salmon makes for a dish sure to wow your guests. I highly recommend them!

Sunday, May 13, 2012

Party for Sixty

A good friend of ours recently retired from the Air Force after 24 years of active duty service. When his wife told me how much they were quoted by a local caterer to provide food for the party they were hosting in honor of the event, I liked to have choked. The price was obscene! As I've been toying with the idea of pursuing some kind of personal chef service when we move the D.C. area this summer, I thought it would be a great trial run to see if I would enjoy that type of work... and I did!

They wanted to provide heavy appetizers for up to sixty guests this past Friday evening. The picture above shows just one of the tables of goodies. Based on estimates that I found online, I prepared over 1000 pieces/servings. As I was also a guest at the party, I had the opportunity to see the reactions to my food. The feedback was great! While I developed some new menu items, which I will be posting in the near future, I also served a lot of items I have already shared with you.

I made my prosciutto and cheese calzone. I made the crust from scratch as well. I just love the salty punch the prosciutto gives to this calzone. For such a simple list of ingredients inside, the flavor is amazing!

Because no party is complete without chips and dip, I decided to serve my
black bean dip.

And because my husband would have disowned me if I hadn't included
deviled eggs on the menu, I managed to shell four dozen very tricky eggs. You know, it's bad enough when you are trying to peel a couple of eggs that won't peel easily, but with this amount, I am amazed I didn't end up with eggs being thrown all over the house! Fortunately, the ugly side goes down and they still ended up looking pretty decent.

I made a monstrous bowl of my
chicken salad. Instead of serving it on french type bread, I baked a loaf of soft sandwich bread and made little finger sandwiches.

Of course, there had to be dessert! I made my favorite
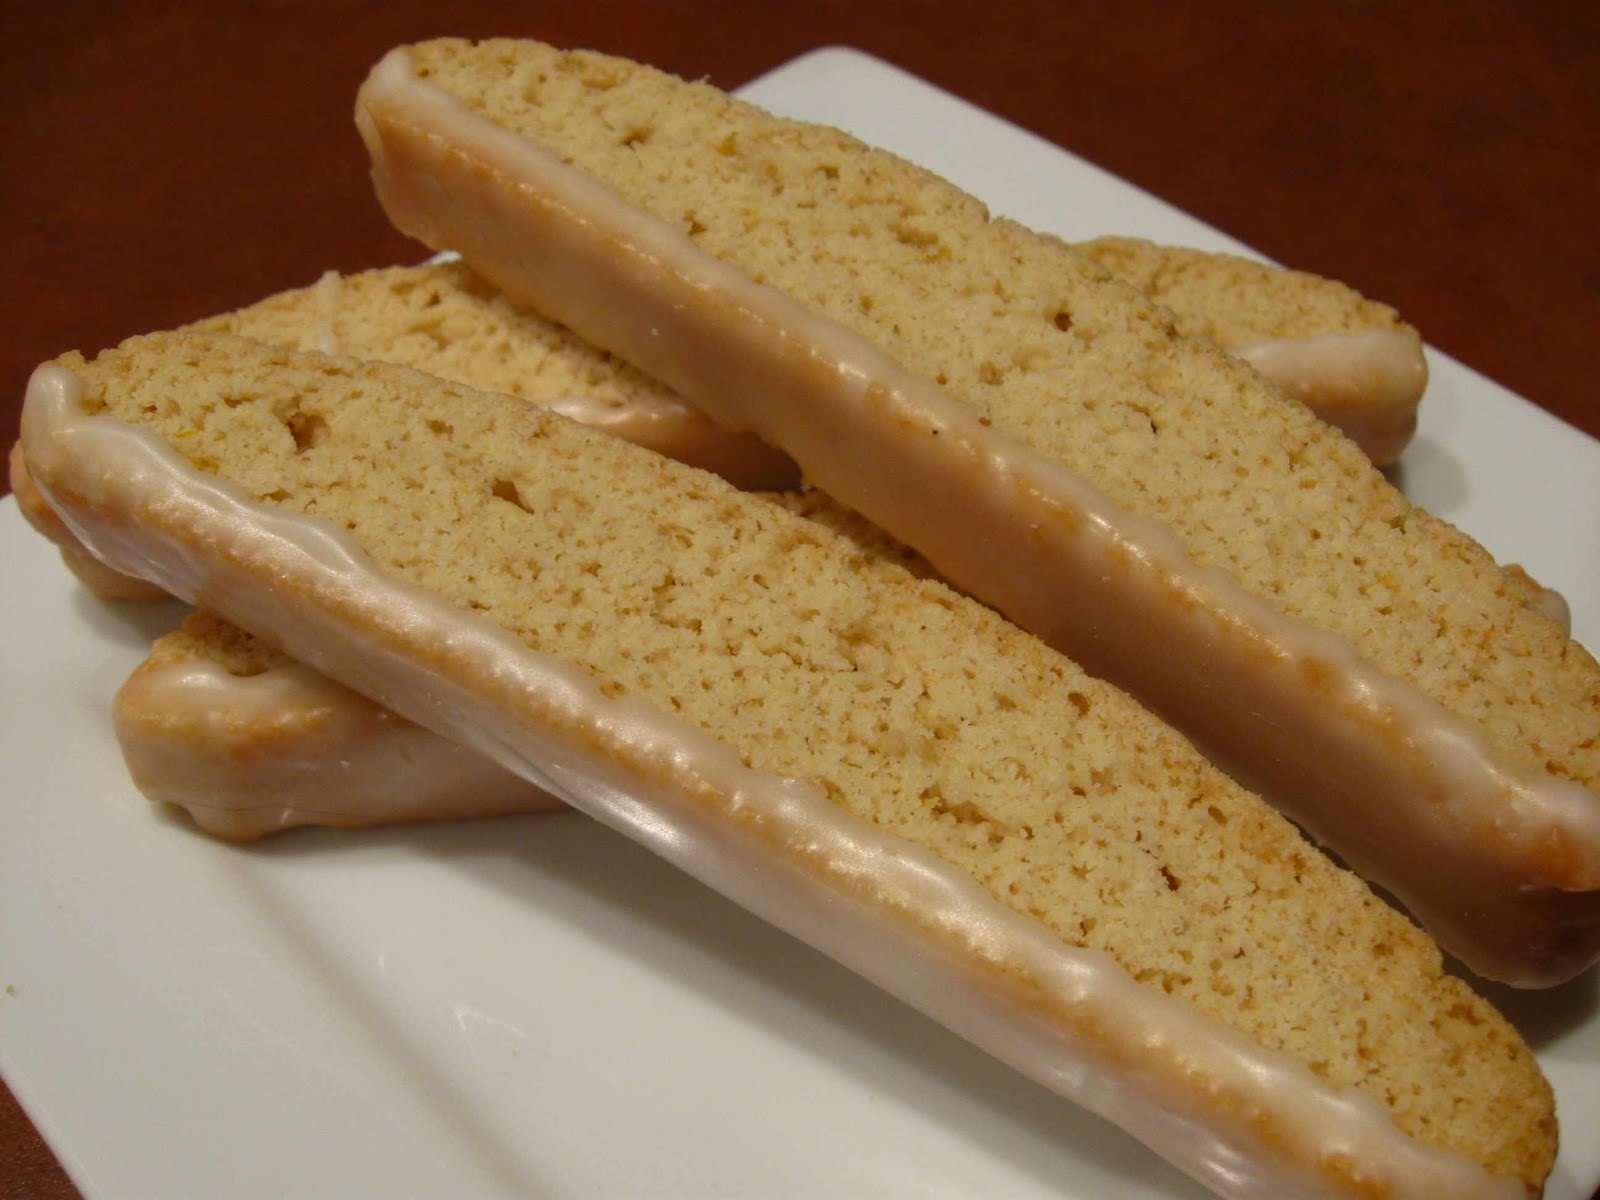
lemon biscotti, but instead of making two logs out of the dough, I made three to make cute little biscotti. I learned a good lesson in that if you cover the biscotti before the icing is 100% completely dry, the biscotti lose their snap. Fortunately, a short trip in my food dehydrator on the lowest setting cured what ailed them.

I made two pans of my
devilishly good brownies!

I couldn't resist making a batch of my delicious little gingersnaps. They're the perfect finger food. So snappy and gingery!

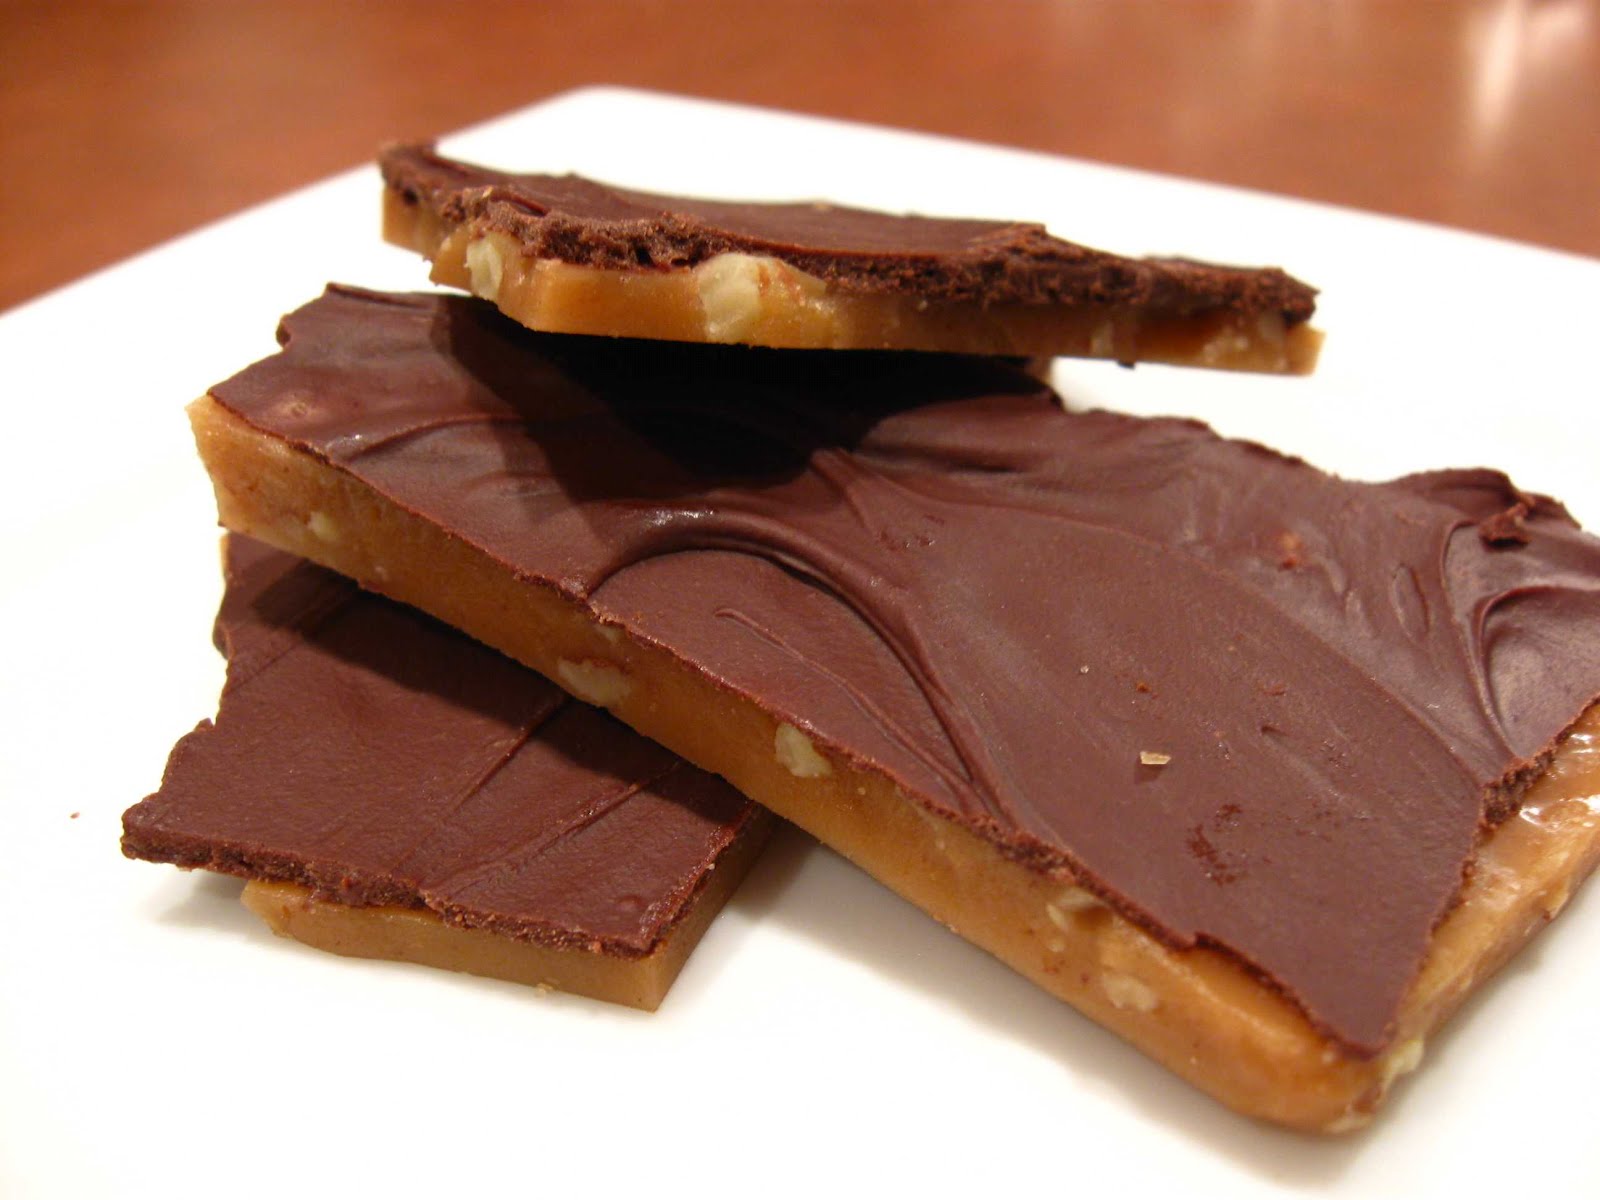
And, lastly (of the things I've already posted, anyway), I served up a dish of crack... aka toffee butter crunch. I think I've gotten a few more people addicted to it deliciousness. Sorry!

There were a bunch of other dishes I prepared, including sausage stuffed mushrooms, some toasted french bread slices with herbed cheese and tenderloin, a smoked salmon spread on cumber slices, chicken satay, mini twice baked potatoes, and spinach and feta triangles. I'll be sharing these recipes with you over the next week or so!

Saturday, May 12, 2012

Cutest Little Caprese Ever!

The last week was a whirlwind of cooking for me. It culminated in my providing the food for a not insignificant party last night. I'll post the details of what I served and add the recipes for those items I made that I haven't shared with you yet over the next week or so. But, I was so excited to share these little gems with you, that I just couldn't wait.

I love a good caprese salad, but it's not always user friendly for a buffet of appetizers. I came up with these cute little skewers to keep things contained. Are they not the cutest things ever??? They were a huge hit. It's the perfect bite with the perfect mixture of cheese, tomato, and basil.

Each toothpick has a grape tomato cut in half. I purchased a container or small, fresh mozzarella balls. The ones available in my grocery were in a herbed oil, but you can use plain mozzarella balls as well. I cut the cheese balls in half as well so that everything fit on my toothpicks. I then picked some basil and cut the large leaves into strips. The smaller leaves I used whole.

The only drawback to these guys is that they need to be prepared the same day as they are to be eaten. Keep refrigerated until serving.

Thursday, May 3, 2012

Brown Rice Pudding

Phew! Apparently, I wasn't the only one getting sick of looking at whole wheat pasta! This post is gonna be a quickie, but keeps in the whole grain theme. I'm a huge fan of my rice pudding recipe. I make it as often as I dare. Not too long ago, while browsing through the selection of rice for sale in our commissary, I saw short grain brown rice. The grains are exactly the same shape as those Arborio/pearl type that I use for rice pudding, only whole grain! I was immediately intrigued. I wanted to see whether it made as good of rice pudding as the white grains.

Good news! It does! As you might imagine, the whole grain version has a bit more chewiness, which is actually quite pleasing in this dish. There's a slightly "fuller" flavor, and - overall - I was just as happy eating the whole grain version as I am the regular.

You make it virtually the same way, I just switched a little bit of the water and milk around and added a little more time to the first step. I simmered the brown rice in 3 cups of water for 40 minutes (instead of 2 cups for 20 minutes) and then only added 2 cups of milk to finish it off (versus the 3 cups in the original recipe). Otherwise, do everything else the same. Delicious!

Tuesday, April 17, 2012

Whole Wheat Pasta

There's just something about homemade pasta. In particular, there's really something special about homemade whole wheat pasta. In my opinion, most store bought whole wheat pasta just isn't worth a darn. Now, I won't lie to you... making pasta is definitely more labor intensive than opening a box, but I'd say it's worth it - at least some of the time. What does that mean? It means that depending on what I've got going on, either I will open a box or I will prepare a batch of noodles from scratch. The nice thing, is that you can make extra when you do make homemade noodles and freeze or dry them for future convenience.

Making whole wheat pasta surprisingly provides you with a plethora of options. Not only can you decide how much whole wheat flour you want to use... go with 100% or 25%, whatever you fancy, but you can decide which type of whole wheat flour to use. Five years ago, when I first came across white whole wheat flour, it was a bit tricky to find. Now days, however, it seems to be everywhere. White whole wheat is only different from your typical whole wheat in the type of wheat berry that is ground up. Your regular wheat flour is usually a hard red wheat. White whole wheat is hard white wheat, which is lighter in color and more delicate in taste. In the picture below, you can see the differences (from left to right) between white whole wheat, regular whole wheat, and all purpose flours. I chose to use white whole wheat for this pasta because it would have a softer, milder flavor that I think is better in a pasta. After all, for the most part, pasta is a vehicle for other flavors; it shouldn't overpower them.

I strongly advise using a stand mixer to make this pasta. While you can mix the dough by hand and roll it through a hand-crank pasta mill... phew! I've done it. it's hard work! The KitchenAid will do most of the heavy lifting for you. Mix all the ingredients in the bowl of the mixer, fitted with a dough hook. Turn the mixer to speed 2 and process until the mixture is completely wetted. Notice that it will never completely come together on its own, but will continue to look like crumbles. Once it is completely mixed, continue processing for another 2 minutes.

Because ambient humidity can lead to significant differences in the moisture of the dough, you will need to test the moisture level of the dough. To do this, turn the mixer off and grab a small handful. Squeeze it together. If it forms a cohesive mass, then you are good to go. If it falls back apart, crumble the handful back into the mixer bowl and add another tablespoon of water. Mix for 1-2 minutes before testing again. Continue until the moisture level is right.

Grab handfuls of crumbles and press them together to form balls. Shoot for 8-9 balls. Place them in a plastic bag to keep them from drying out. Let them rest for 20-30 minutes. You will be amazed what that short amount of time will do to the texture of this dough. When you first shape them, the dough will be fairly rigid and slightly crumbly. Afterwards, it will be more tender and malleable. It's still a stiff dough, but you will definitely be able to tell the difference.

After the dough has rested, pull one dough ball out at a time. Press the ball flat on the counter.

Feed the dough through the flat roller fitted to your stand mixer. Start with the widest setting. The first couple of feeds, all on setting one, are a continuation of the kneading process, so don't skip them. I run it through the first time just as the flattened disk. Then I fold the result over and feed it folded seam first back through the roller, still on setting one.

After doing that a few times, the shape is often a bit funky, so I fold it up like a tri-fold brochure.

I then feed the tri-fold brochure through the roller open end first. This leaves you with a nicely shaped piece of dough. It takes a little practice to get it perfect, but remember, even if it doesn't look perfect, it will still taste good!

Now you can start reducing the width of the rollers. Once I get off setting one, I only roll it once each through the remaining settings. In this case, I went up to setting seven; I wanted my pasta fairly thin.

The dough gets really dang long, so I cut it into manageable lengths with a pizza cutter. In this case, I cut them into 6-8 inch lengths. The dough is dry enough that it can be stacked without the layers sticking together.

The next step is to cut the pasta. I made fettuccine. I placed a large bowl underneath the cutter to catch the pieces. What is that in the bottom of the bowl, you might ask? Semolina flour, which is a coarsely ground flour works really well to keep pasta from sticking together. What is great about using the semolina in this function, is that it falls off the dough when you cook the pasta. If you use all purpose of whole wheat flour to keep the dough from sticking, it gets goopy and sticky when the pasta cooks and makes a bit of a mess of it.

Periodically, toss the pasta around to get it well coated so that it doesn't stick together.

Lay it out on sheet pans while you cut the rest of the pasta. You now have a couple of options: you can cook the pasta immediately, you can let the pasta sit on the counter until you are ready to cook the pasta, you can spread the pasta out a single layer thick for a few days until it is brittle dry, or you can gently place it into bags and freeze it.

If prepared fresh, this pasta takes almost no time to cook... 2-3 minutes at most, so be prepared!

Whole Wheat Pasta
Yield: 1 - 1 1/2 pounds of dough

3 1/2 cups flour (for proper hydration, use at least 50% whole wheat)
1/2 tsp salt
4 large eggs
water
semolina flour, for dusting

In a stand mixer fitted with a dough hook, mix the flour and salt. In a liquid cup measure, break four whole eggs. Gently beat and then add enough water to make one cup of liquid. Add the liquid to the flour mixture. Process on speed 2 until it is completely wetted. Check for proper hydration by taking a small handful of the mixture and squeezing it into a ball. If the ball falls apart, add another tablespoon of water and process again. Continue in this manner until the dough forms a nice clump, then mix another 2 minutes. Press the crumbles into 8-9 balls of dough. Place in a plastic bag to rest for 20-30 minutes. The dough is then ready to be processed in a pasta mill. For details of this processes, see the above post.

Sunday, April 15, 2012

Coconut Chocolate Bars

If you are looking for a sweet, sticky indulgence, look no further. These are the sorts of treats that are too dangerous for me to keep around on a regular basis. They're just so darn tasty! I could eat a whole pan by myself in less than 24 hours. Since I can't justify making them that often, I love it when I have a good excuse. When I don't have a good excuse, I just send the majority of the pan to work with my husband. I do hope that I'm not responsible for someone failing their PT test! No, really, these little suckers are absolutely divine.

I first was introduced to these bars at a friend's house almost a decade ago. I immediately asked for the recipe. I just knew that I would want to eat them again, and soon. However, I was disappointed with the process for how they were put together. The recipe I was given had you simply layer ingredients, but I found that led to a crumbly (albeit tasty) mess. I suspected that mixing the ingredients together first would produce a more cohesive product, and I was right.

First, make graham cracker crumbs out of the graham crackers. I use my food processor and then add the melted butter right in to mix completely. These days, I suppose, you could buy the pre-ground crumbs and save yourself some time. Make sure the crumbs and butter are thoroughly mixed and press into the bottom of a 9x13x2 inch pan. This is also a good time to start preheating the oven to 350° F.

In a bowl, mix the sweetened condensed milk, chocolate chips, flaked coconut, and walnuts together. It will be a sticky, gloppy mess.

Spread the sticky mixture over the pressed crumbs as evenly as possible.
Gently press down the topping; you don't want it to end up pressed so tightly it bakes into a solid rock!

Bake at 350° F for 25-30 minutes, or until everything is golden brown. Remove from the oven and cool completely before cutting. This dessert has so much butter in the crust, that if you use a non-stick pan, you really have no worries about it coming out. If you refrigerate the bars for a bit, you can easily pull the whole 9x13 sheet out so that you can cut it easily on a cutting board with a pizza cutter. Bars can be stored in an air tight container for up to a week.

Chocolate Cookie Bars
Yield: approximately 18 bars

1 stick of butter, melted (1/2 cup)
2 cups graham cracker crumbs
1 14 oz can sweetened condensed milk
2 cups semi-sweet chocolate chips
2 cups flaked coconut (sweetened or unsweetened)
1 cup chopped walnuts

Preheat the oven to 350° F. Mix the melted butter and graham cracker crumbs together until well mixed. Press evenly into a 9x13x2 inch non-stick baking pan. In a separate bowl, mix together the condensed milk, chocolate chips, flaked coconut, and walnuts. Spread over the crumb crust and gently press even. Bake 25-30 minutes or until the bars are nicely golden. Cool completely before cutting and serving. Cutting the bars is much easier if you refrigerate the pan for a few hours first. The whole 9x13" sheet can be removed from the pan to be cut with a pizza cutter on a cutting board. Bars keep up to a week at room temperature in an air-tight container.

Saturday, April 14, 2012

Southwestern Style Chicken Soup

In the last year, we've experienced a bean revolution in our household. It seems like every time I turn around, I come across evidence that beans are practically a super food. Not only are they apparently super healthy, but they are cheap and really tasty. Now, I throw them in all kinds of dishes. A lot of the time, I use them instead of adding meat. In this soup, however, the beans play a supporting role. And what a supporting role it is. I love both the flavor and texture of this soup. The creaminess of the beans contrasts perfectly with the pop of the corn kernels. The slight tang of the lime brings out the warm spice of the cumin. This is a hearty and delicious soup!

Southwestern Style Chicken Soup
Yield: 4 servings

1 TBS vegetable oil
1 onion, diced
1 TBS garlic, minced
4 cups water
1 1/2 cubes Knorr chicken bouillon
1 1/2 cups cooked, shredded chicken
1 cup frozen corn kernels (or fresh)
1 can black beans, rinsed
1 can diced tomatoes, drained
1 TBS lime juice
2 tsp cumin
1 TBS chopped cilantro
salt & pepper, to taste

Heat the oil over medium-high heat in a large soup pot. Cook the onions until they are translucent and softened. Add the garlic and continue to saute for two minutes. Add the water and bouillon. Bring to a boil. Add the chicken and remaining ingredients. Simmer for five minutes.

Thursday, April 12, 2012

Pork Chops with Feta

I know I've been a little MIA lately... every time we're staring another military move in the face, I start getting antsy trying to get my ducks in a row. In addition, the weather's been freaking fantastic! I have to take advantage of it while I can. Hell will be here soon enough. I've been riding my horse a lot... trying to get my fill before I have to find her a new home, and I've been trying to get a lot done around the house and yard; we'll be renting our current house to another military family when we leave. I'm sad to report that there's been a lot of take out lately. Shhhhhhh! Don't tell!

Tonight, however, I wanted to make an old fashioned, from scratch dinner. This combination turned into a winning one. So yummy!

I sliced the onions into long strips. I used two small onions. I put a little olive oil in a large saute pan and then cooked the onions, stirring frequently until they started to brown nicely.

I then cut a pint of baby portobello mushrooms in large chunks. I minced 3-4 cloves of garlic as well and added these to the pan to cook with the onions. When everything was nicely browned, I deglazed the pan with about 1/4 cup of Madeira.

I dumped the sauteed goods into a bowl to hang out while I cooked the pork chops. At this point, the pan was fairly clean again.

I drizzled a little more olive oil into the pan. When it was hot, I added the pork chops, cooking them over medium heat. I sprinkled them with salt and pepper. I let them cook without disturbing until it naturally let go from the pan and had a nice brown crust. I them cooked them on the other side until almost cooked through.

I returned the sauteed onions and mushrooms to the pan and threw in the thyme. I stirred everything together and turned the heat down to low.

The sauce was a little thinner than I preferred, so I temporarily removed the pork chops for a moment. I sprinkled a little cornstarch into the mixture and stirred until it was thickened.

I returned the pork chops to the pan and then sprinkled the feta over top. I turned the heat off and served them immediately.

Pork Chops with Feta
Yield: 4 small or 2 large servings

1 TBS olive oil
2 small onions, sliced
1 pint baby portobello mushrooms, cut in large chunks
3-4 garlic cloves, minced
1/4 cup Madeira
1 TBS olive oil
4 boneless pork loin chops
1 TBS fresh thyme, minced
1/2 -1 tsp cornstarch (optional)
1/3 cup crumbled feta cheese
salt and pepper to taste

In a large saute pan, heat the olive oil over medium high heat. Add the onions and cook until they soften and start to brown. Add the mushrooms and garlic. Continue to cook until the onions are tender and the mushrooms are nicely golden. Deglaze the pan with the Madeira. Pour the mixture into a bowl and set aside.

Add the other tablespoon of olive oil and let it heat up. Pat the pork chops dry before adding them to the pan. Sprinkle with salt and pepper. Let the chops cooks without disturbing them until they release naturally from the pan and are nicely browned. Then, flip them over and let them cook on the other side until they are almost cooked through.

Add the onions and mushrooms back to the pan. Add the thyme and stir. Reduce the heat to low. If the sauce is too thin, remove the pork chops and sprinkle a little cornstarch into the sauce until it is the thickness you prefer. Return the chops and sprinkle the feta over top. Turn the heat off and serve immediately.

Saturday, March 31, 2012

Perfect Hard Boiled Eggs

It never ceases to amaze me how something so simple can end up being so hard. Snicker, snicker. At least, we hope that it ends up hard. There's nothing more frustrating to me than to go through the motions of hard boiling eggs and then crack one open and find it's still soft in the middle. Or how about the opposite problem? I've had that happen too. I'm not a big fan of eggs that are rubbery with yolks starting to green.

Previously, I always used this process: place eggs in cold water, place on stove, bring to a boil, boil for fifteen minutes, cool with ice water. Ninety-plus percent of the time, this technique worked great, but occasionally, I'd end up with overcooked eggs. In my attempts to correct this issue, I started trying myriad methods found online and in cookbooks. The attempts just went from bad to worse.

Fortunately, when doing my research on sous vide, I came across a graphic that showed the characteristics of eggs when cooked to various temperatures. This image, which I found in the massive tome, Modernist Cuisine, showed an ideal temperature of 176° F. So, here's the great thing about having this knowledge: if you keep the water at this temperature, you can never overcook your eggs! Every time, you can have perfect, hard boiled eggs.

Here's how: place your raw eggs into a pan and submerge with cool water. Place the pot on the stove and turn the heat on high. Rig a thermometer so that you can keep track of the water's temperature. Heat the water up to 176° and then adjust the burner to maintain that temperature. Cook the eggs for 20 minutes. Unless you are cooking extra-large eggs, they'll probably be done at 15 minutes, but you can cook them for 20 without any adverse affects as long as the temperatures stays at 176°. Cooking for a full 20 minutes insures they are cooked all the way through. Drain the hot water and fill the pan half with cold water and half with ice to chill the eggs.

By the way, if you are frustrated with hard to peel eggs, make sure you use eggs that have been around for a little bit. In fresh eggs, the shell can be very difficult to remove. I try to use eggs that have been in my refrigerator a couple weeks before hard boiling them. It sounds weird, but it makes all the difference in the world.